How to Paint with ArtRage
Painting with ArtRage
So you have started ArtRage and you have a blank canvas on the screen – What do you do now? Fortunately it’s so easy to get started painting that the only problem you’ll have is deciding what to paint. This is what we call a ‘happy problem’!
This section explains the basic features of ArtRage including the three most important ones: How to choose a tool and color, how to paint a stroke, and how to save your work. The methods you learn here should give you enough of an understanding of the tools and options in ArtRage that you can go exploring and discover the rest of the features in your own time.
You don’t need to use everything in the kit to get good results so don’t worry about pressing every button and using every tool.
Painting on your computer is a bit different from painting on a real canvas with real paint, so here are some golden rules to remember when you get started:
- Every time you start ArtRage, a blank canvas is created for you so you can start painting immediately.
- Every time you lift the brush up it is automatically reloaded with paint so you don’t need to dip it in anything to get more color before you paint a new stroke.
- Every paint stroke you make can be undone if you don’t like how it looks, so don’t be afraid to try something and get it wrong a few times!
Finally, the most important rule of all: Don’t let the software get in the way of
your creativity! Experiment with tools and colors and don’t worry about
breaking anything, ArtRage won’t let you get into trouble as you play around!
Selecting a Tool
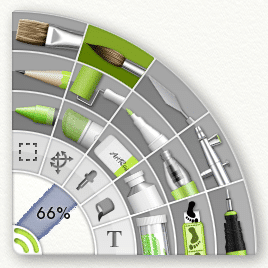
All of your painting tools are stored
in the Tool Picker on the left hand
side of the ArtRage window.
Click one of the tool icons and that
tool will be selected.
The currently selected tool is lit up.
In the image to the left, the
Watercolor tool has been selected.
In the left hand corner you can see a preview of the currently selected tool. You can also see the size of the tool head. Click and drag in this box to change the tool size, or single click in it to enter the size manually.
Selecting Colors
The other thing you need to know is how to select colors. Full information can found in the Colors section but here are the basics.
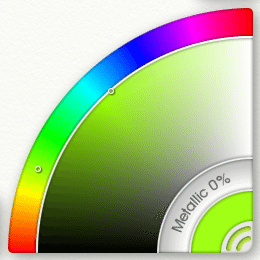
In the bottom right hand corner of
your ArtRage window is your Color
Picker. The Color Picker lets you
pick what color you are going to
apply to your painting. Picking a
color on a computer isn’t quite like
picking it in real life but it’s similar.
In real life you select the basic color
you want then select another color
to blend with it to make an exact
color. In ArtRage you do something
similar because the Color Picker is
split in to two sections.
Around the outer edge of the Picker there is a rainbow spectrum of basic color (‘Hue’). Click and drag inside this rainbow to select the basic color you want to use. For example, if you want a Green of any kind you click in the green area of the spectrum.
The inner, large curve shows you the current basic color you selected and a range of brightnesses and intensities (‘Luminance’ and ‘Saturation’). Click and drag in this section to choose how bright or how grey you want your green to be.
When you click in either section, the small color sample in the bottom right corner of the Color Picker updates to show the exact color that will be loaded on your brush head when you paint the next stroke.
If you want your green to be a bit more yellow, you can click and drag in the rainbow spectrum towards the yellow tint. The large curve area updates when you do this? Now you can select the exact brightness of yellowy-green you want and the color sample updates to show the result.
So selecting colors involves:
- Picking a basic color from the rainbow.
- Picking how bright or grey you want it from the mixing area.
- Watching the color sample so that you know what color you have selected.
Painting a Stroke
Once you have selected a Tool and a Color, painting a stroke is simple: Just click and drag on the canvas! If you are using a mouse, hold down the left mouse button as you drag. If you are using a stylus on a graphics tablet you should only have to touch the stylus to the tablet and drag. If you are using a touch screen device, touch the screen with a single finger and drag.
As you drag, a stroke is created following the path you paint. When you release the mouse button, or lift the stylus or your finger from the drawing surface, the stroke ends.
Your tool is automatically refilled with paint every time you finish a stroke so you can just click and drag again to paint a new stroke of the same color.
Realistic Paint
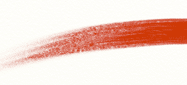
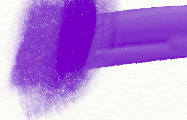
Paint in ArtRage isn’t just flat color, it has its own thickness and wetness and other properties that work like they do in the real world. This means you can work with paint on the canvas the way you would if you were working with real tools: Smearing thick paint around to create new colors through blending, and smudging dry paint to create blurred edges. Some tools even know how much paint is loaded on to the head, so they run out over the length of a single stroke!
If you paint with a wet medium your paint can be blended with other wet paint. If you paint with a dry medium it won’t blend with other paint, but you can smudge it after you have finished painting.
Thick wet paint such as oil paint will also spread over the Canvas and run out as you spread it further. This means you can control whether you apply paint thickly in small areas, or draw it out over large areas to spread it thinner.
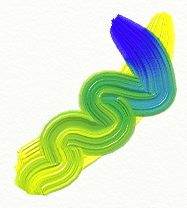
When paint blends its color may change depending on what you are blending it with. Two colors will blend to create a new one as you mix them, and if you keep blending, more of the new color will be created. As you smear paint over the canvas it thins out and will eventually go dry. Imagine smearing real oil paint: The thick blob you started with gets thinner as you spread it over a larger area.
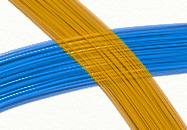
Wet tools that apply thin paint such as a wet marker pen or watercolor can still blend with other colors as they pass over them. Watercolor strokes will merge with other watercolor strokes as they get closer and the wet areas of the strokes touch.
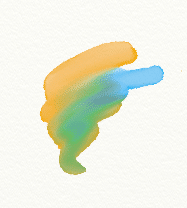
If you paint a stroke of wet paint over a stroke of dry paint the two colors will not interact. Dry paint does not blend with other paint that passes over it.
Some paint tools have limited amounts of paint on them with each stroke. As you paint they may run out of pigment and the stroke will end. To ‘re-fill’ the tool, just start a new stroke and more paint will be loaded on to it.
Dry strokes won’t spread over your Canvas if you paint over them, but you can still use the Palette Knife tool to Smudge them, like using a finger to smudge a pencil line on paper.
Thick paint can be made dry too. If you paint a stroke of Insta-Dry Oil Paint you can paint another stroke on top and the colors won’t blend. Notice how the bristle lumps on the bottom stroke show through the bristle lumps of the top stroke.
Undo and Redo
ArtRage has one big advantage over real painting: You don’t need to worry about making mistakes because you can Undo any action you have previously taken. The Undo option allows to completely erase the last action you took, even if you blended a stroke in with other paint. You can continue to Undo through as many actions as you like.
You don’t even need to worry about making mistakes when you Undo! The Redo option allows any action you just removed with Undo to be put back in to your painting, so you can change your mind after Undoing if you realize you wanted the change after all.
Undo and Redo allow you to experiment without fear of damaging your painting.
Saving Paintings
When you have finished your painting, or you are ready to take a break, make sure to Save your work so that you can get it back later. Full information on how to do this is found in the Working with ArtRage Files section but for now, just select Save Painting from the File Menu and select a name for your painting. ArtRage has created a folder for your painting to be saved in so that you can find it later.
Sharing Paintings
ArtRage Painting Files (.ptg files) contain lots of information that most image applications don’t understand, like the thickness and wetness of your paint. This means that you can’t share your paintings with other people just by giving them a copy of the painting file unless they are also using ArtRage.
If you want to share your artwork online, or send images to friends who aren’t using ArtRage, you will need to save a copy of your painting file in a common image format. This is done using the Export Image option in the File Menu.
For full instructions on how you can export copies of your painting as an image file that can be viewed in other applications, see Importing and Exporting Images below.
Final Notes
This section explained the basics of painting in ArtRage, but there is much more to discover. The rest of this manual goes through all of the features in detail and explains how they work. As you explore the product, just remember that you can Undo anything you do so don’t be afraid to try things out!