Steps for backing up the existing paintings and reducing the gallery size in ArtRage for iPad
If you have a very large gallery, it may use so much memory that you start seeing problems accessing paintings and running ArtRage. You will need to copy your files to the computer and delete at least some of your gallery to free up space again.
Even you do not see any issues, there is always a small chance of losing data when updating iPad apps or the iPad operating system, so we always recommend backing up your artwork.
You can export individual paintings over time, export all the paintings from a single group at once, or export the entire gallery as a single backup file.
1. Create a backup file
You can create a single backup file that can be exported to your computer and imported back into ArtRage on the iPad to restore your entire gallery exactly as it was when you created the backup. The backup file is exported as a single folder that will contain your entire gallery.
For more help with importing and exporting, see the Files section of the manual.
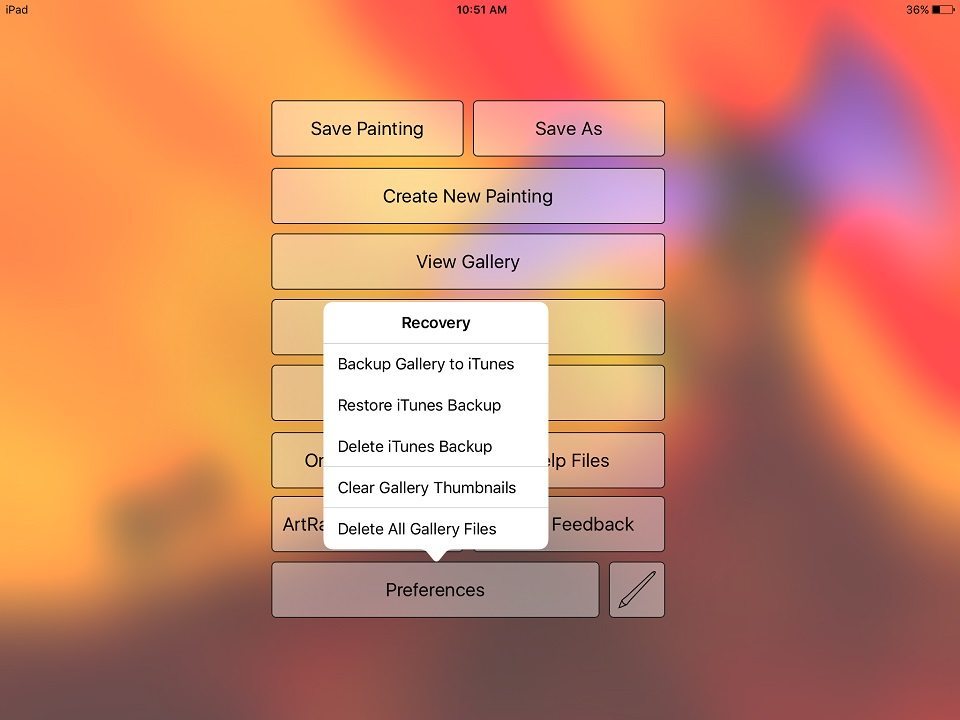
- Open ArtRage and open the menu from the canvas view.
- Press and hold on the ‘Preferences’ button for about five seconds until a new menu appears
- Then choose ‘Backup Gallery to iTunes’
- You will need to transfer the new backup file to your computer using iTunes (step 4 below)
2. Export paintings and groups individually
To export your paintings as actual paintings, rather than a single backup file, go to the gallery and look for ‘Options‘ over on the right in thumbnail view.
- Tap Options and choose ‘Export Group‘
- Then choose ‘ArtRage Painting File’
- Then select ‘iTunes‘
If your gallery has multiple groups, you will need to export each of them separately. You can also export paintings individually, but if there are a lot of them, exporting them as groups will probably be easier.
Large groups may take a long time to process for export, so you might want to divide your gallery into smaller groups beforehand.
3. Copy your files to a computer
Then connect the iPad to iTunes and find the ArtRage app. The backup file and the individual paintings will be available in the file transfer section. You can export images via Dropbox or email or the Creative Cloud, but ArtRage PTG files can be extremely large, so transferring them directly to the computer using iTunes is usually the best option. See this guide for help transferring files through iTunes.
Copy the backup file to the computer to save a complete file that can be re-imported back to the app to add the entire gallery again in one action.
Or transfer the individual paintings (select the files and then choose ‘save’).
Your files are not ‘safe’ until you’ve transferred them completely off the iPad.
4. Deleting paintings
Once you have copied the paintings from the computer, you can delete them from the gallery. You can delete everything at once by going back to the hidden Preferences menu and choosing ‘Delete All Gallery Files’ or you can just delete individual paintings by pressing and holding on them in the gallery (or look for the rubbish bin icon under the fullview images).
You can import paintings back to the iPad by reversing the steps (move file into the app in iTunes, then press the ‘+’ symbol in the top right of the gallery to find the import options).