Create and Save Color Palettes
ArtRage offers multiple ways to import and mix up colors, to create temporary or permanent color palettes. From an on the spot Color Sampler tool, to exportable custom Sample collections, there is a flexible range of options to suit all artists.
Note: This guide was created in ArtRage 4, so your version may look slightly different or offer different options.
Color Picking
The easiest way to ‘grab’ a color is to use the Color Sampler tool, or the alt+click shortcut (hold down Alt and click on the color you want on the canvas or a reference image).
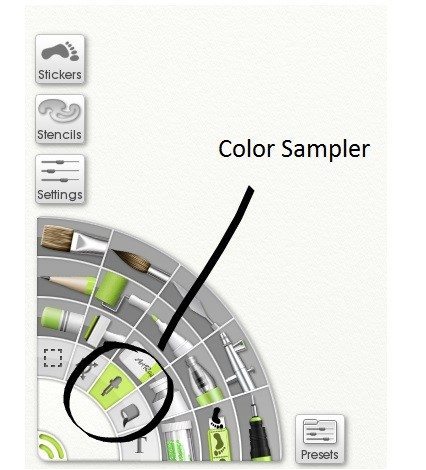
The Color Sampler tool in ArtRage 4. Alternatively, use Alt + Click.
Mixing Your Own Colors
Real Color Blending
If you are going to mix your own colours, you may want to turn on Real Color Blending. This feature can be found under Tools > Color Options > Real Color Blending.
It is more demanding than the default RGB color mixing, as it requires far more intensive calculations, but is much closer to real life.
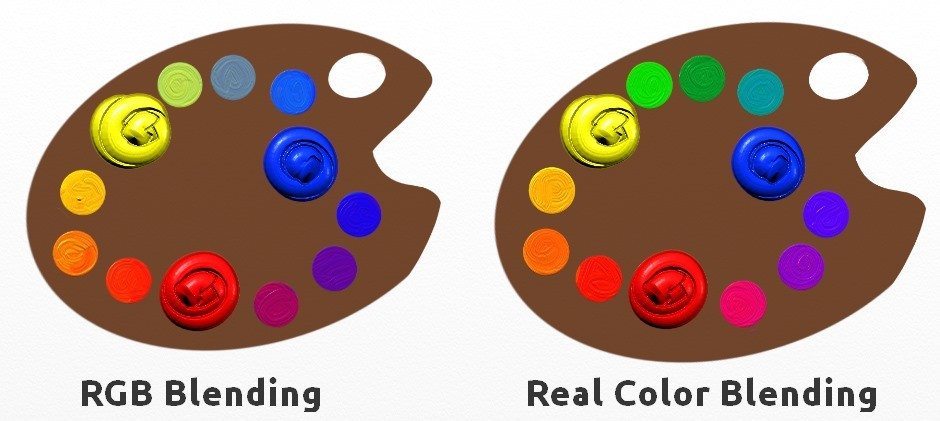
There is a noticeable difference between Real Color Blending (inner circle) and the default RGB blending (outer circle). It tends to be brighter and more accurate than RGB blending, and is able to produce green when you mix blue and yellow.
Scraps
ArtRage 4 offers the Scraps feature, which allows you to mix paint on a live canvas and pick colours from it. You can have an unlimited number of Scrap palettes, and they will be saved along with your painting. You can also take a screenshot to create a reference image for us in other paintings.
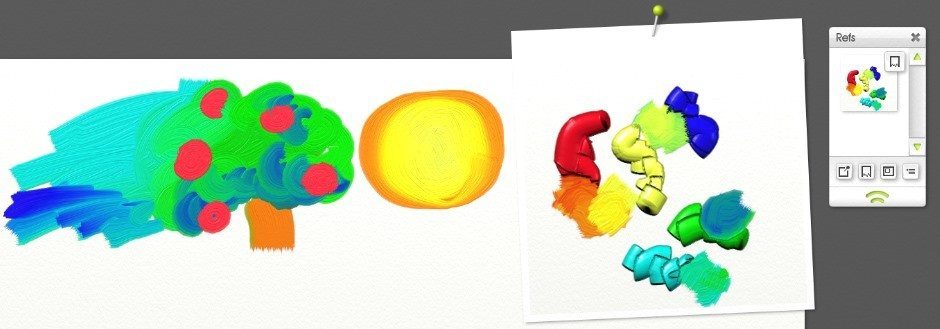
The Scraps canvas in ArtRage 4 is useful for mixing paint.
Multicolour Strokes
You can manually create a multicolour brush by turning ‘Auto Clean’ off, and making a stroke through another colour. It’s not perfect, as the paint will continue mixing, but it tries to mimic real life behaviours.
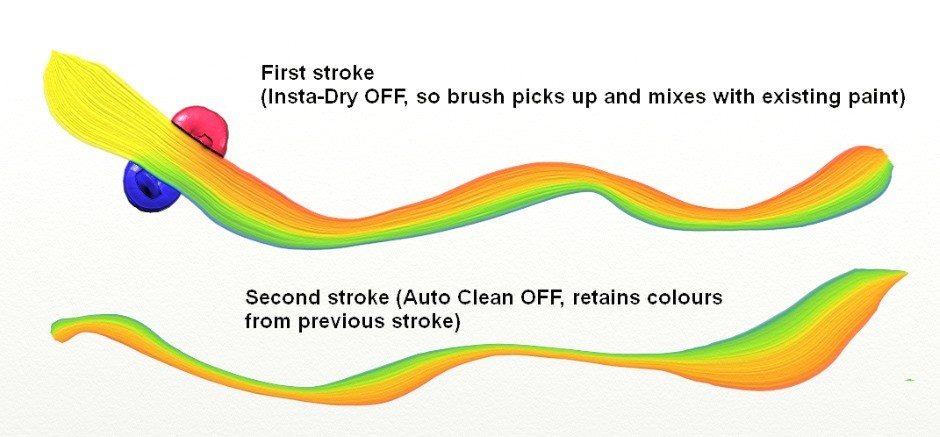
Turning Inst Dry and Auto Clean off on the Oil Brush tool allows you to create multicoloured brush strokes.
Setting Up A Permanent Color Palette
If you’ve prefer to set up a permanent colour palette, rather than just mixing as you go, then you have three options:
- Create and add a sample image as a reference photo
- Create a custom colour sample set in ArtRage
- Create a custom colour picker
- Download existing resources from elsewhere
1. Reference Image
The easiest, quickest option is to add an image file as a Reference Image, and use alt+click to select colours as you worked. You can create and add your own sample image as a reference photo.
Tips
- Find a picture of your desired range of paints and download it
- Or create a palette yourself in ArtRage, export it, and then add it as a Reference Image
- You can change the size of reference images by hovering over the white space of the border in the corners until you see a two headed white arrow, then dragging.
For more help with References, check out the manual section on Tracing & References.
2. Colour Samples
You can find Samples down in the bottom right next to the colour picker. You can create a new collection of colours by clicking ‘Add Sample’ and it will add the currently selected colour.
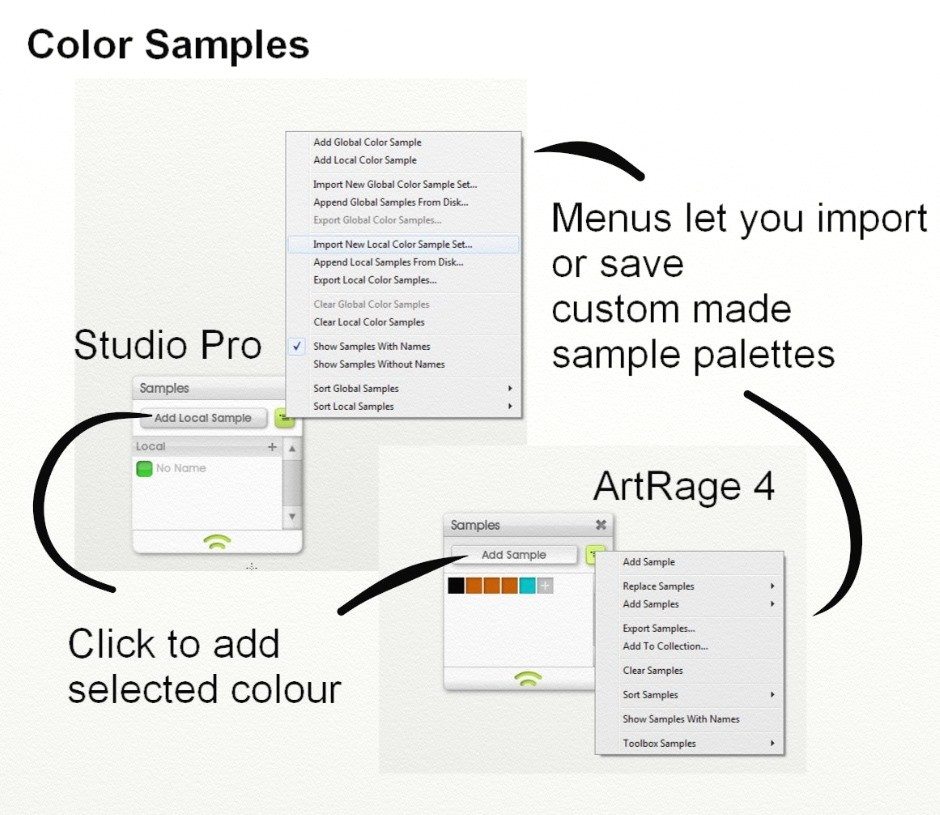
A quick guide to the Samples menus in ArtRage Studio Pro and ArtRage 4.
You can save multiple palettes and reuse them across paintings, and change colours just by clicking on it.
Sample collections are saved as the “.col” file type, and can be exported individually, or as part of an ArtRage Package File (“.arpack”). You can save and load them for other paintings, or even upload them and share them with other users. If you’re looking for a specific set of colors, it’s possible that a downloadable collection already exists in the forums. See the last section in this guide for tips on where to look and how to get started.
Use Existing Sample Sets
We have some existing collections of colours that you can find by opening the menu in Samples.
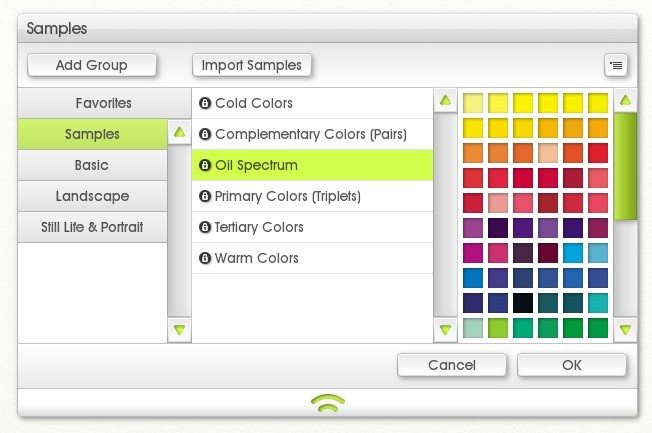
The desktop versions of ArtRage come with Sample Collections for you to play with.
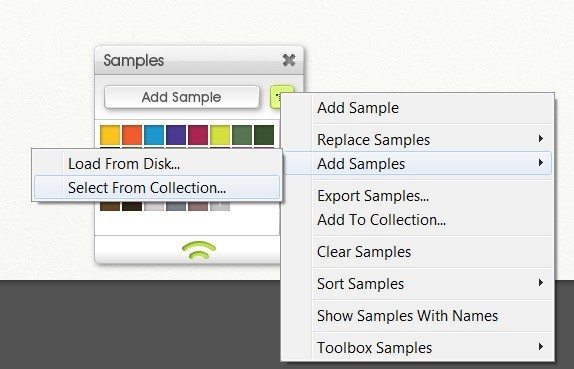
Go to Tools > Color Sample Options or find the Samples pod and the menu button inside it. Then go to Add Samples > Select From Collection.
Browse and load existing collections, using the Samples menu.
Tips
- You can also open the menu and click “Show Samples With Names” to add custom names to your colours.
- The current shortcut for the Color Sampler tool is ‘Shift + C’.
- You can change the shortcut to something else by going to Edit > Set Keyboard Shortcuts > Tool Commands
- If you are using a stylus, you can map one of the buttons to use this command.
- You can add your color samples to the Toolbox as well, to have them show up in the Workbench view.
- Color samples can be dragged around to reorder (in ArtRage 4.5) or sorted by various properties such as Hue, Luminance and Name.
3. Custom Colour Pickers
ArtRage offers a range of different color pickers (the color wheel down on the right), but it also allows you to replace the normal colour range in the colour picker with a specific image.
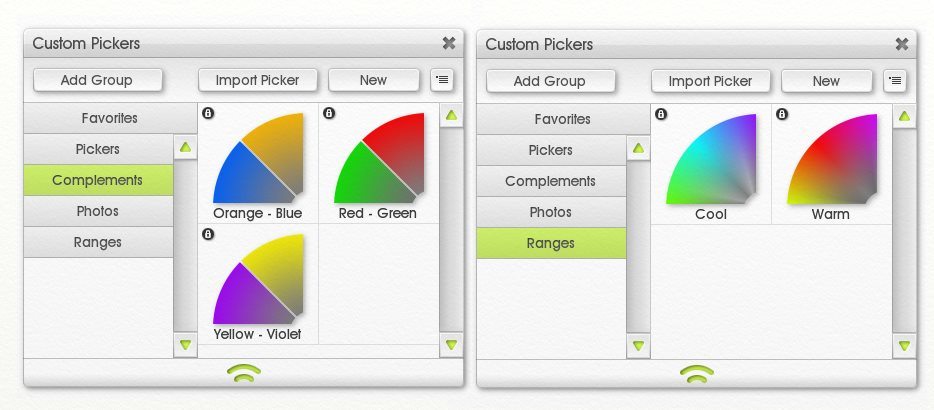
Choose between various Color Pickers.
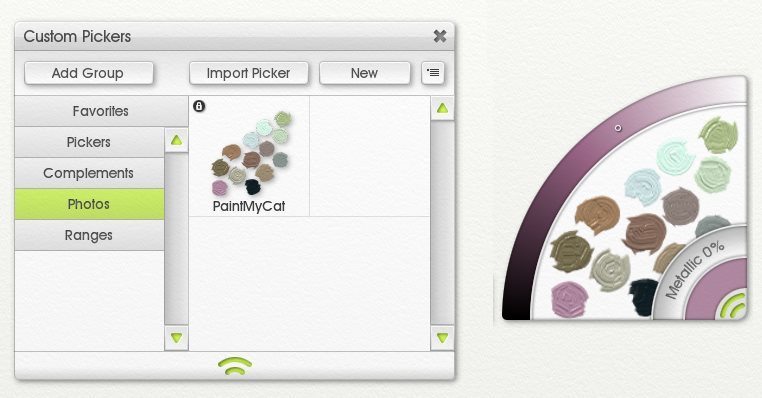
Or choose a custom Color Picker featuring a chosen color palette.
To load a new Color Picker, go to Tools > Color Options > Custom Color Picker Collection or left click on the arc indicating the ‘current colour’ (the one just inside the Metallic arc).
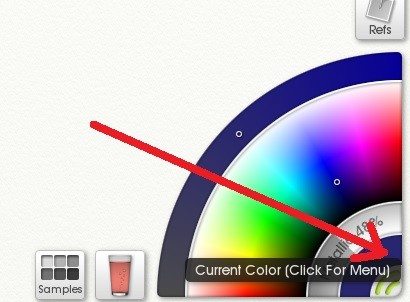
Click on the ‘current color’ ring in the active Color Picker to quickly access various options.
Note
It will have to fit into the existing arc, so random images may not work well, but you could easily take a screenshot of the screen and replace the area with your own choice of colours. Or download an existing template, such as this one in the forums.
There is also a range of custom palettes and sample sets available in the forums.
4. Download Existing Resources
All of ArtRage’s custom resources are shareable, which means that there are plenty of existing colour samples and pickers for you to download for free, from generous and creative ArtRage users.
ArtRage Package Files
Added in ArtRage 4, this is an easy way to package up and install custom resources. “.arpack” files can contain other custom resources, include custom sticker brushes, tool presets, and color sample “.col” files. You don’t need to worry about file types, just load the package file and follow the prompts to install it. You can learn more from the manual section on Package Files or see here for a visual guide to installing.
However, if the resources come separately as individual file types, you may need a few more instructions:
Adding Reference Images and Color Pickers
Both of these options support common image formats, so all you need to do is download the image file, then browse to it through the relevant menu in ArtRage.
ArtRage 2: To use your custom colour picker, click the arrow in ArtRage’s colour picker just to the right of the Metallic slider to bring up the menu. Go to ‘Custom picker’ then ‘Load custom picker’ and open the file you saved. Your colour picker will now be loaded in place of the normal colour picker.
To get back to your normal colour picker, open the Colour Picker menu again and select ‘HS/L Picker’
ArtRage Studio / Studio Pro / 4: At the bottom right corner of the Colour Picker, click the current colour and then select ‘Custom Colour Picker Collection’. Then select the group you wish to import the colour picker to and click ‘Import Colour Picker’. If you want to import it to a new group, you can create one by clicking ‘Add group’ in the stencils panel.
Installing Color Samples From Elsewhere
ArtRage 2: To use the new colour set, in ArtRage open your Tools menu and select ‘Show Colour Samples Panel’ to bring up the colour samples panel. Alternatively, you can just press the S key. Click the arrow at the top left of the colour samples panel to bring up the menu and choose ‘Load Colours’ then open the new file you saved. You’ll now see all the new colours there ready to use.
ArtRage Studio / Studio Pro: Click on ‘Samples’ to open the samples panel and from the menu ( top right ), choose ‘Import New Local Colour Sample Set’, browse to the .col file you downloaded and open it. This loads samples to the current painting, which means they will be saved with the painting.
ArtRage 4: ArtRage 4 has a color samples collection which you can add new color samples to. First add the samples to your user color samples folder. You can open this folder via Tools -> User Content -> Open user Samples Folder. Put your new .col files in this folder. Now they will be available from your color samples collection. For example: Open the color samples panel, click the menu at the top right, choose ‘replace samples’ or ‘add samples’ then ‘from collection’ to open the color samples collection. Your new color samples will be in the ‘Samples’ group.
For more help installing custom resources, check out this forum post: The ‘How to’ thread for downloading and installing ArtRage Resources.
It is also worth having a look through the Art Supplies forum or in the DeviantART Group in case someone has already created what you want. For example:
- My Colors
- Palette – Paint Brand Color Sample Sets
- Martin F Weber Paint Collections
- Copic Colors for Artrage
- ArtRage Colors: Prismacolor Premier
ArtRage Mobile Apps
Most of these features are exclusive to the desktop version of ArtRage. Mobile devices offer:
- Color Sampler tool
- Multicolor/paint mixing
- Reference Images
- Global Samples (one collection for all paintings)
They do not offer Real Color Blending, Scraps, custom Color Pickers or custom exportable resources.
For a comprehensive technical guide to the different color related features in ArtRage 4, check out the Colors section of the manual.