Tools and Presets
On the left side of the ArtRage window are controls for your painting tools. These include the Tool Picker for selecting tools, the Settings Pod for adjusting the settings associated with your current tool, and the Presets Pod for selecting presets for the current tool.
This section tells you everything you need to know about working with tools, and includes a detailed list of all of the settings and properties of the tools included in the application.
Pods

The Tool Pod: When the Tool Pod is visible click it to open the Tool Picker where you can select the tool you want to use. Click and hold it to bring up a menu of available tools for easy selection. Click and drag left and right on it to change the size of the current tool, which is indicated at the top left of the Pod. The icon displayed on the Pod indicates which tool is currently selected.

The Settings Pod: When the Settings Pod is visible click it to open the Settings Panel where you can adjust the settings of the current tool. Click and hold it for a ‘Reset Tool’ menu option.

The Presets Pod: When the Presets Pod is visible click it to open the Presets Panel for your current tool. Click and hold for a menu of available Presets.
The Tool Picker
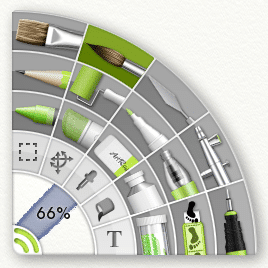
The Tool Picker on the left hand side of the ArtRage window is used for selecting which tool will be active when you click and drag to paint a stroke on your Canvas.
Each tool has its own icon in the Picker and the currently selected tool is lit up so that you can see what it is.
To select a tool, click its icon and it will light up to show you that it has been selected. If you want to know what a tool is, just hover the mouse pointer over it and after a short time a Tooltip will appear to tell you.
At the bottom left corner of the Tool Picker is a preview of the paint stroke that will be generated by the current tool, and an indication of how large it will be. You can change the size of the tool by left clicking and dragging in this area. If you want to enter the size manually, left click in the size area without dragging and you will be prompted for a percentage size.
The Settings Panel
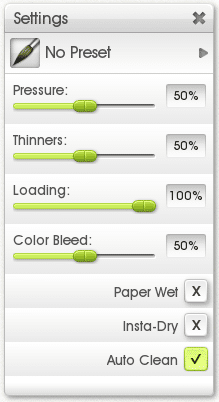
Each tool has a collection of settings that can be adjusted to alter the appearance of the stroke made when the tool is used. If you want to edit the settings of the current tool click the Settings Pod and the Settings Panel appears.
The appearance of this panel changes depending on which tool you have selected. When you select a tool the contents of the Settings Panel change to display the settings available for that tool.
A detailed description of the settings for each tool can be found in the ‘Tools’ section below.
The Preset Block
At the top of the Settings Pane is a control that indicates which Preset (if any) you currently have selected. Presets are combinations of settings that are applied to the tool to make it behave in a specific manner. For example you might have a ‘drybrush’ preset that causes the Oil Brush tool to reduce loading and thinners to dry its paint out.
The Preset Block at the top of the panel allows you to quickly select presets for the currently selected tool. To select a preset, click the Preset Block and a menu will appear containing options:
- Reset Current Tool: If you ever need to reset the tool to its default settings, select this option.
- Stylus Controls: Options that allow you to change how a stylus input device works with the current tool. For more information see Stylus Controls.
- Preset Options: Items that allow you to open the Preset Collection panel to select presets, or add new presets.
- A List of Presets: The final items in the menu are a list of presets currently available for the tool you have selected. These are divided in to groups. Select an item from one of the groups and those settings will be applied to the current tool.
Pressure
The Pressure Setting is available to most tools and does the same thing for each one. Pressure indicates how hard you are pressing the tool down as you work. If you are using a mouse or graphics tablet with no pressure sensitivity this sets the level of pressure the tool applies. If you are using a pointing device that is pressure sensitive this value adjusts the pressure of your stroke, allowing you to increase or decrease the effect of the pressure you are applying manually.
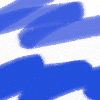
Oil Brush
The Oil Brush lets you paint with a variety of styles of oil or acrylic paint. The Oil Brush is great for putting down strokes of paint for blending. It can also be good for creating texture because the bristles of the brush leave trails in the stroke.
Features of the Oil Brush include:
- Smearing: Wet oils will smear and blend as you paint over them. If you paint a stroke over a previous oil stroke the colors will blend and the strokes merge. You can also smear oil strokes with the Palette Knife.
- Texturing: The bristles of the brush leave a trail in the oil stroke giving it the appearance of depth and texture.
- Runout: If you have a lightly loaded brush the color will run out as you paint, thinning down until it leaves a dry stroke on the surface of the Canvas.
- Cleaning: If you turn off Auto-Clean, your brush head will remain dirty after each stroke so the last color you had on it will be applied when you next paint.

The Oil Brush interacts with the texture of your Canvas. As the paint thins and dries out at the end of a stroke you will see that it sticks to only the high points of the Canvas.
Settings
Thinners: Allows you to add Thinners to your paint. As you increase this value the paint you are applying gets thinner so the stroke will go further before running out. Thinner paint is also more transparent and the bristles of the brush leave fewer marks as the paint gets thinner. Thinner paint is harder to smear because there isn’t much volume to spread around, but you can still smudge a thin stroke with the Palette Knife.
Loading: Indicates how much paint has been picked up by the brush head before the stroke begins. The higher the value the more paint there is so your paint will spread further if you turn Loading up high. If you set Loading to 100% the paint will never run out in a single stroke.
Insta-Dry: If this is turned on your paint will dry as soon as it touches the Canvas.
Dry paint does not blend with other paint on the canvas so color and texture will be unaffected as you paint over it.

Auto Clean: If this is turned on your brush will be cleaned automatically between strokes. If it is turned off you will need to clean the brush manually using the Water Glass that pops up next to the Color Picker. For more information see the Colors section.

Aspect: This controls how round or square the brush head is.
If the brush is using a Round head and the value is 100%, the brush head will be a perfect circle, reduce the value and the brush head ‘squashes’, becoming more elliptical.

Rotation: Controls the default rotation angle of the brush head.
This is more visible if you have a narrow aspect brush. Rotation is also controlled dynamically as you paint, this setting just assigns the default value.
Stiffness: This controls how stiff the bristles of the brush head are.
The stiffer the bristles, the less flexible the brush head is and the less the pigment will be ‘pushed’ in to the dents in the canvas.

Square Head: The Oil Brush usually uses a rounded brush head but if you turn this on the brush head becomes square, giving a more blocky start and end to the stroke.
Pencil
The Pencil Tool gives you a range of difference pencil types including soft and hard, and precise mechanical pencils. The pencil tool is good for detailed line work and soft shading when you sketch using the side of the lead. If you have a pressure sensitive stylus the darkness of the lines you make can also be adjusted while you draw.
The Pencil Tool has the following features:
- Dryness: Pencil strokes apply dry color to the Canvas so they do not smear, but they can be smudged using the Palette Knife.
- Hardness: The tip of the pencil is hard so the lighter you press with a pressure sensitive stylus the lighter the stroke you will make. In addition, if you draw with the pencil over an area of thick paint the tip of the pencil will cut through the paint and leave a flat trail.
- Shape: The head of the pencil is conical so if you increase the Tilt value setting you can draw with the flatter, wider side of the lead.
- Smoothing: Precise Pencils can adjust your strokes after you draw them to make them smoother. This helps reduce the wobbles that can occur when using a mouse or stylus.
The Pencil interacts with the texture of your Canvas. If you draw lightly on a
rough Canvas you will see the texture of the Canvas show through as the
Pencil touches only the higher parts of its surface.
Settings
Softness: Controls how soft the lead of the pencil is. Higher value, softer lead breaks up more easily so leaves more on the Canvas as you draw, leading to a darker line and a more powdery look. Harder leads break up less so create lighter, more precise lines.
Tilt Angle: If the Pencil’s ‘Precise’ setting is turned off you can adjust the Tilt Angle. The higher this value, the more the pencil is considered to be tilted when you draw, giving softer, wider strokes as you sketch with the side of the lead rather than the tip.
Smoothing: This setting is only available when the Pencil’s ‘Precise’ setting is turned on. It controls how much smoothing is applied to your stroke after it is complete. Smoothing can be used to make strokes flow more smoothly or remove small irregularities in their shape. Higher values apply more smoothing to your stroke and can significantly change its basic shape and size as ArtRage calculates a smoothed version of the path you took.
Precise: If turned on this setting switches the pencil to a precise mode that simulates mechanical pencils. Precise pencils ignore the texture of the Canvas and create smooth, accurate lines that can be smoothed. Precise Pencil lines still vary in their opacity based on pressure as they are drawn.
Felt Pen
The Felt Pen tool lets you draw with a range of marker pens of varying wetness and qualities, creating a number of different effects. From cheap, dry markers and highlighters through to expensive art pens that have wet brushtips, the Felt Pen is a great tool for applying color while sketching without applying texture such as the bristle strokes in the oil brush.
The Felt Pen has the following features:
- Smudging: Even a wet felt pen doesn’t leave much actual paint on the Canvas so it won’t leave lumps and won’t smear. It can, however, be smudged using the Palette Knife.
- Blending: Wet felt pen tips can blend with other colors as they pass over them, lifting some of the existing color off the Canvas and blending it in to the color of the pen.
- Build Up: Dry felt pens like highlighters don’t blend very well so as you use them to draw back and forth over other colors, or even their own stroke, they tend to build up and darken.
Using a white felt tip pen is like using a water soaked felt nib. It will blend and thin existing color but it won’t apply white to the surface. Solid white requires a thicker paint such as Oil, or Chalk/Crayon if you want a dry medium.

The Felt Pen interacts with the texture of your Canvas. If you draw lightly on a rough Canvas you will see the texture of the Canvas show through as the tip touches only the higher parts of its surface. Because it is really a wet medium the stroke sinks deeper in to the Canvas than something like Chalk or Pencil.
Settings
Softness: Controls how soft the tip of the pen is. Softer pens will vary the size of their stroke more with pressure. If you are not using a pressure sensitive input device this setting won’t appear to do much unless you change the pressure slider.
Wetness: Controls how wet the tip of the pen is and how much ink is deposited as you move.
Lower values create dry pens that break up around the edges where the texture of the Canvas is lumpy and the tip is not in full contact.
Higher values cause the edges of the stroke to smooth out as the ink flows in to the dents of the Canvas Texture. Higher values also cause the felt pen to drag existing color from the Canvas as the pen moves over it.
Art Pen: If this is turned on the felt pen is given a much higher quality stroke as the tip quality is improved. Art Pens produce a bolder stroke that doesn’t build up over itself because the tip deposits more color on the Canvas as it moves around. Art Pens also blend with other colors smoothly.
Pastel
The Pastel Tool lets you draw with wax or chalk pastels of varying softness, producing strokes of varying boldness depending on the pressure of the stroke and interacting with the grain of the Canvas to produce textured results.

The Pastel Tool has the following features:
- Waxiness: Strokes of Wax Pastel are almost dry, but not quite. This means that as you draw over them small amounts of color can be picked up from previous strokes and the wax can build up slightly on the surface of the Canvas.
- Dryness: Chalk Pastel strokes are dry so they do not smear, but they will smudge if you use the Palette Knife.
- Hardness: The tip of the Pastel is hard so the harder you press the bolder the stroke becomes. Light strokes will only apply to the high parts of the Canvas, because the tip doesn’t deform to push in to the dents.
The Pastel interacts with the texture of your Canvas. If you draw lightly on a
rough Canvas you will see the Canvas Texture show through as the tip
touches only the higher parts of its surface.
Settings
Type: The Pastel can be set to use Wax or Chalk. The two are very similar but Wax Pastels will blend and smear slightly as you work with them. Chalk Pastels are dry and blur slightly but do not smear.

Softness: Controls how soft the pastel is. Softer wax will apply more easily to the Canvas. The higher the softness, the bolder the stroke will be at light pressures.
Eraser
The Eraser lets you remove paint from the surface of the Canvas. It doesn’t just erase color, it will erase the texture of paint as well so you can use it to shape large volumes of paint that you have previously applied.

The Eraser has the following features:
- Hardness: Even a soft eraser is hard enough that you can vary how much is erased by varying the pressure of your stroke. Light strokes only erase small amounts of paint, harder strokes erase more.
If the Eraser is used on a stroke of paint it will remove the physical mass of the paint before it removes the color. This can be useful if you have a very thick area of paint and want to thin it down a bit. Carving dents in to paint strokes with a light pressure eraser can produce some very interesting effects.
Settings

Softness: Controls how soft the edge of the erased area is. The softer the eraser, the more blurred the edge of the line it erases. To get a solid, hard edged eraser take softness all the way down to 0%.
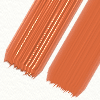
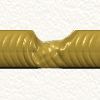
Paint Tube
The Paint Tube can be used to lay down lines of thick paint on the Canvas for blending or adding texture. It adds a large amount of physical material so it is the ideal tool to use when preparing to smear paint with the Palette Knife.
The Paint Tube has the following features:
- Wetness: The paint laid down by the Paint Tube is thick and wet so it can be easily smeared around.
- Never Runs Out: The Paint Tube never runs out so you can make as long a line of paint as you like.
- Thick: The paint applied by the Paint Tube is thick enough that it covers over the texture of the Canvas.
- Shape: Single splotches of paint on the Canvas look different to the strokes you make, and can be used to make for interesting textures.
The Paint Tube has no settings of its own.
Single clicking with the Paint Tube causes it to leave only a spot of paint on the Canvas. The harder the pressure, the larger the amount left behind.
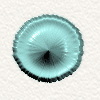
Glitter Tube
The Glitter Tube lets you sprinkle colored particles of various shapes on to the Canvas. This can be used to build up textures, add some sparkle to a painting, or even recreate images if used with a Tracing Image. Glitter is particularly good to use when you want a metallic look, as the many particles reflect the light in different ways.
The Glitter Tube has the following features:
- Dryness: Particles of glitter are dry as they hit the Canvas so they cannot be smeared, but they can be smudged with the Palette Knife.
- Flow: The tube continues to sprinkle without you needing to move it around, so you can build up large piles of glitter in a single spot if you wish.
- Shape: There are five different options for the type of glitter you want to sprinkle.
Settings
Glitter Size: Controls the size of the particles of glitter that are sprinkled. The higher the value the larger the particles.
Multicolor: Allows you to make the glitter particles change color as they sprinkle. The higher this value, the further the color of the particles will be from your currently selected paint color.
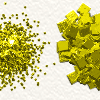
Glitter Shape: Sets the shape of the particles that are sprinkled. The options are: Square, Circle, Ball, Grit, and Random.
Each option creates a slightly different texture when used on the canvas.
Selection Tool
The Selection Tool does not create strokes of paint on the Canvas, it is used to mark areas for other operations such as copy and paste, or transformation. If you want to prevent paint being applied outside a specific area of the Canvas you can use a selection as a mask and it is active paint can only be applied inside its area.
Full information on selections and what you can do with them can be found in the section on Selections. This section explains the settings of the Selection Tool and how to use it to make selections.
Settings
Type: There are six types of Selection Tool available:
Rectangle: Creates rectangular selections by clicking and dragging on the canvas. Hold down Shift to create perfect square selections.
Ellipse: Creates elliptical selections by clicking and dragging on the canvas. Hold down shift to create perfect circle selections.
Polygon: Creates multi-sided polygonal selections. Click to place a corner point, then release the mouse button and click to place the next point.
To end the process and create the polygonal selection either double click on the last corner you want to create and a final edge will be linked back to the first point, or click on the first point again to close the line.
Press Escape on the keyboard or select another tool to cancel polygon construction.
Freehand: Creates freehand selected areas. Click and drag to draw an outline around the area to be selected. When you release the mouse button the end of your line will be automatically connected to the start and the area closed.
Magic Wand: Creates automatic selection areas using the color on the canvas as a guide. Click in an area to select the surrounding area of color similar to the point clicked. This mode has additional settings that are used to change how ArtRage identifies the area to select.
Paint Area: Allows you to paint an area that will be turned into a selection. As you paint, the area you want to protect from changes is filled in with red, you are painting a Mask. You can always use Invert Selection in the Edit Menu to turn the selection around after you are finished.
When you have finished painting your selected area, select another tool or selection mode to convert the ink you applied in to a real selection.
This mode has additional settings that are used to change the shape of the paint stroke.
Unique settings for each type are listed below:
Magic Wand Type
Spread: Controls how far the area to select will spread from the point you click. To select the area, ArtRage looks at the color of the point you clicked and expands outwards until it finds a different color, at which point it stops. The Spread value controls how different that color can be before the spread ends. The higher the Spread value, the more different it can be. So a low Spread value means that if you click a blue spot on the Canvas, even a lighter blue could stop the selection spreading. A higher Spread value means that the selection will expand further through the light blues but might stop when it hits green.
Antialias Edge: If this is on the edge of the selected area will be antialiased, selecting partial pixels to soften the selection. If you do not want to work with partial transparencies, turn this setting off.
Current Layer Only: When you click a point to make a magic wand selection ArtRage can either look at color only on the layer you clicked, or on all layers to find where it should stop expanding. If Single Layer is turned on, other layers will be ignored. If it is turned off, color on other layers is also taken into account as the selection spreads.
Paint Area Type
Opacity: Adjusts the opacity of the selection. The higher this value the more the area will be selected. Lower values can create transparent selections. For more information see the section on Selections.
Hardness: Controls the hardness of the edge of the strokes made with the Paint Area selection tool. The higher this value the sharper the edge of the stroke. The lower the value goes, the more blurring you will see at the edge of the stroke.
Autoflow: If this is turned on the tool will automatically place ‘selection ink’ down on the surface of the Canvas as you hold the pointer still. This causes the selected area to build up over time and is particularly visible if you turn Hardness down to 0%. If this is turned off, ink will only be applied as the pointer is moved.
These settings are available for all types:
Mode: Controls how the next selection will be added to any current selection already on the Canvas. Available modes include:
Replace: Replaces the current selection with the new one.
Add: Adds the new selection to any current selection to create a new result.
Subtract: Subtracts the area of the new selection from any current selection to create a new result.
Difference: Makes a new selection from any area of selection that is in either the current or new selection, but not in both.
Intersection: Makes a new selection from areas that are in both the current and the new selection.
For more information see the section on Selections.
Feather: Controls how soft the edge of the selection is. Feather creates a blur at the edge of your selected area. The higher the value the softer the blur will be. This setting is not available to the Paint Area type.
Clear Selection: Removes the current selection from the Canvas.
Invert Selection: Inverts the current selection.
Transform Tool
The Transform Tool is used to adjust the shape, size, and position of paint and other objects that have already been placed on the Canvas.
The Transform Tool is used to select an item to transform. When you have this tool selected, clicking on an object on the Canvas will trigger a transformation overlay so that you can change its position, size, and rotation. For example, if you have a paint stroke on the Canvas you can click it with the Transform Tool and it will become available for transformation.
If you have a Selection active, clicking inside the selection with the Transform Tool will affect only the paint in its area.
More information on how to perform transformations can be found in the section on Transformation. This section explains the settings and use of the Transform Tool itself.
Settings
Type: There are three types of Transform available:
Normal: Allows adjustment of scale and rotation using the handles and edges of the transform area.
Non Uniform: Allows non uniform transformations that can be used to skew the transform area.
Perspective: Allows perspective transforms that can be used to skew the transform area and apply perspective distortion.
A full description of each type can be found in the section on Transformation.
Select Layer: If this is turned off, the Transform Tool will only select items on the current layer when you click. If it is turned on, the Transform Tool will select the first item it finds underneath the point you clicked, regardless of which layer you have selected.
In complex paintings the Single Layer option can be turned on to give you more control over what you are selecting when you click in the Canvas.
Color Sampler
The Color Sampler allows you to sample colors from the Canvas and make them your current color. For more information on colors see the section on Colors.
To use the Color Sampler simply click on the Canvas. The color underneath the point you click is selected as the current color.
Settings
Single Layer: If this is turned on the Color Sampler will only sample color from the current layer you have selected. If there is no paint on the layer where you click, nothing is sampled. If this is turned off the Color Sampler will sample whatever is under the pointer regardless of what layer it is on, and if there is no paint it will sample the Canvas color.
With Lighting: ArtRage has a light that creates the illusion of dents and lumps in paint strokes. If this option is turned on the Color Sampler will sample the color you see on the screen, so a red paint stroke that has a bristle dent might give you a dark red where there is a dent or a light red where there is a peak. If this option is turned off the Color Sampler will only sample the actual color of the pigment used to create a stroke, so your red paint stroke would produce red regardless of whether you click on the dark or light parts made by the bristles.
Tool Presets
Most of the tools in ArtRage have a large number of settings that allow them to be used in a wide number of different ways. For example, the single Oil Brush tool can create thick oil strokes, delicate thin washes, rough drybrushed smudges, and many more effects. This means that each tool is actually a collection of hundreds of other potential specific tools, each defined by what can be a very narrow range of settings from the available controls.
Tool Presets are used to avoid you having to remember the exact settings that go to make a specific type of tool, and allow you to set up all of those settings with a single click. Presets store all of the settings of the tool they are created for, and can optionally also store the paint color and brush size at the time of creation.
The Presets Panel
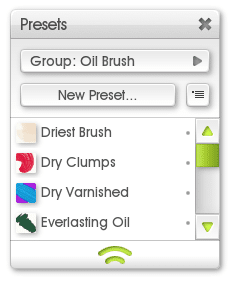
The Presets Panel is opened by clicking the Presets Pod. It gives you functions for selecting, storing and sorting presets for the current tool. When you select a tool the contents of the Presets Panel update to show you what you have available.
Presets are sorted in to groups for ease of use. You can select which group of presets you wish to display using the Group control at the top of the panel. The presets that are in the current group are displayed below in the main list.
Selecting Presets
To select a preset from the list, click it. This will apply all of its settings to the current tool and the preset will light up. If you change any of the properties the highlight will disappear because the preset’s settings are no longer active.
Presets that are listed with a dot next to them on the right hand side cannot be edited as they come installed with ArtRage. Presets without a dot are ones that you have added and you can edit them by right clicking on them.
Creating Presets
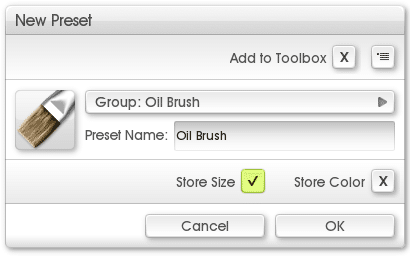
If you want to create a preset, set up your tool in the state you want to store then click the New Preset button. When you click this button the New Preset Panel appears and you can set up details.
At the top of the panel is a menu containing options for setting up groups, and the option to add the preset to the Toolbox when it is created. For information on the Toolbox see the Toolbox and Workbench section later in this manual.
The next section of the panel allows you to select the Group that the preset will be added to. Click the control to choose from a list of available groups. You can also set the name of the preset here.
If you want to set the icon for your preset click the icon button to the left of the name entry. This will produce a menu that allows you to use the default tool image for the current tool, load an image from disk, or sample an image from the Canvas.
If you want your preset icon to show what its tool strokes will look like and you have a sample on the Canvas select the Sample Preview Image option. When you select this a small panel will appear and the rest of the interface will fade out. Drag the small panel until its central preview area is over the part of the Canvas you want to sample and click the tick button. This will sample from the Canvas and assign that image to your preset.
Finally you are given the option to store Tool Size and Paint Color with the preset. If you store these properties, they will be set when the preset is selected. If they are not stored, the tool size and paint color will remain unchanged when the preset is selected.
When you are ready to create the preset click OK and ArtRage will generate the file for you. If you have selected a name that has already been used or there is a problem of another kind you will be notified and can choose how to resolve the problem.
Once you create a preset it is added to the User Preset Collection and you will find it in the appropriate Group of the presets panel.
Storing Size and Color
The option to store Size and Color with your preset allows you to use presets in two different ways:
- As tool types: If you do not store Size and Color, your preset represents a generic type of tool that you may use in different ways in different projects. For example, a stiff bristle brush, or a leaky airbrush. Selecting the preset sets the basic type of tool you are using and you can then apply that tool to various different jobs in the painting.
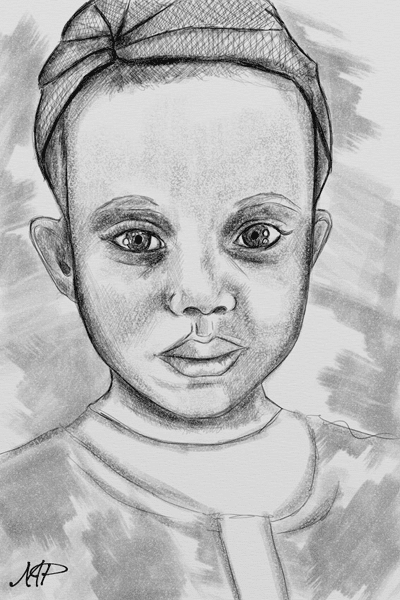
- As specific tools for defined purposes: If you store Size and Color your preset represents a specific tool for a specific task. For example, if you are painting a portrait and working on the eyes you might want a specific soft brush at 10% size with a precise blue-green color. This is still just an Oil Brush, but it is for a defined task rather than for general use.
You may want to split your presets in to groups that reflect these different
types of functionality. You may also find if you are using lots of specific tool
presets that the Toolbox is useful. For information on the Toolbox see the
Toolbox and Workbench section later in this manual.
Managing Presets
Any presets you add to ArtRage can be accessed from the User Preset Collection folder. The easiest way to get to this folder is by selecting Open User Tool Presets Folder in the Preset Panel menu.
Each preset is a file on disk so you can change their names and move them around in that folder if you like. Each Group is a folder stored inside that folder, so if you add new folders you are adding new categories.
If you want to import a preset that someone else has sent you, you can use the Import Preset To Collection option in the Preset Panel menu. This allows you to select a preset to load and ArtRage imports it to the correct disk location for the currently selected Group.