One & Two Point Perspective
The Perspective feature in ArtRage 5 lets you add one or two point perspective, and create your own customized perspective layouts. You can customize the individual lines and planes, add or remove any line or section, create complicated skyscrapers or simple landscapes.
Perspective also acts as a drawing guide, helping you draw straight lines with the ‘Snap To Perspective’ feature and adjust the proportions of your art with the ‘Scale to Perspective’ option in Transform Mode.
Click video above to learn about “Two Point Perspective” in ArtRage 5.
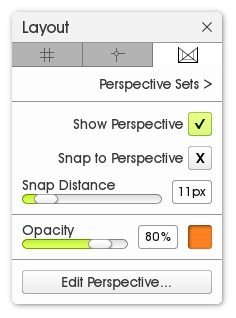
Layout Panel
Load perspective sets from View > Perspective, or open the Layout Panel, which offers top level settings and editing options. You can load a default Perspective Set first and either use that as is, or edit it, or you can go straight to Edit Perspective to create a custom set.
Perspective Sets
Click ‘Perspective Sets’ to load a default one or two point Perspective Set, or access a previously saved set. You can save custom Perspective Sets within a painting and switch between them while you work.
Show Perspective
This toggles the visibility of the current Perspective Sets on and off.
Snap To Perspective
You can use the ‘Snap To Perspective’ option to draw perfectly straight lines along the major lines and outside edges of the perspective set. As soon as you click on a line, your cursor will lock to it, and will continue outwards even after the visible line ends.
Snap Distance lets you control how near or far your cursor can be before it snaps to a line.
If you need to draw a straight line along the inside of the Perspective Set, you can add a new plane or line, or just add a Guide instead for a single vertical or horizontal line. Once your stroke ‘locks’ to a line, your brush stroke will continue along it until you lift the stylus. This prevents it being sidetracked when the lines are close together, and allows you to continue the line out past the edge of Perspective Set.
Opacity & Color allow you to customize the appearance of the lines to your personal taste, or to show up better against the colors of your painting.
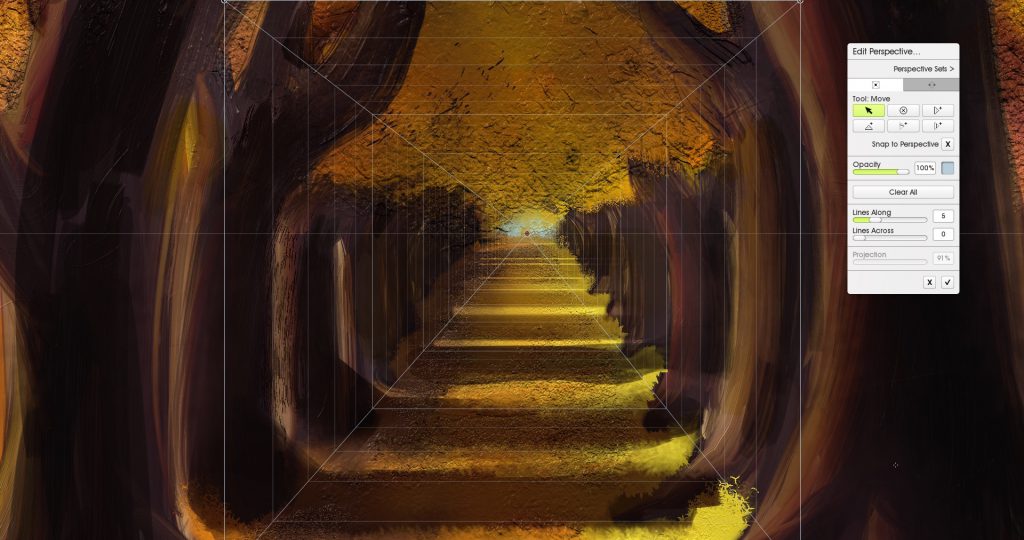
Edit Perspective
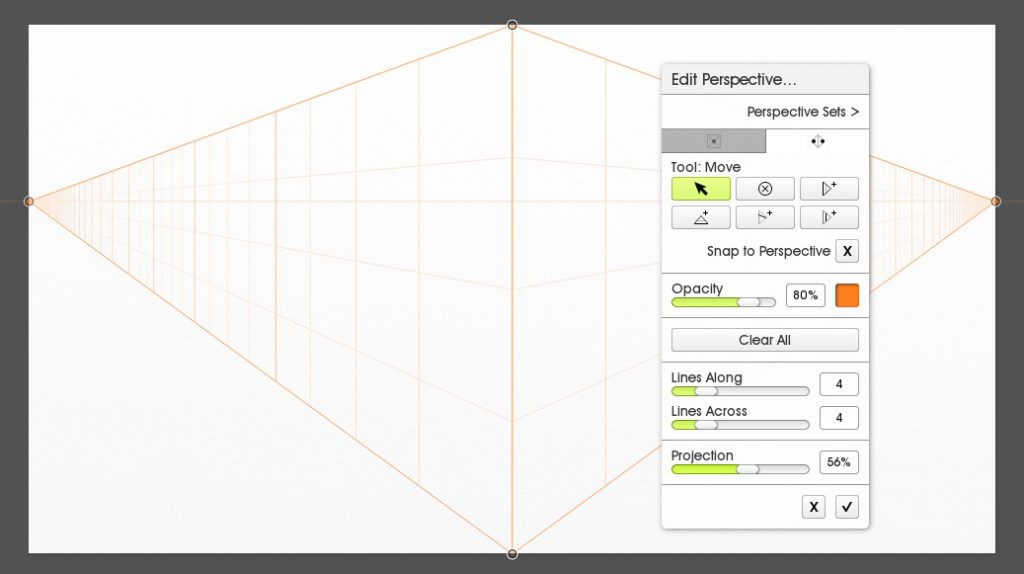
The final option in the Layout Panel is the Edit Perspective button, which opens the more advanced editing menu that allows you to customize every aspect of the active Perspective Set.
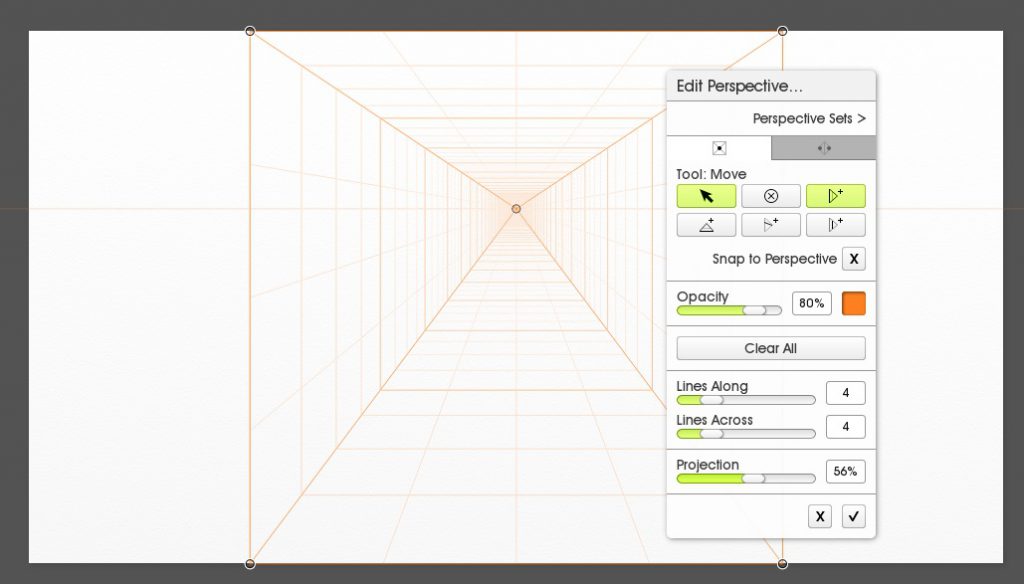
Edit Perspective
You can edit both One and Two Point Perspective from the Edit Perspective menu. The options are the same for both modes, but you will lose any changes if you switch between them (you can save a Set if you want to keep your changes).
You can add any number of walls and floors, and then add individual major and minor lines and customize the spacing of the minor lines. You can choose between one and two point perspective (‘standing on a corner’ or ‘looking down a corridor’) using the tabs at the top of the menu.
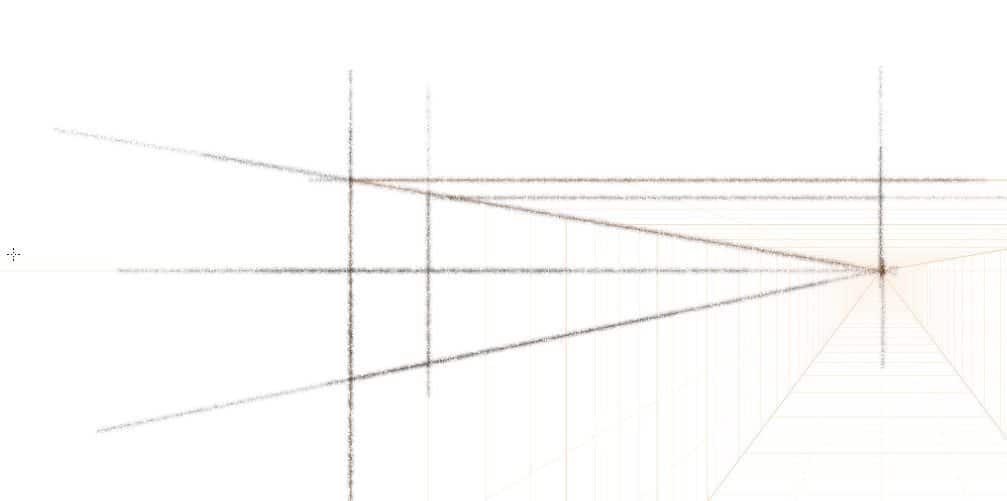
Move & Delete
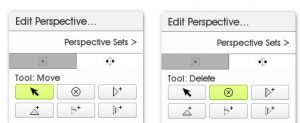
Click the ‘Move’ arrow to select part of the perspective set. Transform handles will then appear, and other options, such as Projection, will become available. You can adjust the size, width and location of any of the planes, move individually added lines, and drag the horizon and vanishing points up and down the canvas or off to the far sides.

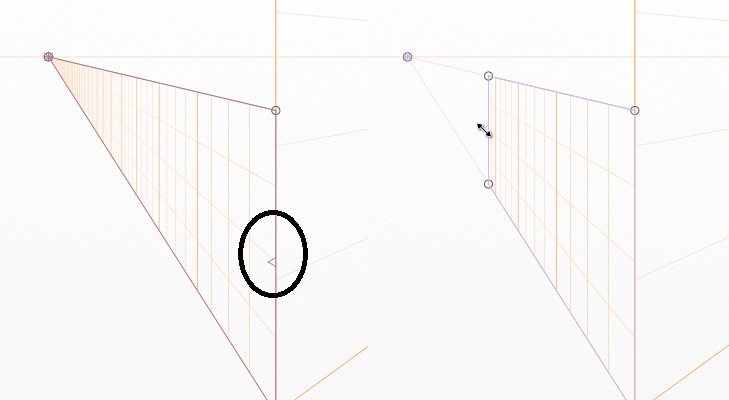
Bonus Tip: The Move tool doesn’t just move and scale, you can use it to adjust the visible area of walls and floors.
Click the ‘Delete’ X symbol to remove individual elements of the perspective. Click on the outside edge of planes to delete them (this helps you avoid accidentally clicking the wrong line).
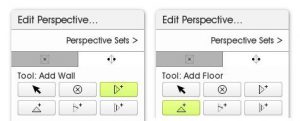
Add Walls & Floors
Add a new vertical plane (wall) or horizontal plane (floor) using these options. You can have an unlimited number of walls and floors. Edit their size and placement when you add them, or come back later and use the Move arrow to transform them. New walls and floors wall automatically extend from the currently selected vanishing point, so if you need it to come from the other vanishing point (in two point perspective), select that first using the Move tool.
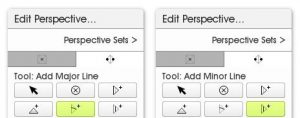
Major & Minor Lines
You can add individual Major lines and Minor lines using these buttons. Major lines extend from the vanishing point to the near edge of the wall or floor. Minor lines run across the wall or floor (vertically on a wall, horizontally on a floor).
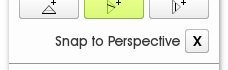
Snap To Perspective
The ‘Snap To Perspective’ button in the Edit Perspective menu affects the placement of the perspective elements and makes it easier to line everything up neatly. When it is active and you are moving a line or plane, they will snap to existing edges.
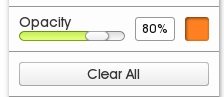
Opacity, Color & Clear All
These options allow you to edit the appearance of the perspective lines, or clear everything and start over. The Opacity and Color options can also be accessed from the Layout Panel.
Clearing the active perspective will leave the horizon line and the vanishing point, but they will be reset to the default position.
Lines Along & Lines Across
You can set the exact number of Lines Along (along the length of the plane) and Lines Across (across the width of the plane).
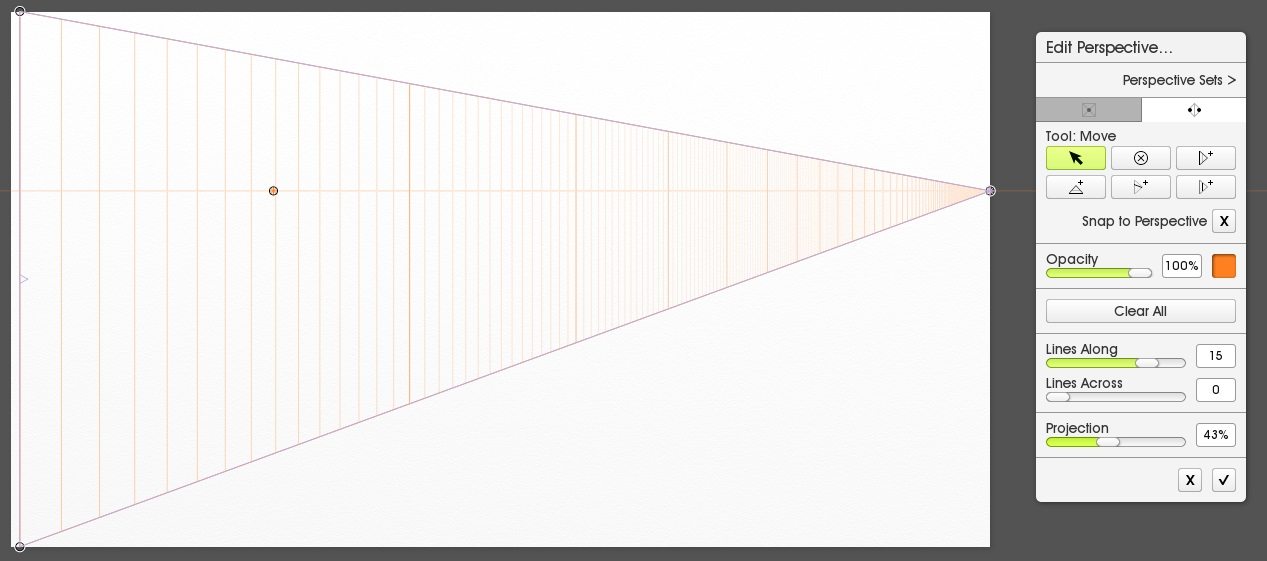
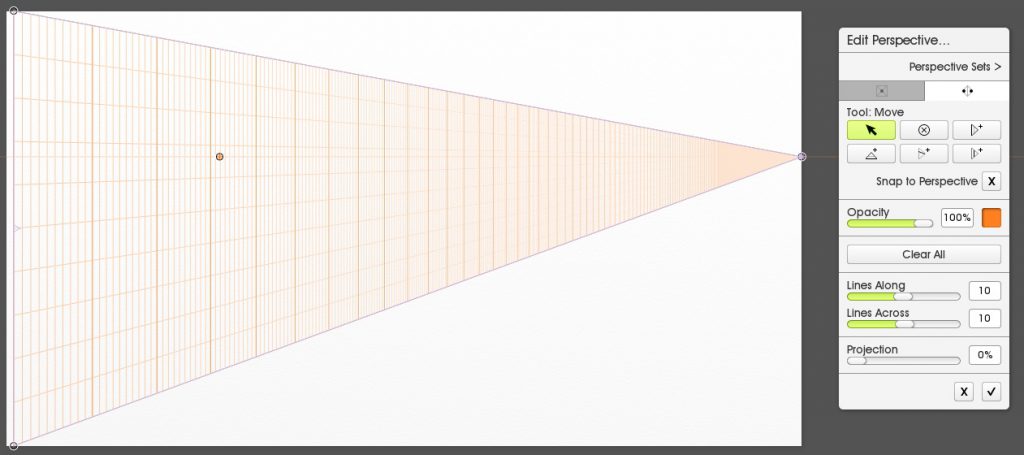
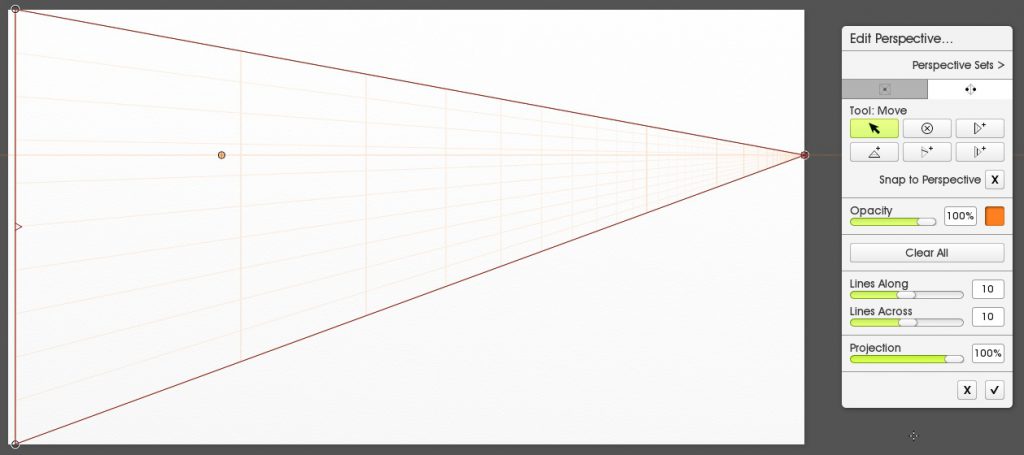
Projection
Projection allows you to edit the ‘depth’ of individual planes. Increasing Projection means that the minor lines get much closer together in the distance, and further apart in the foreground.
This option is only available for a active plane, so you need to select existing planes with the Move tool first, or edit projection when you add the new wall or floor.
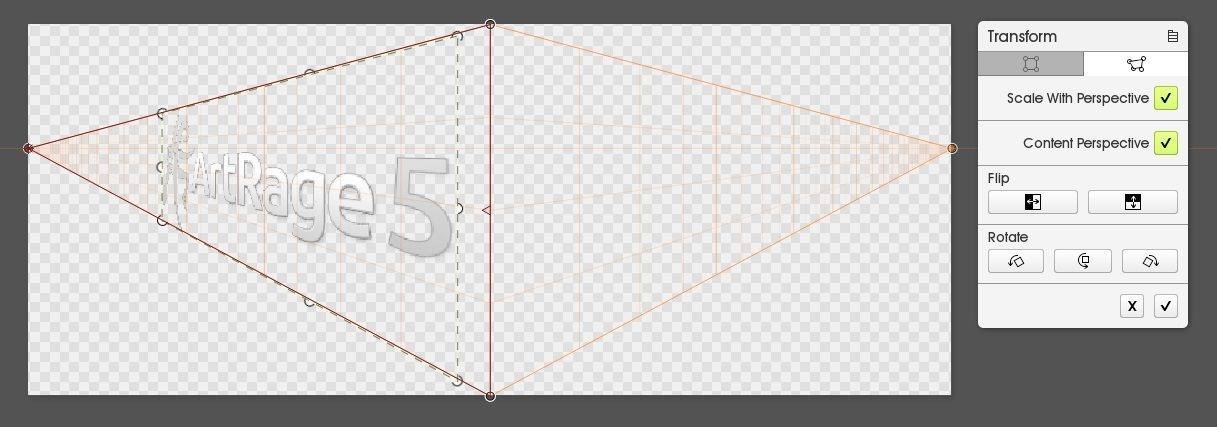
Scale to Perspective with Transform
The Transform mode offers a ‘Scale to Perspective’ option. This will scale your content relative to the active Perspective set.
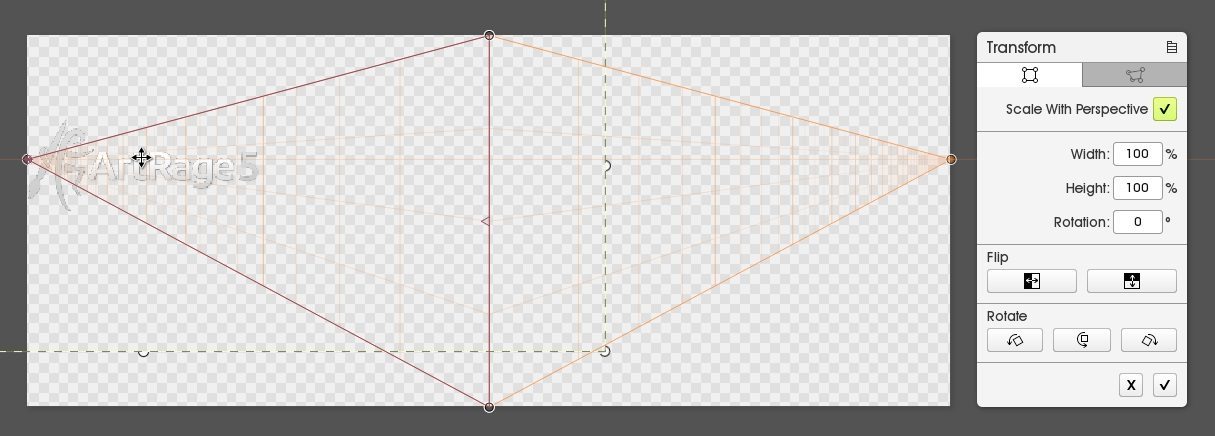
Linear Transform
Linear Transform means that the relative proportions of the content remain fixed. It will scale the size of the transformed content as you move it along the major perspective lines.
Free Transform
Free Transform allows you to distort and adjust the corners independently, so when you move it around the active perspective lines it will stretch to fit. It will also flip around to map to walls and floors. You can use the ‘flip’ shortcuts to adjust the final direction of your paint.
Content Perspective is internal perspective that isn’t linked directly to the perspective set. Turning this on will shift the paint so that it is slightly more realistic.
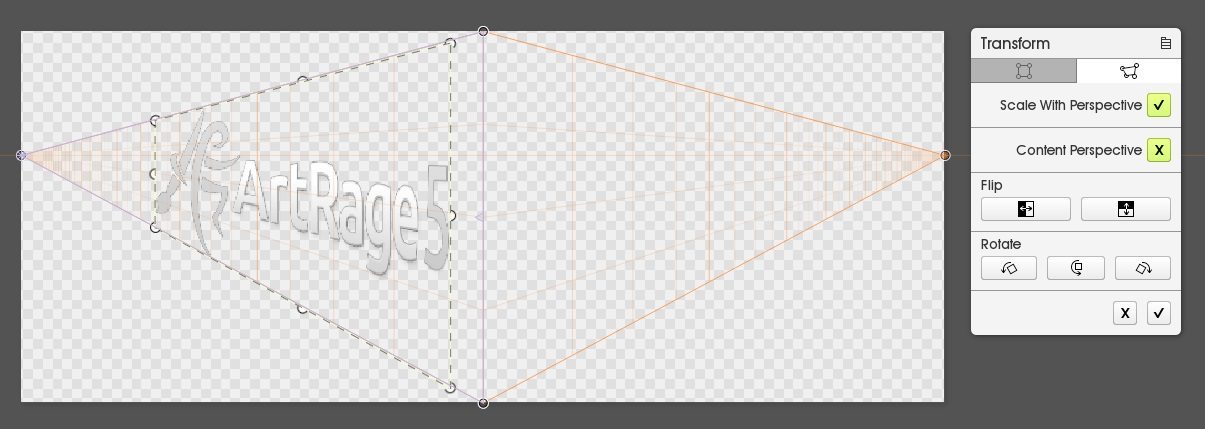
You can use Free Transform to create patterns and textures and then convert them into walls and floors with accurate perspective.
Click video above to learn about “Making Painted Backgrounds with Accurate Perspective” in ArtRage 5.