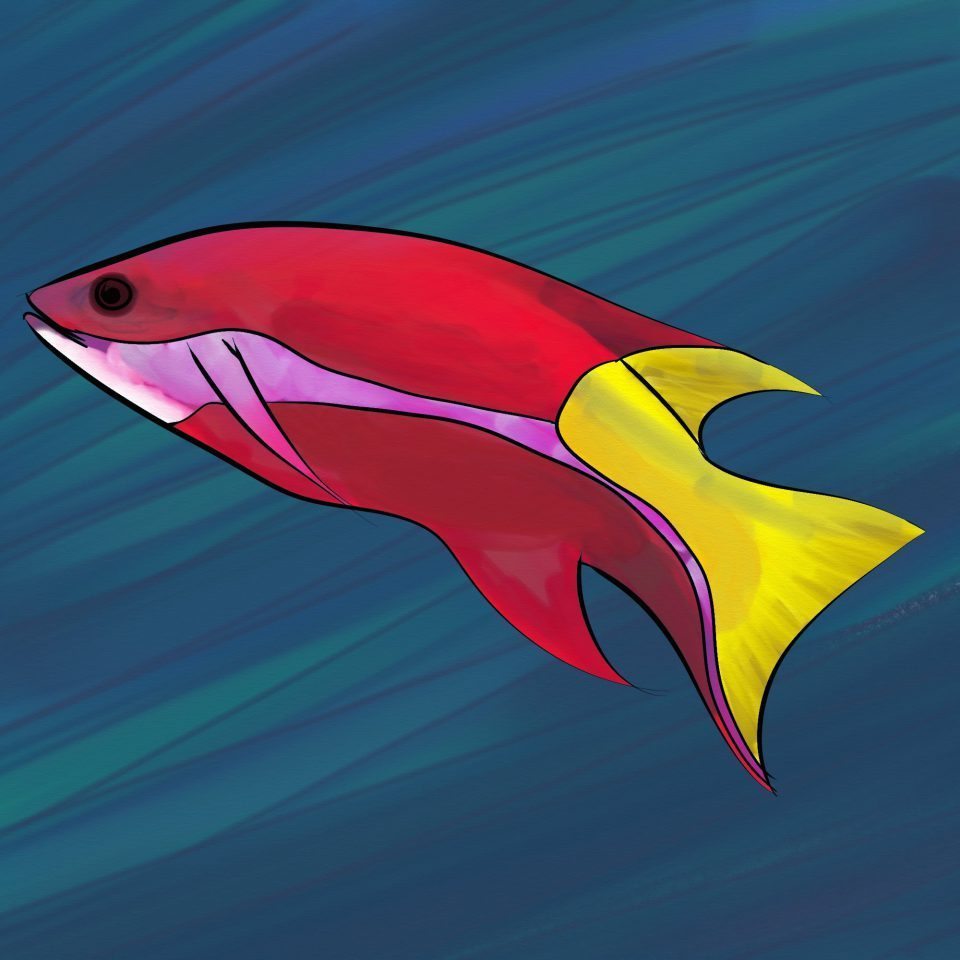
Join us for a quick coloring session featuring the vibrant Cuban Hogfish and the Felt Pen tool! A coloring tutorial demonstrating tips for creating a line art from your pencil sketch and coloring it neatly with the felt pen in ArtRage 4. You can also watch the video of the painting process on YouTube (or at the end of this post).
Learn How To Draw and Color This Fish! The finished picture from this tutorial
Click through the gallery for the step by step tutorial
Step 1: Sketch your basic fish shape
This sketch used the Pencil tool (P) Precise Mode and Smoothing are optional but let you get cleaner lines Use a reference or tracing image if you need to Step 2: Ink Your Lines
Add a new layer (Ctrl+L) Lower the opacity of the sketch layer Choose the Ink Pen (I) Adjust Smoothing & the Taper settings to get a nice flowing line that works with your hand movements and desired line sizes image See Ink Pen Settings Manual for help with the Ink pen settings Step 3: Tidy the Line Art
Hide your sketch layer Go over all the ink lines to make sure they look right and there are no gaps The next step will be selecting by area, so you really don’t want any gaps in the lines! Magic Wand Selection
Then switch to the Selection tool (Shift + S) Choose Magic Wand and pick the ‘Add’ mode in the Settings Select all the areas that you want to be the same colour Step 4: Base Colors
Select all the areas that you want to be the same colour Switch to a NEW layer under the line art layer Pick the Felt Pen (M) tool Any settings will do, but higher Wetness will have smoother edges Block out all the areas with the same color You can also just use the Fill bucket (F) for this step Step 5: Keep Coloring
Block out all the main areas of color Use the Selection tool to create new active selections so that you can color without messing up your previous areas of color. Ctrl + D will quickly deselect everything (Cmd+D on Mac OSX) Step 6: Shading and Highlights
Go over your colors and add areas of shading and light Use the Selection tool on the line art layer to reselect different areas as needed Adjust Softness and Wetness in the Felt Pen settings to get different amounts of blending Step 6a: Art Pen Mode The Art Pen mode lets you block out richer, more solid colors. It’s also good for applying light color over dark, but less good for subtle blending.
Step 7: Background
Add a new layer behind your fish for the background If you want a new canvas texture, either go to View > Canvas Settings to change it for the whole image or open the menu for that layer in the Layers panel and choose Set Layer Texture for individual layer textures. The canvas texture here is the 'Fine' texture from ArtRage Forums - Traditional Media Surface ARPACK Increase your Felt Pen tool size and lightly go over the background. heavy strokes of ink will hide the texture. You may want to adjust Pressure in the tool settings. Step 7a: Finish the Background Or just have fun pressing as hard as you like, blend away, and mix up colors until you like the look of it!
Watch the video of the painting process Tip: You can slow down the playback or turn off the annotations by clicking the YouTube settings shortcut in the bottom right of the video screen.
Software: ArtRage 4 Tools Used: Pencil, Ink Pen, Felt Pen, Selection Tool Fish: Cuban Hogfish (Bodianus pulchellus ) Music: www.bensound.com
More ArtRage Tutorials
For more help with using ArtRage, check out the ArtRage Manuals , the list of community tutorials or previous posts in the Tutorials category . And don’t forget to check the FAQ section !
You can also drop by our Artrage Forums , or Contact our Tech Support directly.