How To Set Up Your Canvas and Get Started in ArtRage for Manga Art
This tutorial helps you get started before you actually draw and colour something for the Drawing Manga in ArtRage: Sketching and Inking and Drawing Manga in ArtRage: Colouring tutorials.
ArtRage uses a real world painting canvas texture by default, but you probably don’t want this for most of your cartoon and manga drawings. Instead, you want a very flat digital background that won’t distract from, or interact with, your tools too much as you draw.
This is an ArtRage 4 Tutorial
This tutorial assumes that you are using ArtRage 4. While most of these options are available in other editions (including the mobile apps!) the menus may look a bit different, and some of the most advanced settings are only in ArtRage 4.
If you don’t currently have ArtRage, you can download the demo and follow along!
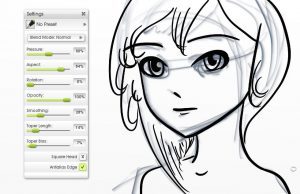
Tools
We have noticed a lot of first time users aren’t really aware of the range of options buried in the tool settings and spend a lot of time struggling to mimic Copics and ink with the oil brush, or trying to colour evenly with the watercolour brush, which just aren’t designed for that sort of thing.
The tools you want to be focusing on for simple line drawings, cartoons, manga and very ‘digital’ looking drawings are:
- Pencil (with certain settings)
- Ink Pen
- Felt Pen
- Airbrush
- Eraser
- Fill Bucket
- Palette Knife (Blur/Wet Modes only)
Once you have created your drawing, you can then go back and add a wide range of effects and explore more advanced options.
Shortcuts
Pay attention to the shortcuts. ArtRage 4 has a very long list of possible shortcuts and most of them are completely customisable.
Some of the most important ones:
- Shift will let you draw straight lines.
- Ctrl + Shift will let you draw straight lines at angles.
- Alt + click will pick a colour
- Ctrl + right click will zoom the canvas
- Alt + right click will rotate the canvas
- D will reset the canvas
- Ctrl + D will clear any active selections
- Tool sizes go up to 500% in the desktop editions! Hold Shift and drag right on the canvas area, or click the size and type in a number.
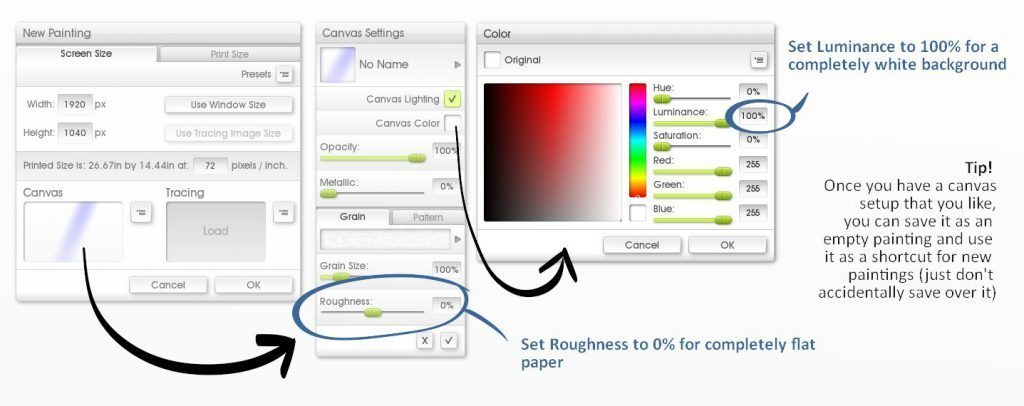
Canvas Settings
To get a flat white digital background, go to the canvas settings and edit the canvas texture and colour.
- Set Roughness to 0%
- Set Luminance (brightness) to 100%
- Decide if you want Canvas Lighting
You can find the Canvas Settings in the New Canvas menu, under View > Canvas Settings, from the layers menu, or by pressing Ctrl + Shift + C
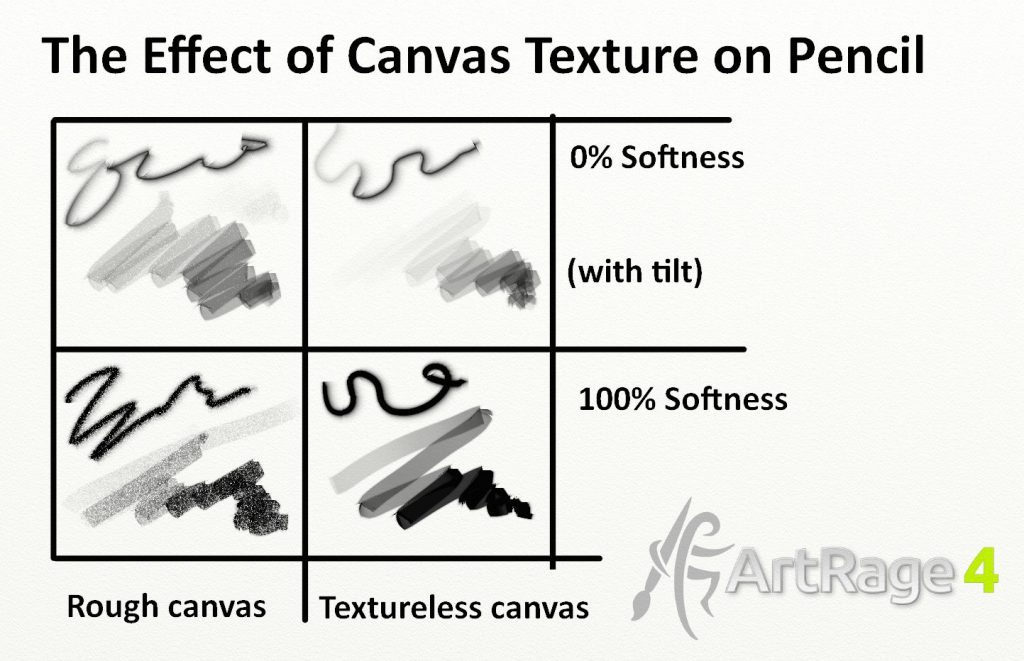
About the Canvas Settings
Important: Canvas Texture affects your tools as you draw, so changing the texture later will not change the strokes you made earlier. You can change the background colour, patterns and canvas lighting at any point as these do not interact directly with your strokes.
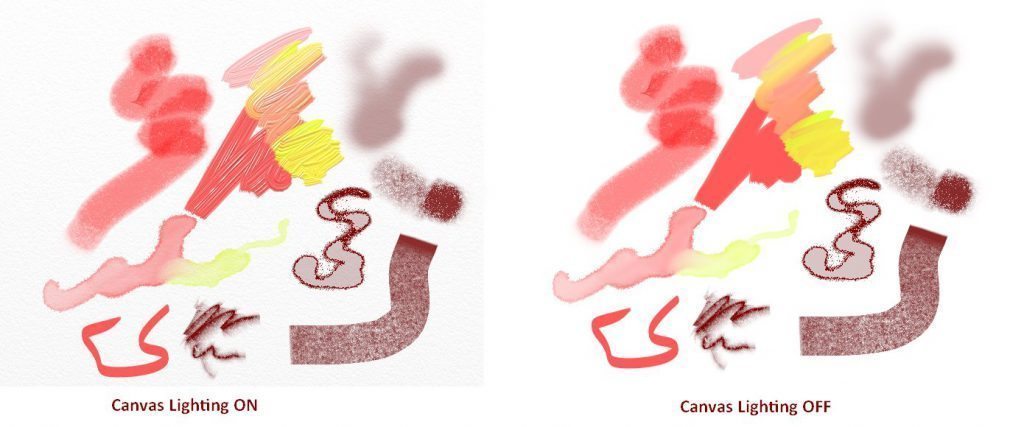
Canvas Lighting
The canvas lighting is used to create 3D effects for the paint and other tools and casts a slight gradient over the background.
Turn the lighting effect on and off in the Canvas Settings or by pressing F5. You can toggle the Canvas Lighting on and off as you work without affecting your drawing.
Most of the screenshots in this page have Canvas Lighting on (mostly because I kept forgetting to turn it off when taking screenshots), but here’s an example of the difference.
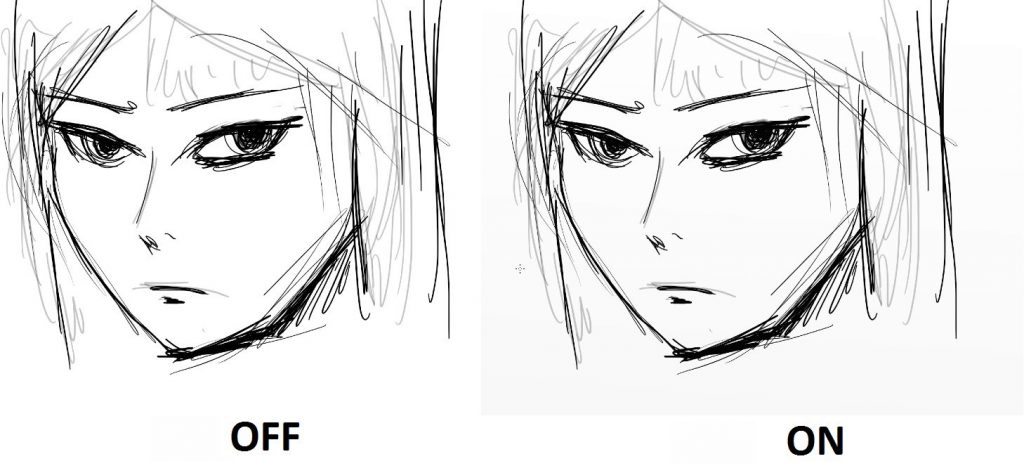
It will not have much effect on the very flat tools that we will be using in this tutorial, so you might decide you don’t want it at all. If you plan to use the Oil Paint, for example, then it will make a big difference.
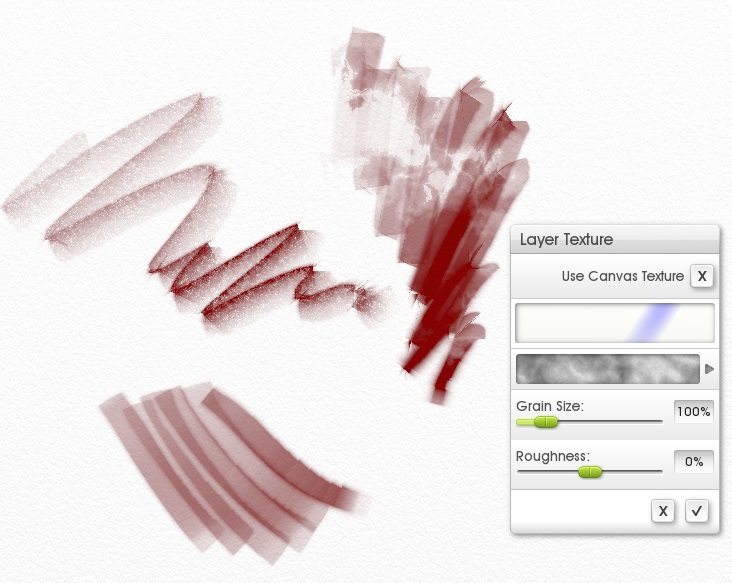
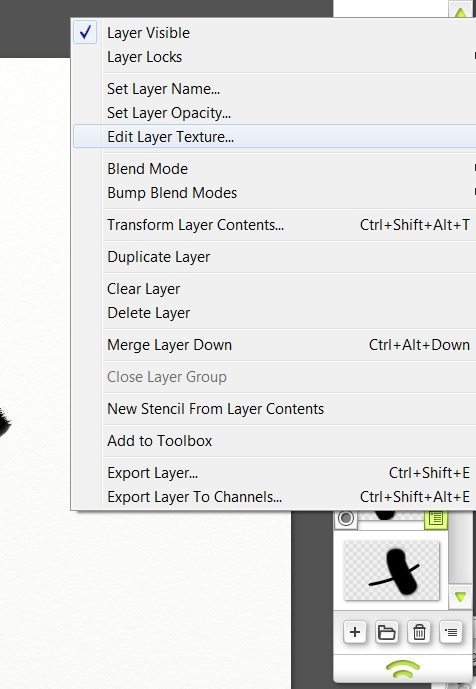
Individual Layer Textures
What if you want to sketch with texture on one layer, draw smoothly and digitally on another and make neat watercolour effects on a third? Or you don’t want to constantly change the entire canvas back and forth?
Then you can set each layer to have its own texture, so you can customise each one to act exactly the way you want!
Resources & Tutorials
Here are some tutorials and resources that might be useful:
- Copic Colour Samples (DeviantART)
- Manga Drawing Tutorial (ArtRage Forums)
- Beginners Manga Tutorial (ArtRage Forums)
- ‘How to draw manga’ video tutorials that use ArtRage (YouTube Playlist)
- Halftone Screen Stencils (ArtRage Forums)
- Comic Book Themed Resources – e.g. movement line stencils and background effects (ArtRage Forums)
- Free Screentones – can be imported as a background pattern, stencil or pattern fill (DeviantART)
- メイキングっぽい覚え書き: A guide to sketching and coloring manga using the Pencil and Watercolor tools, in Japanese.
Manga Tutorials & Articles
Now you know how to set up your canvas, you need to actually draw something! This means that you need a pen or pencil to sketch out your character and ink it nicely, and then you need to lay down some basic colours and shading.
[fp_carousel width=”940″ height=”200″ items=”5″ num=”-1″ speed=”600″ tag=”manga” orderby=”date” post_type=”post”]