How To Sketch & Ink in ArtRage for Manga Art
This tutorial follows on from Drawing Manga in ArtRage: Tools & Canvas and shows you the best tools for creating a drawing before moving onto Drawing Manga in ArtRage: Colouring.
ArtRage is a very traditional themed program with paints that are designed to mix and react realistically and often quite messily, but that doesn’t mean that you can’t create very digital manga art in it and retain full control of every detail. The trick is to use the correct tools for the job!
This is an ArtRage 4 Tutorial
This tutorial assumes that you are using ArtRage 4. While most of these options are available in other editions (including the mobile apps!) the menus may look a bit different, and some of the most advanced settings are only in ArtRage 4.
If you don’t currently have ArtRage 4, you can download the demo and follow along!
Canvas
This tutorial assumes you have set up the canvas to be completely flat and white, following this tutorial. You definitely don’t have to do this, but it will strongly affect the appearance of some of the tools, so you may not always get the same results.
Drawing Your Character
This tutorial isn’t about how to draw, it’s about which tools to use for different steps. We can’t teach you to draw in a particular style, and recommend that you find some artists you admire and studying their style or follow any ‘how to draw’ tutorial, but there are definitely some tools in ArtRage that will give you better results.
While there are some manga artists who create amazing traditional media art, we aren’t going to cover that here. Those artists use the same drawing style but a completely different set of techniques.
Sketching
Sketch out the rough shapes and outlines so that you can figure out how your drawing should look, then you can ink over it afterwards and concentrate on getting exactly the lines you want.
While some people can skip straight to working in pen, laying down exactly the lines they want, I am not one of those people, and sketching a draft out first never hurts!
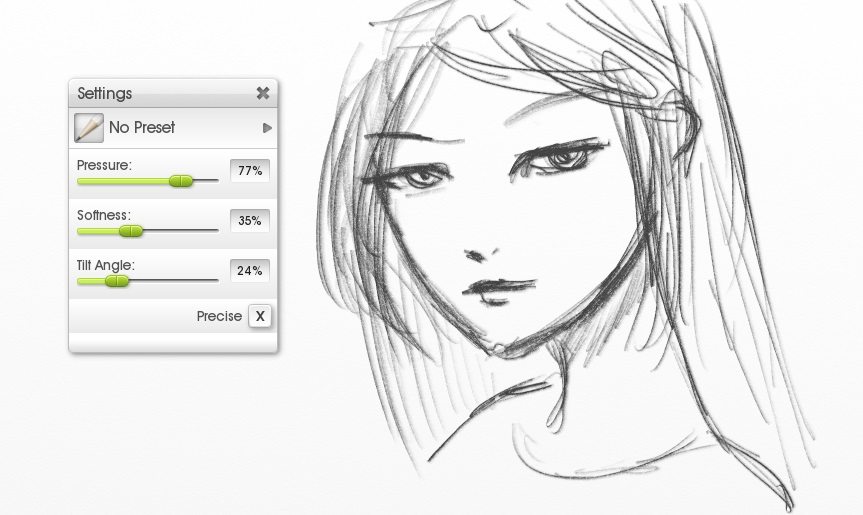
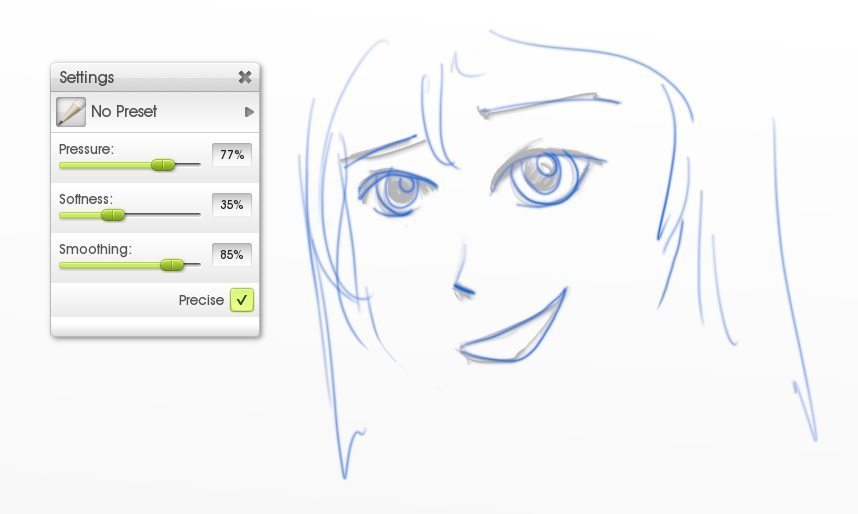
Pencil
- Turn the canvas texture off to get a very very smooth, flat pencil (View > Canvas Settings > Roughness 0%) that lets you keep using Tilt
- Also, turn on ‘Precise Mode’ in settings to get a smooth digital/mechanical pencil (ignore canvas texture) with an autosmoothing feature
- I like to set the colour to dark grey, for a more realistic pencil, but choose whatever helps you draw easily. You can change the colour of the lines later.
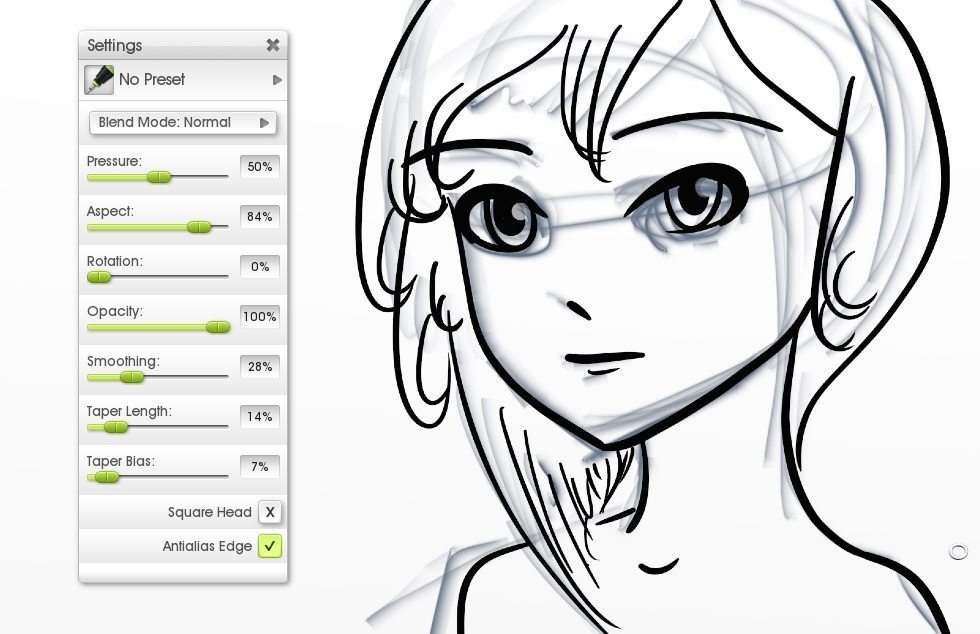
Ink Pen
You can also use the Ink Pen for sketching, and many users prefer it (the ink pen acts much more like the ‘digital’ pencil you see in other programs. Our pencil tool is meant to act like actual pencil). The Ink Pen ignores canvas texture completely.
- Turn Pressure and Aspect up 100% to keep the line size constant (e.g. to mimic a ball point pen)
- Turn Opacity down to get less dark lines
- Turn Taper and Smoothing down or off entirely to let you scribble freely
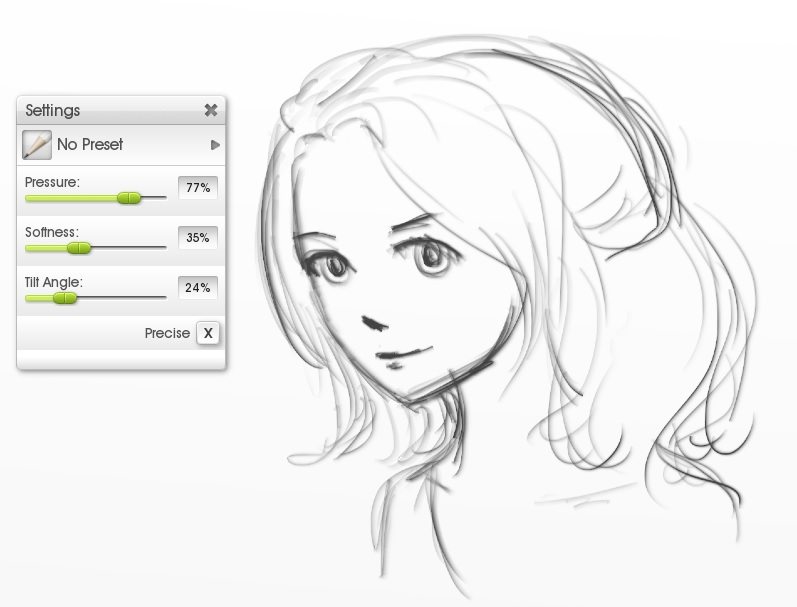
Inking
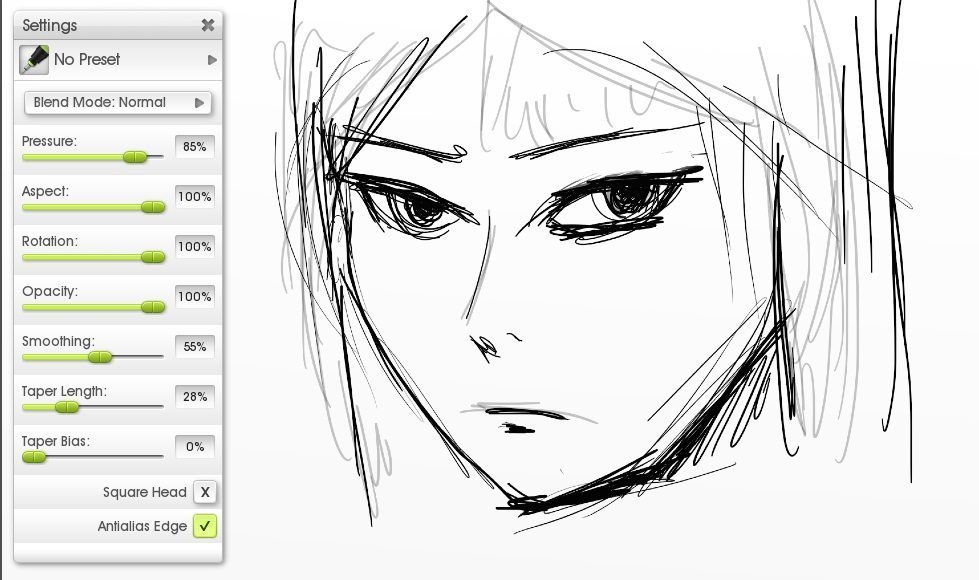
Once you’ve created your sketch, you can add a new layer and neatly ink it using the Ink Pen.
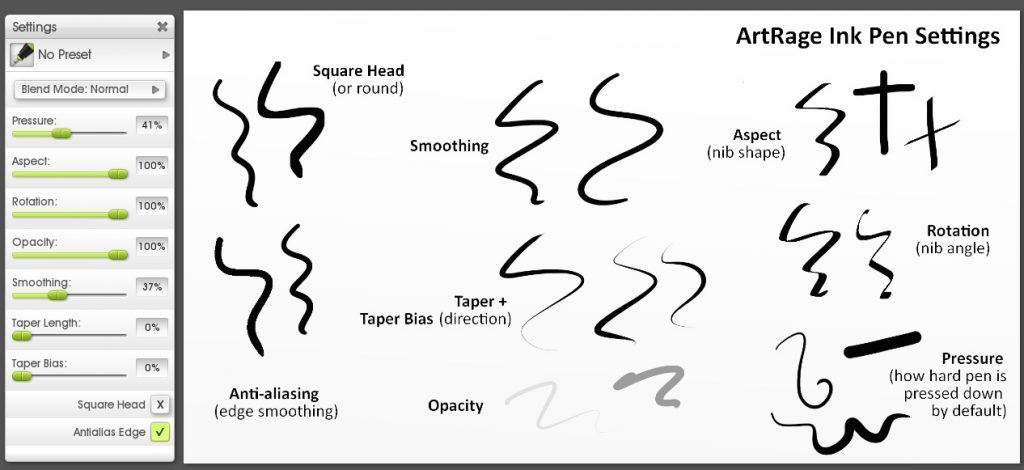
Adjusting the settings lets you mimic most of the digital brushes found in other art programs, so you can use it for fine inking or flat colours. If the options seem overwhelming, try starting with the Presets instead and then tweaking the Settings to get it to where you want.
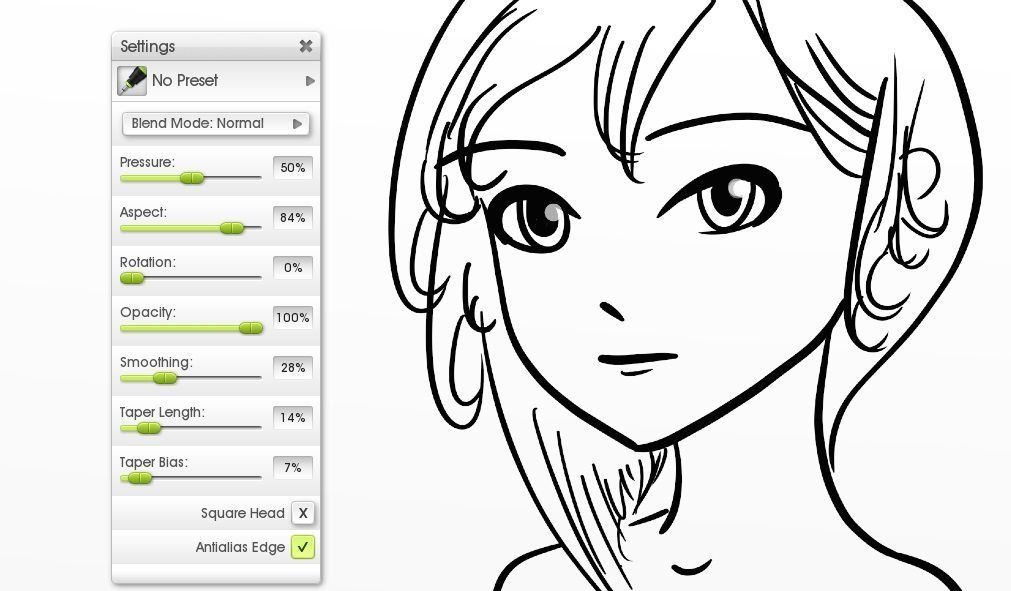
Tips
For your initial inking, add a little smoothing, taper and rotation, just to make the lines a bit more natural. If you set pressure to 100%, this means that the pen is constantly at full pressure and will not vary as you draw. You can rely on the artificial tool settings (taper, aspect, etc) to create variation, or you can lower the pressure value and create your own (set Aspect to 100% to allow better control of your lines if you are varying them with pressure)
To make it easier to see your new lines, you can:
- Import the sketch as a tracing image
- Adjust the sketch layer’s opacity to make it less visible
- Change the sketch layer colour using Edit > Adjust Layer Colors
Take advantage of the Smoothing, Taper, Rotation and other features to get exactly the lines you want. All these lines used the current settings in the screenshot, but you can get a lot more variation and very precise control.
Other Ways To Draw
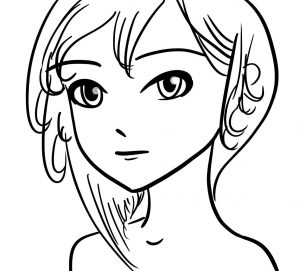
Instead of carefully inking out a detailed sketch, you can build up hair and shadows using softer, slightly see through lines. For example…
The Ink Pen (Again)
It’s a very versatile tool!
- Lower the opacity to use it for shading and hair. Turn it up to draw solid lines.
- Turn Taper up a bit to get neat hair and eyelash flicks and layer your strokes to build up shading and hair.
- Turn Smoothing and Taper off when colouring areas (rather than drawing lines).
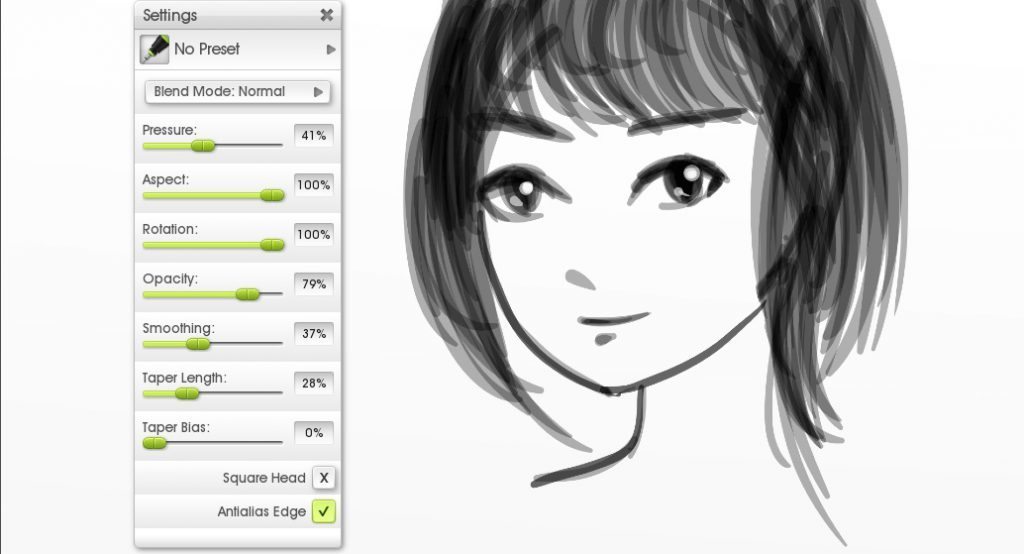
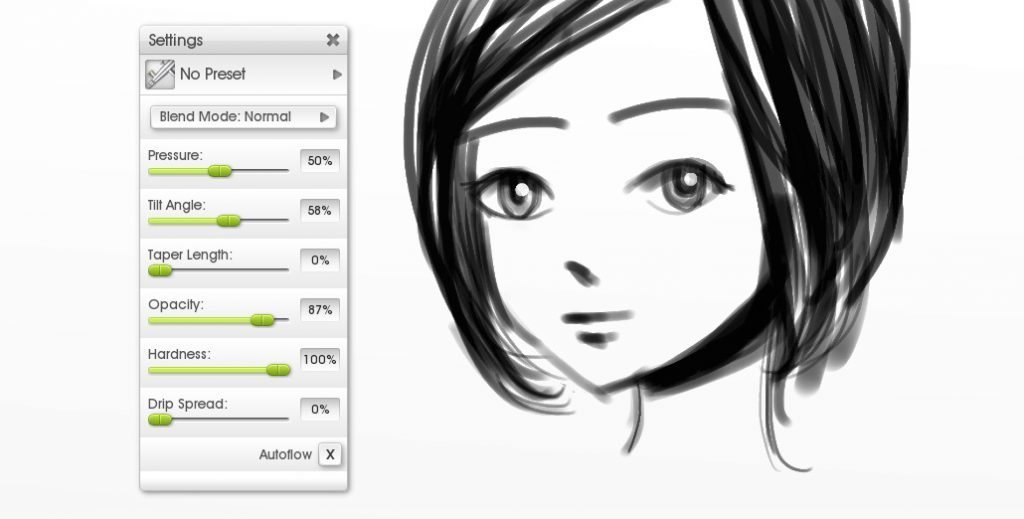
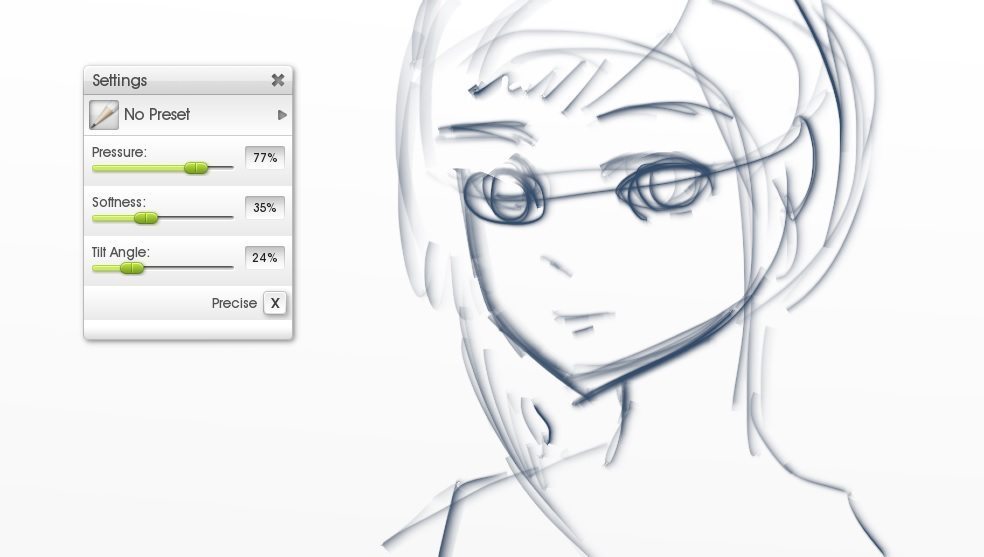
The Airbrush
The Airbrush isn’t just good for soft shading, you can also turn the Hardness setting right up to turn it into a proper brush. It shades very nicely and has a Taper option (which I forgot to use for this example, but you can see it in the settings!), but doesn’t automatically smooth your stroke the way that the Ink Pen does.