Blend Modes
Blend Modes can be used to tell layers to interact with layers beneath them in different ways. Bump blend modes affect the bump (texture) results, and layer blend modes affect the colors of different layers.
Layer Blend Modes
By setting Blend Modes you can make paint darken paint below, tint it, or otherwise adjust it. ArtRage provides a number of Blend Modes, including standard ones from Adobe Photoshop and some of its own.
The default Blend Mode applied to each Layer is ‘Normal’, which means that paint will sit on top of paint on the layer beneath and cover it over like normal paint on a surface. There are four other modes specific to ArtRage.
ArtRage 2, ArtRage 3 Studio and ArtRage Lite only offer the Tint, Shadow, and Highlight blend modes. These three blend modes are equivalent to the Multiply, Darken, and Screen Photoshop Standard blend modes (which are the most commonly used ones), but they were given more easily understandable names for first time digital artists, and are adjusted slightly for more reliable performance in ArtRage.
These three blend modes are also in the other editions of ArtRage, and are listed up the top of the Layer Blend Modes list for quick access.
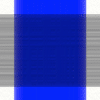
Tint: The tint mode takes the color of the paint on your layer and tints the paint underneath it. In this example the blue stroke has applied a blue tint to the darker grey stroke beneath. Use this mode if you want to apply color to something that has none, or tint the color below with a new color above.
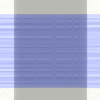
Shadow: The shadow mode darkens paint beneath it, allowing you to make subtle adjustments to the shading of paint from a layer above. In this example the grey stroke has darkened the stroke underneath.
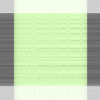
Highlight: The highlight blend lightens paint beneath it, allowing you to make paint brighter by applying paint above it without washing it out to plain white. In this example the green stroke has lightened the stroke underneath.
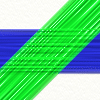
Watercolor: This blend mode is a special mode that can enhance the look of your Watercolor strokes if you are painting on multiple layers.
Other Blend Modes are from Adobe Photoshop and may not produce predictable results, they are included so that you can pass documents back and forth easily between the two applications without losing data.
See this PDF for a comprehensive walkthrough of the different layer blend modes: Layer Blending Modes (created by Hanzz, an ArtRage forum member).
Bump Blend Modes
ArtRage also allows you to change the way the volume of your paint builds up over multiple layers. There are three available Bump Blend Modes:

Maximum: The default mode. ArtRage uses the thickest volume of paint on all layers, as if the strokes were all on the same surface.

Replace: ArtRage uses the volume of the topmost layer, as if it had cut through the layers beneath.
Add: ArtRage adds the volume of the top layer to the volume of the bottom layer, as if the top stroke was laid on top of the bottom one.