How To Paint A Realistic Portrait of Amber Benson in ArtRage
Paul Hinch-Worman (Paulthedoodlebug) is a portrait painter who specialises in enchanting realistic portraits with a touch of the lifelike about them. In this tutorial, he explains in detail how to create a photorealistic portrait.
I have cobbled together here my own techniques from the immense wealth of ideas and tips out in the lands of the Internet. Trial and error have been my constant companions and I am more than happy to share what I have learned and perhaps inspire someone myself the way I was inspired.
This step by step guide assumes you have some knowledge of ArtRage and/or some experience with digital art software concepts like layers. This tutorial uses ArtRage 4, and some features are only found in ArtRage 4 or later. The overall process can be applied in any version of ArtRage.
Reference Image
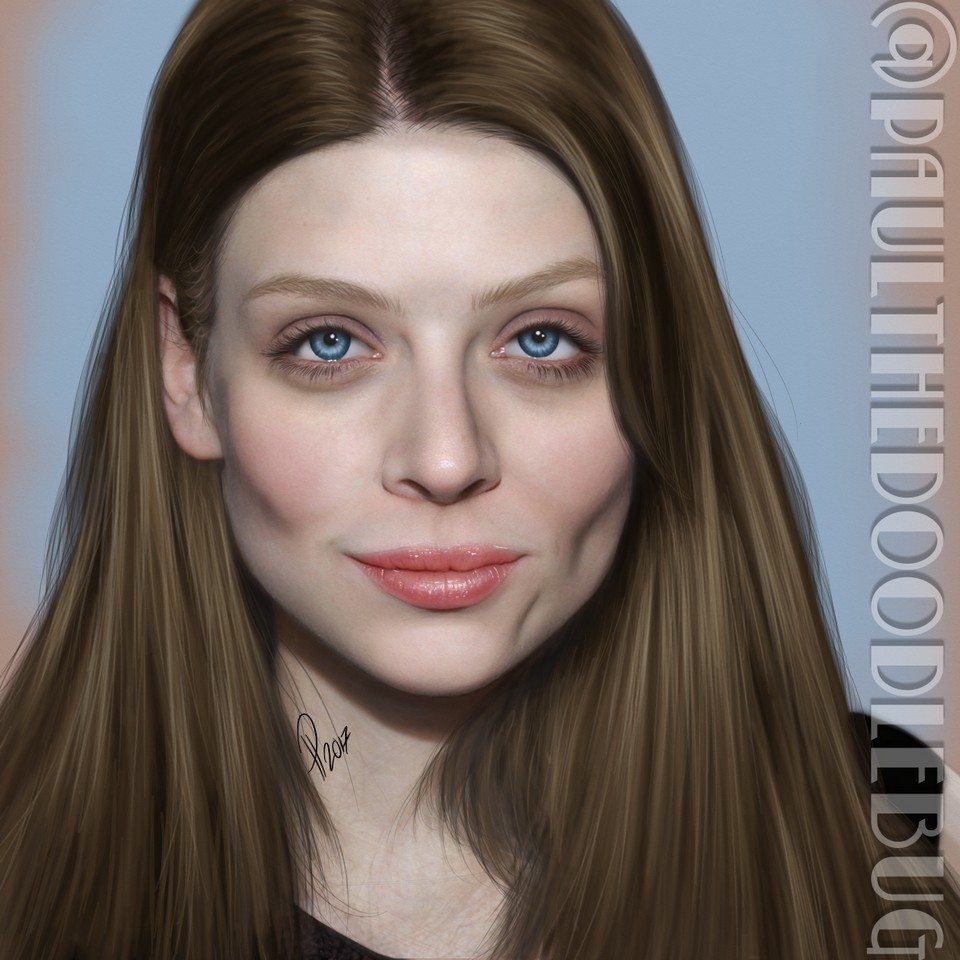
You will need a good reference photo with clear lighting for this tutorial. The photograph used for this tutorial features Amber Benson, best known for her role as Tara Maclay in Buffy the Vampire Slayer, she now produces her own films. The original photograph was taken at the 2nd Annual Fashion Forward Charity Event, 2004.
While you can use any photograph for practice, and there are many good images online, it is important to remember that the copyright for individual photographs usually belongs to the original photographer. If you wish to sell your work and are at all uncertain about whether you are allowed to use an image, look for stock images that allow commercial use. There are many websites that sell stock images, and you can browse an enormous collection of free resources on DeviantART with varying rules set by the original creators.
Painting the Portrait: Step by Step
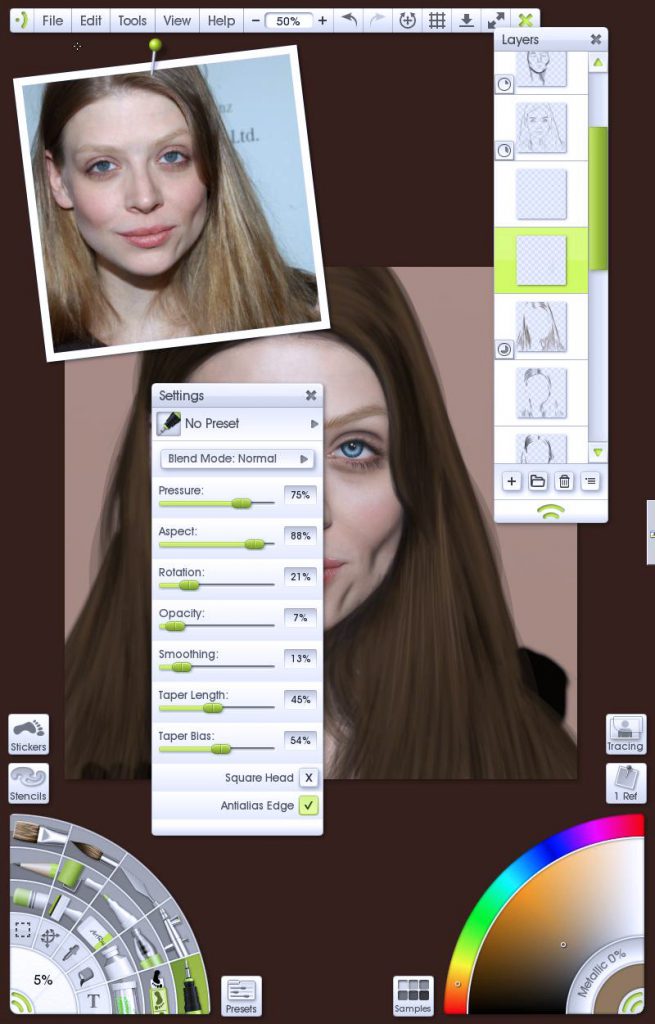
Create the Sketch
I start building up a sketch of the subject, getting everything in the right place and marking out important features along way, moles, scars etc.
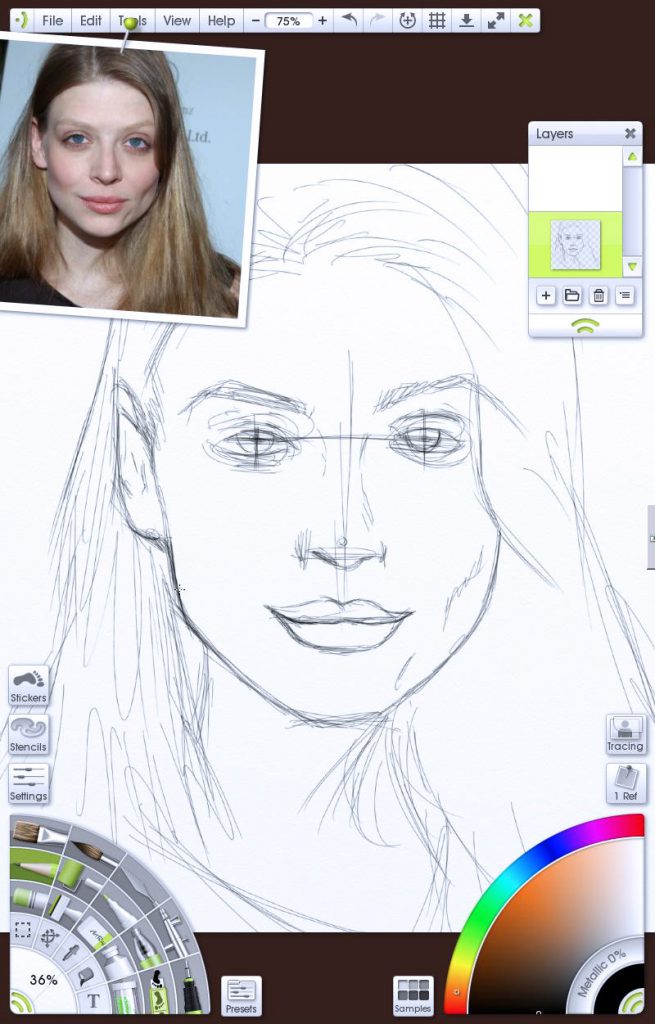

If you have trouble free-handing this you can always drop your subject onto a tracing layer. This can speed the process immensely as everything is mapped out for you, the fiddly bits are where they are supposed to be. This can really help you learn the structure of faces as you go and in time you’ll be able to freehand faces with little trouble.
I never try to get everything on one layer. I draw something, turn down the opacity, draw a new layer over the top, I keep going studying the geography of the face until I’m happy. This sometimes results in a pretty awesome sketch on its own.
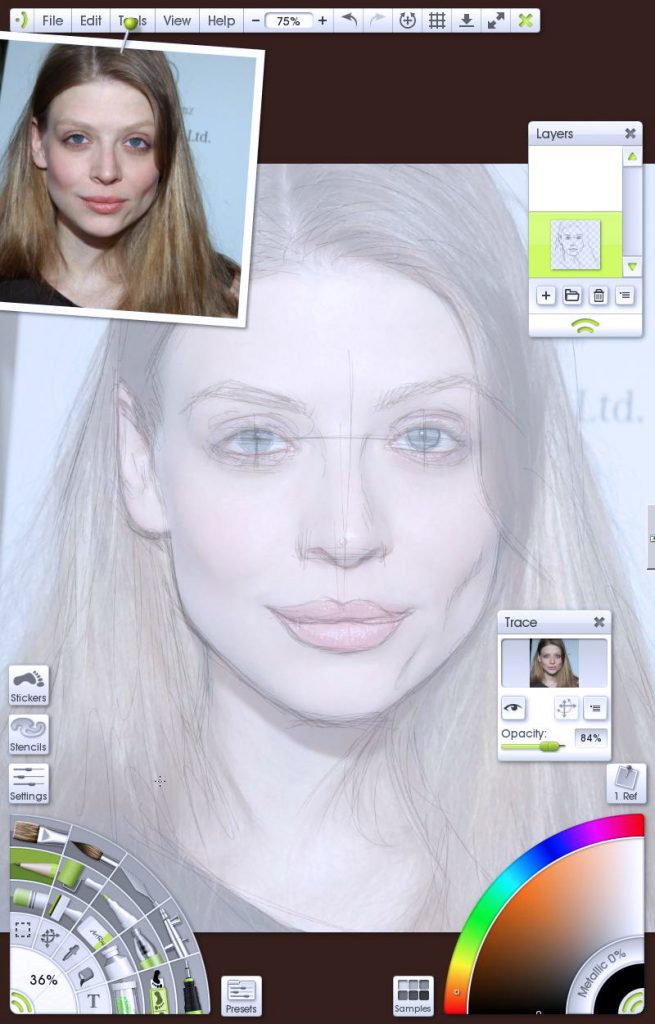
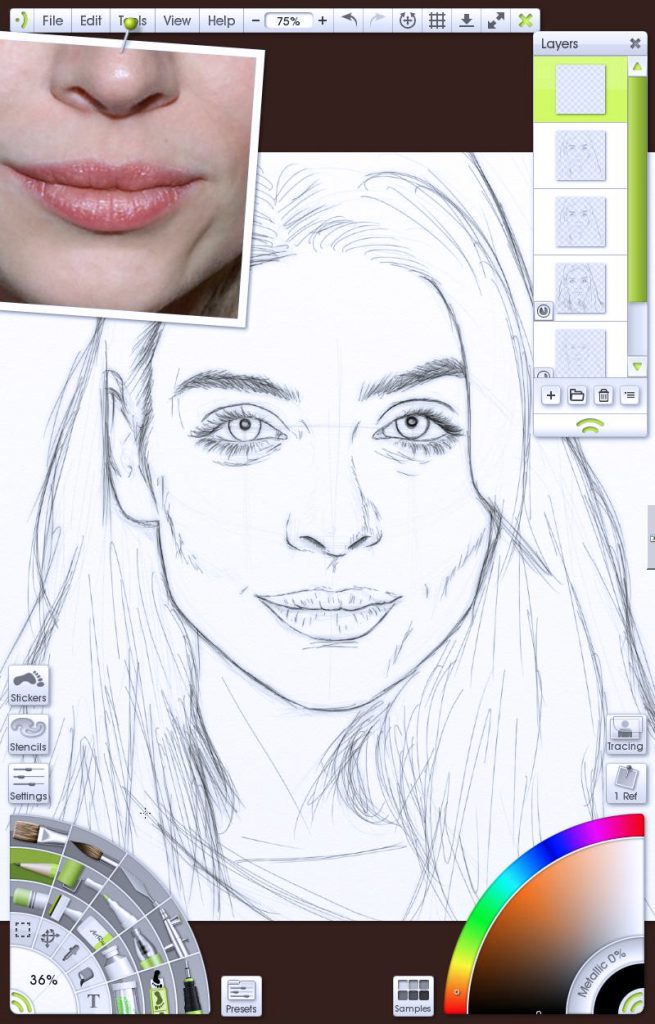
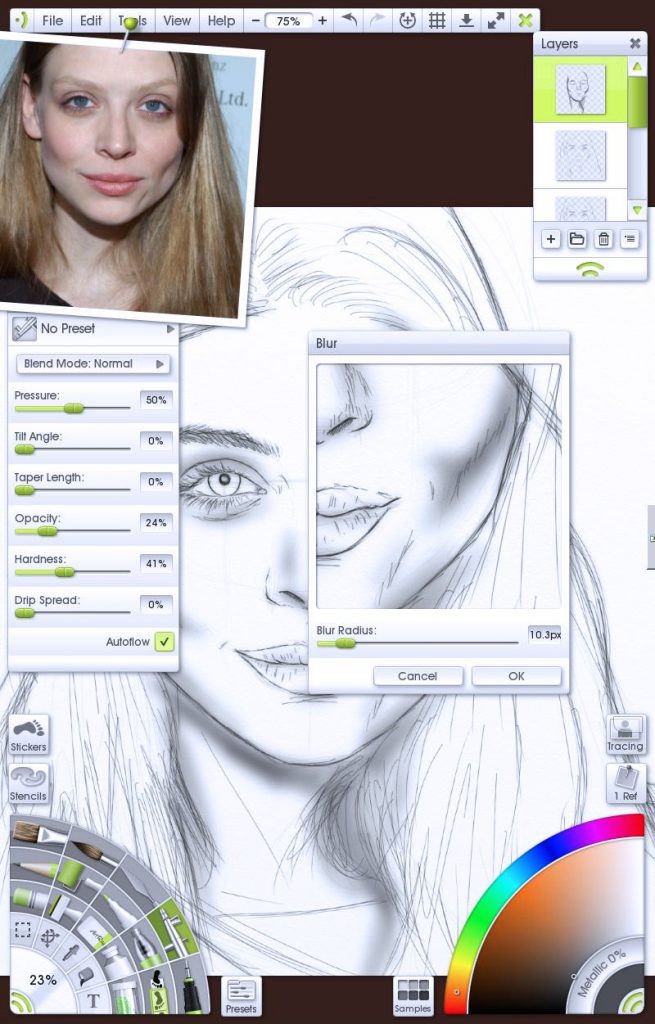
Using the Airbrush, I build up some simple shading to give the face a bit of form, nothing complex or detailed, just getting some tonal values on the page. I don’t even worry about nice blending, that’s what the Blur function is for. Blur your paint using the ‘Blur’ mode for the Palette Knife, or blur an entire layer by going to Edit > Blur Layer.
It is at this stage that you need to decide if you will continue in black and white, or push the boat out and go full colour.
The rest of this guide is for full colour but the principles will still apply for greyscale.
Base Colours
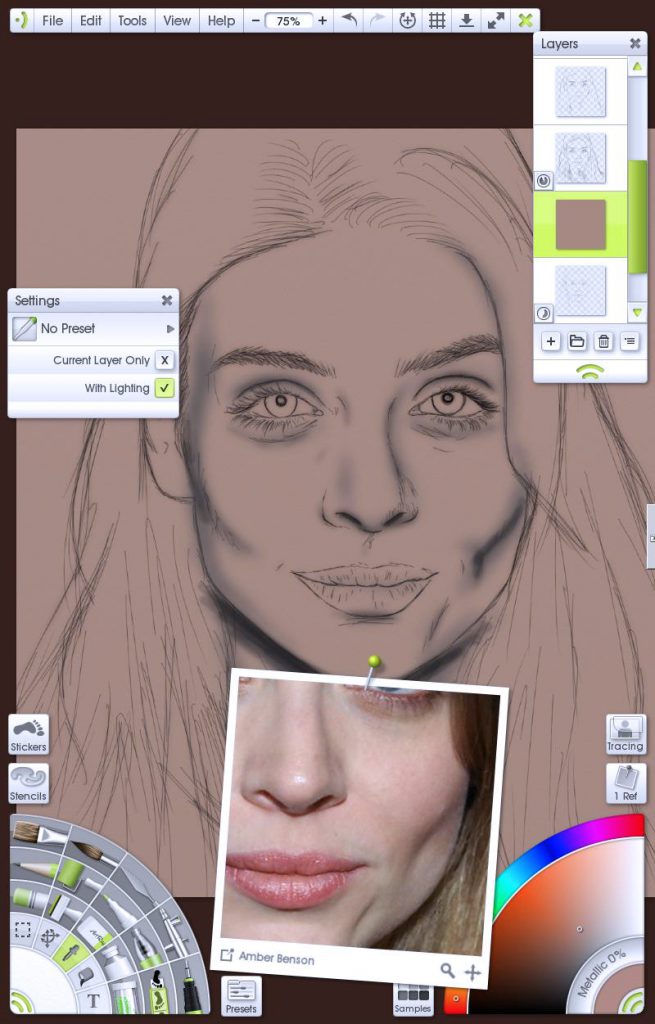
Colour pick from your reference photo, get a mid to low shade for your base so you can work it both up and down in light. I plop this under the sketch and shading so I still have a map to work from.
Picking the lightest or darkest tone from the reference allows us to build a range of shading. Sample from under noses or chins for shadows and from tips of noses, cheeks and foreheads for highlights.
My workflow is:
- Shadow layer, blur to soften, tweak opacity
- Highlight layer, blur to soften, tweak opacity
- Merge these two layers
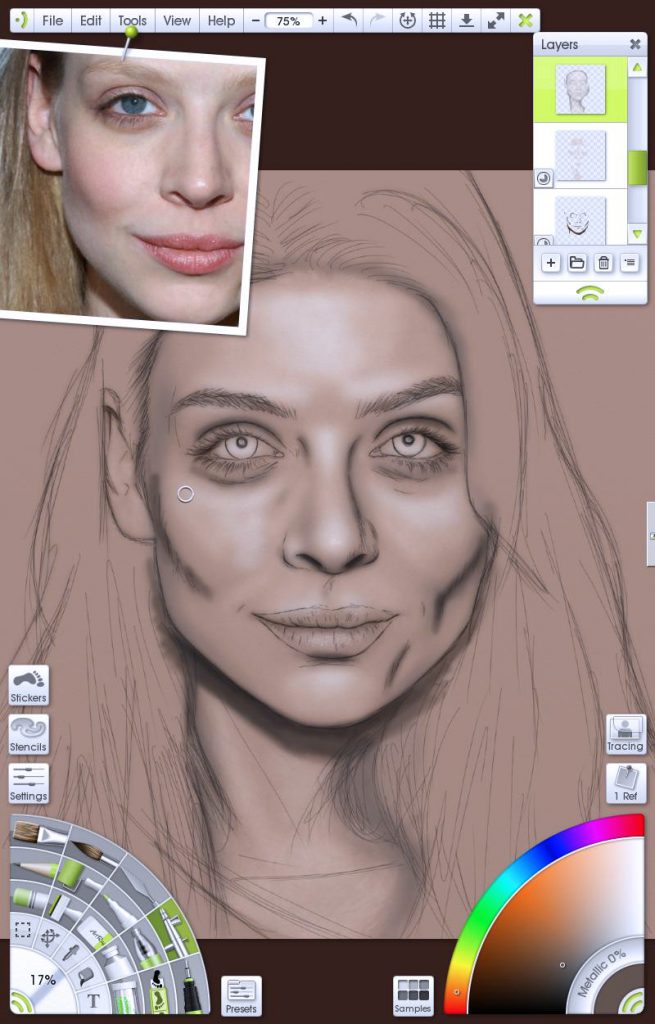
I repeat this, adding more and more light and shadow until I feel I need to introduce more colour.
What we have been doing so far is great for a two-tone scale image like sepia but people are not all one flavour. Lips, blush and any atmosphere lights can be lifted direct from the source with the Colour Picker and now a colour layer is added to the routine above.
Skin Texture
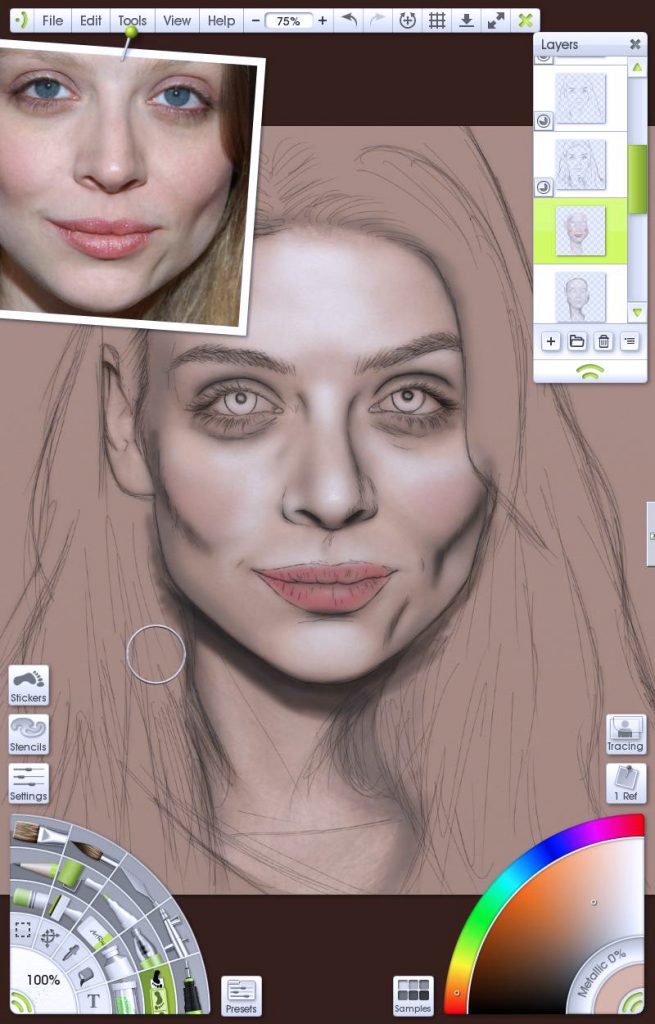
One thing I get asked a lot is how do I get the texture to my skin? Well the secret is stippling. Skin is littered with pores and bumps and to simulate that in ArtRage I use the Sticker Spray!
Seriously, this tool is great for making any sort of brush with hugely customisable settings. Big areas, small, dense, sparse, Airbrush Spat 3D is one of my go to tools. Spray highlights or lowlights wherever you want to bring out texture. Use Overlay, Soft Light, or Multiply blend modes to get a variety of finishes. It takes practice to get confident with them but be patient and persevere. Even at beginner level you have tools that can be used for spraying freckles on a cheek, or glittering some eye shadow.
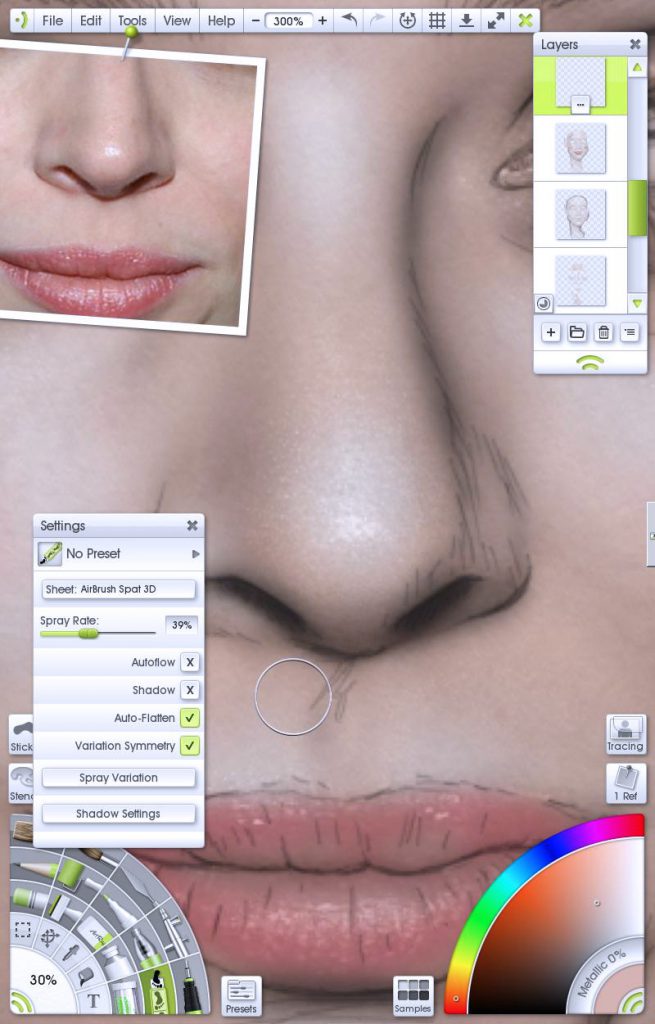
As I hone in on the details, my brushes get smaller and smaller until I am working on the pixel by pixel scale. I don’t go too crazy, 300-400% zoom on a 1500×1500 image is enough. My ancient Thinkpad would melt if I tried larger resolutions on it so this natural barrier keeps my work consistent.
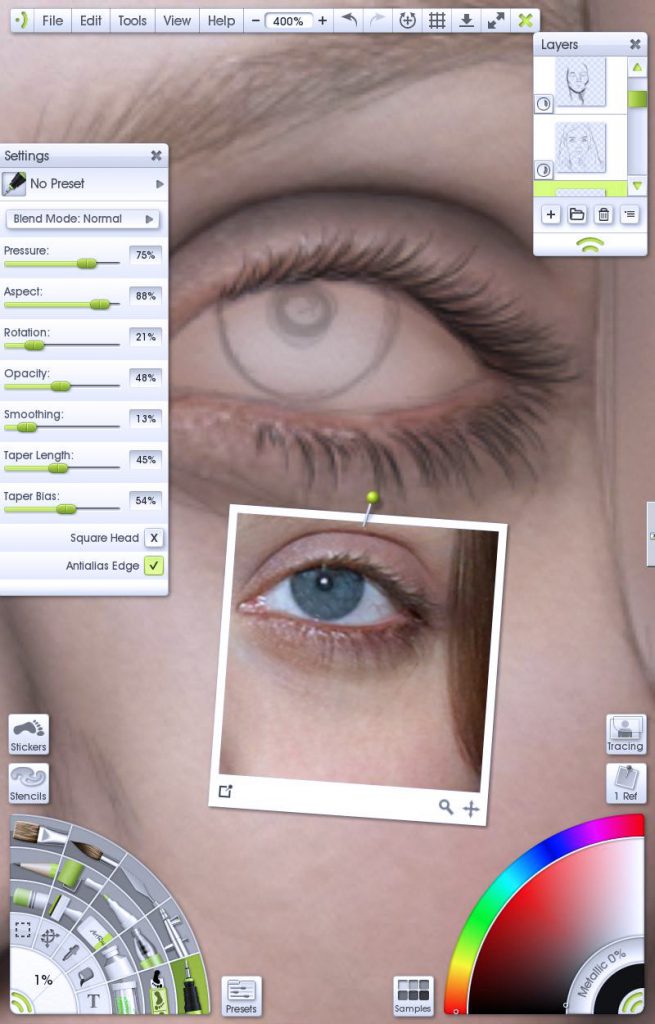
Eyes
Eyes are probably the most important feature in the human face. They are just astoundingly complex and while it was easy to learn to draw eyes in general, getting those eyes to engage the viewer, getting them to feel alive is something I will always pursue.
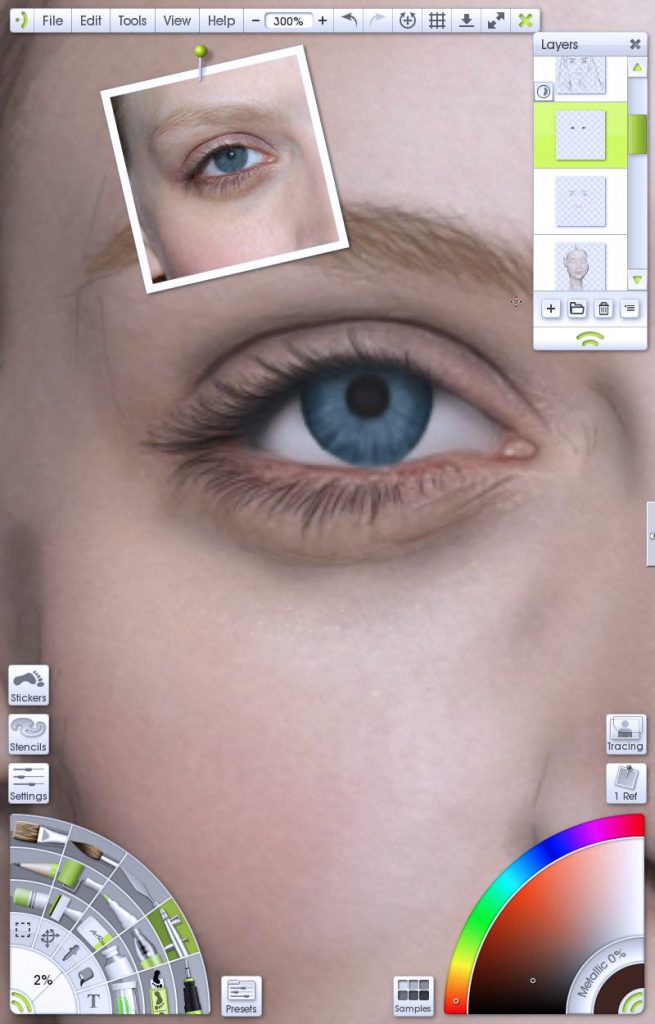
For eyelashes I use the Ink Pen tool, its silky smooth lines lay down like fine hairs and I can build up luscious lashes in little time. The same applies to eyebrows. I put down hair after hair sculpting the brow and building body. Amber posed a particular challenge as she has very light lashes on pale skin.

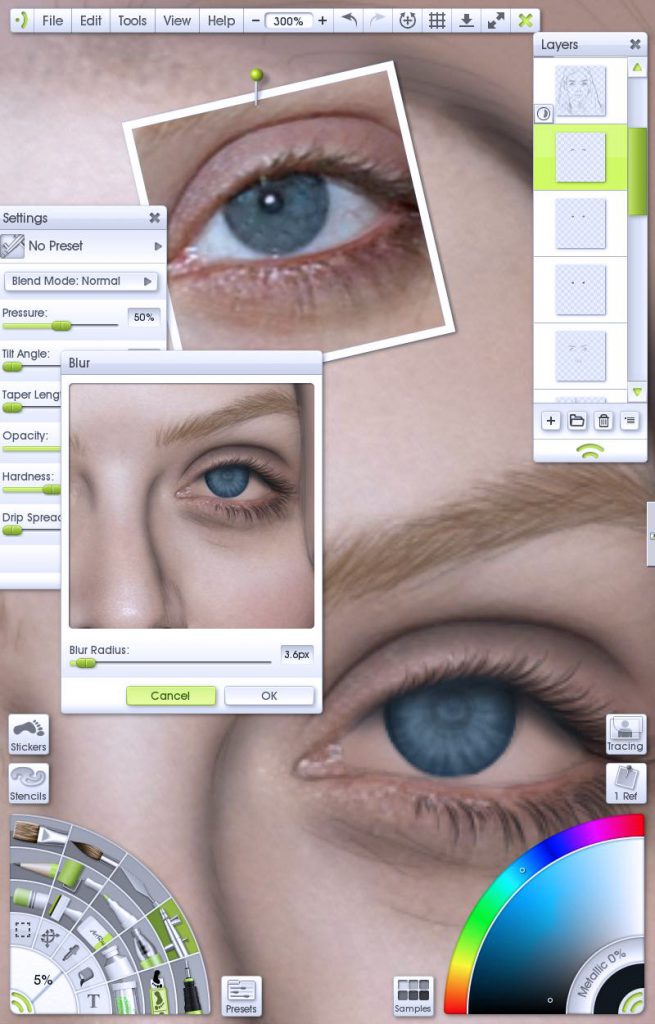
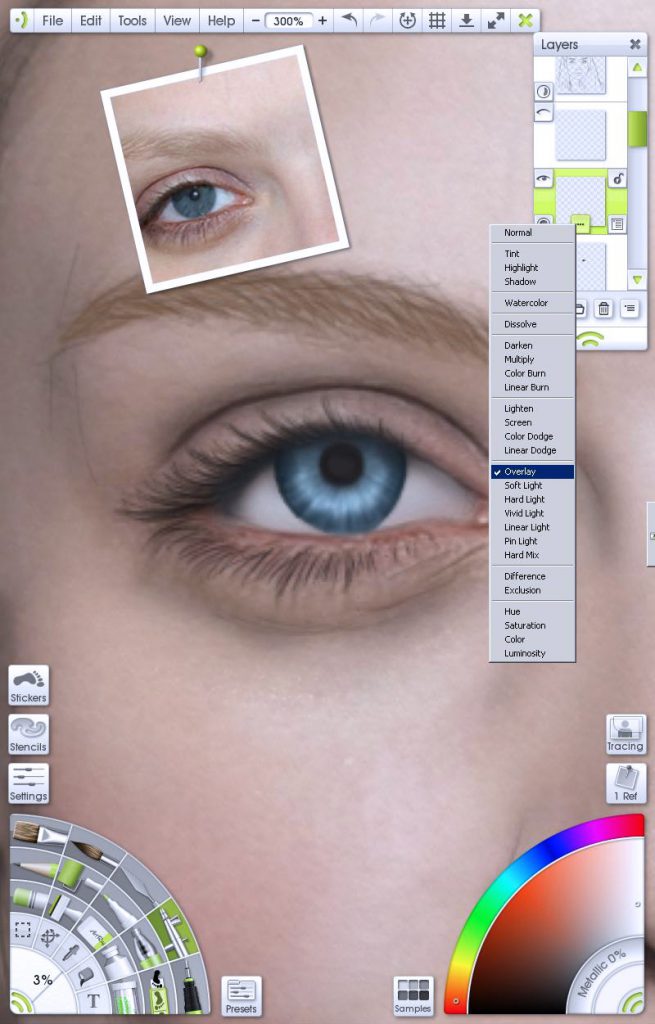
Pixel level details again, building up the darker outside of the iris along with highlighting the definition of the fibres in the eye. Eyes are round objects and under the cover of lashes, shape this with shading over the top arch of the lid and bring the shadows down the outside edge of the iris. Remember, Blur is your friend.
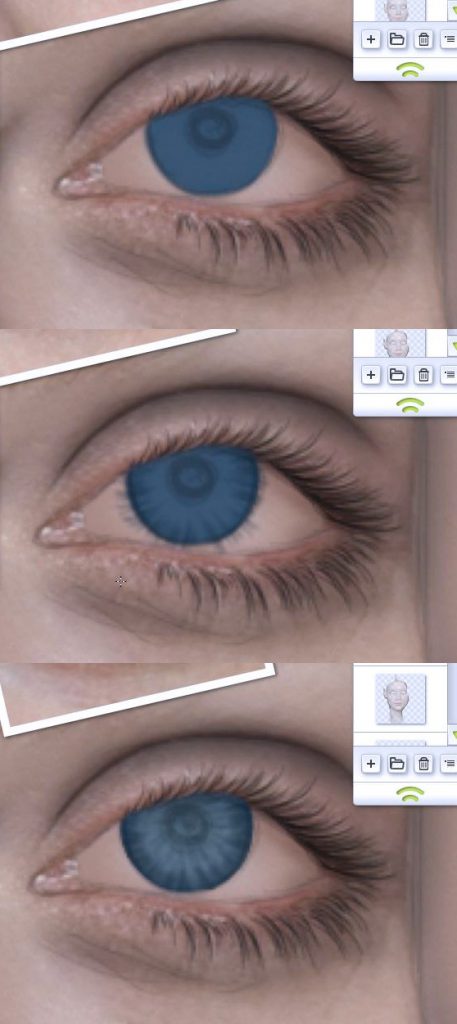
Have fun lining up your pupils! I hate this part. Whiting out the sclera can be done a number of ways, I just splurged some white into the area, used Blur, set layer to colour, lowered opacity a little and erased the spills. Simple.
Everything we have drawn so far is under the cornea, this glassy dome adds a dimension to eyes making them like jewels. This I simulate with a white highlight in an arc across the bottom half of the iris.
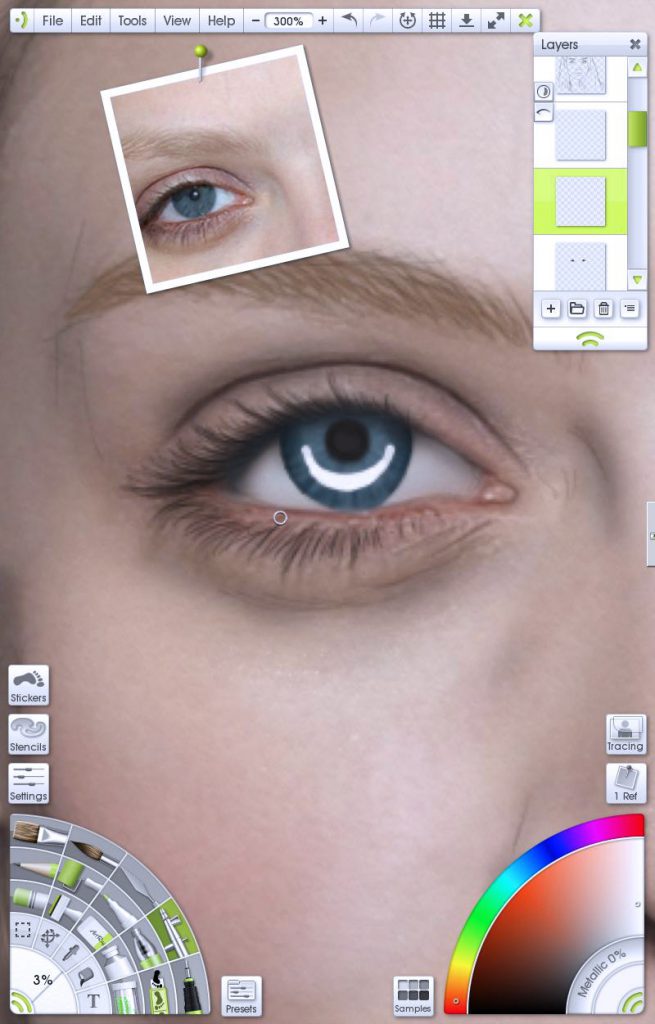
Hit that Blur again to soften the edges (or leave it sharp if you want a hyper glossy, artificial cyborg eye!) then switch the layer to Overlay. This will pop the colours underneath.
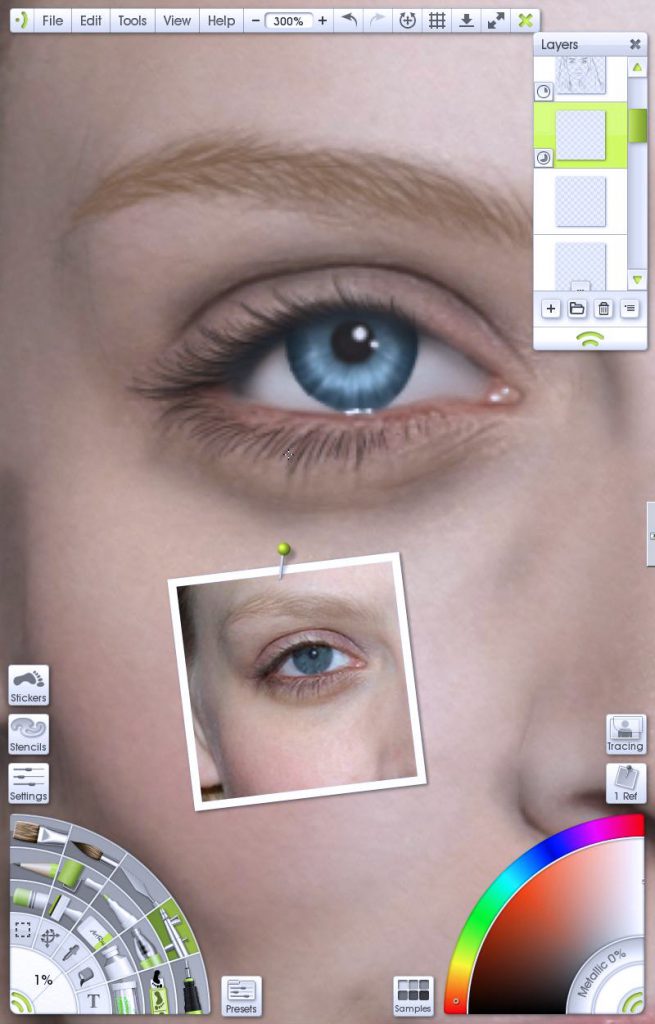
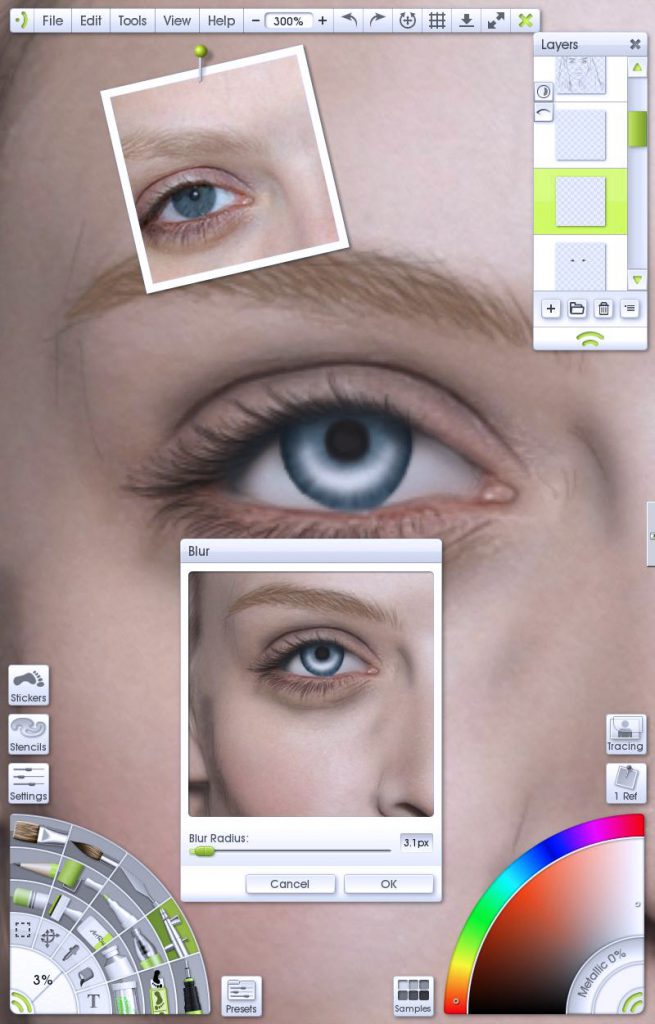
Eyes are moist and glossy so throw in some sparkles or muted reflections. A tiny white splash on the lower lid can really push home the gooey biology of the human you are replicating. These need to be subtle, too heavy and you will overload the eye and that will just be distracting.
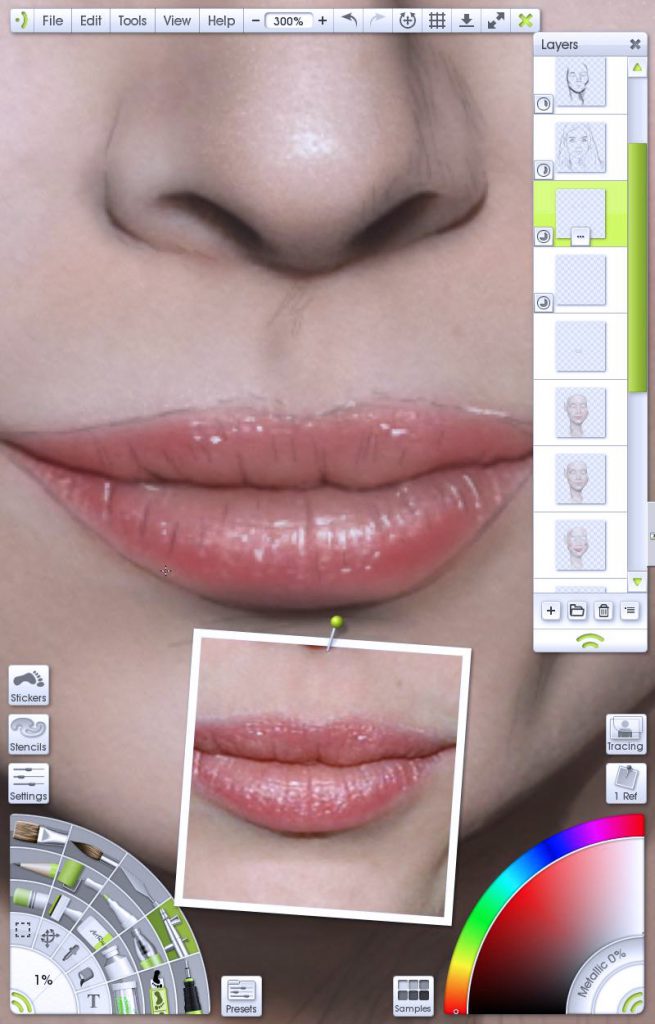
When working up close, it is always good to pull out occasionally and get a broad feel for how the whole image is coming along. It is a great time to save work, sort through layers and merge some down. You can also use the View feature in the References menu to pin a view of the overall canvas on your screen while you work.

Hair
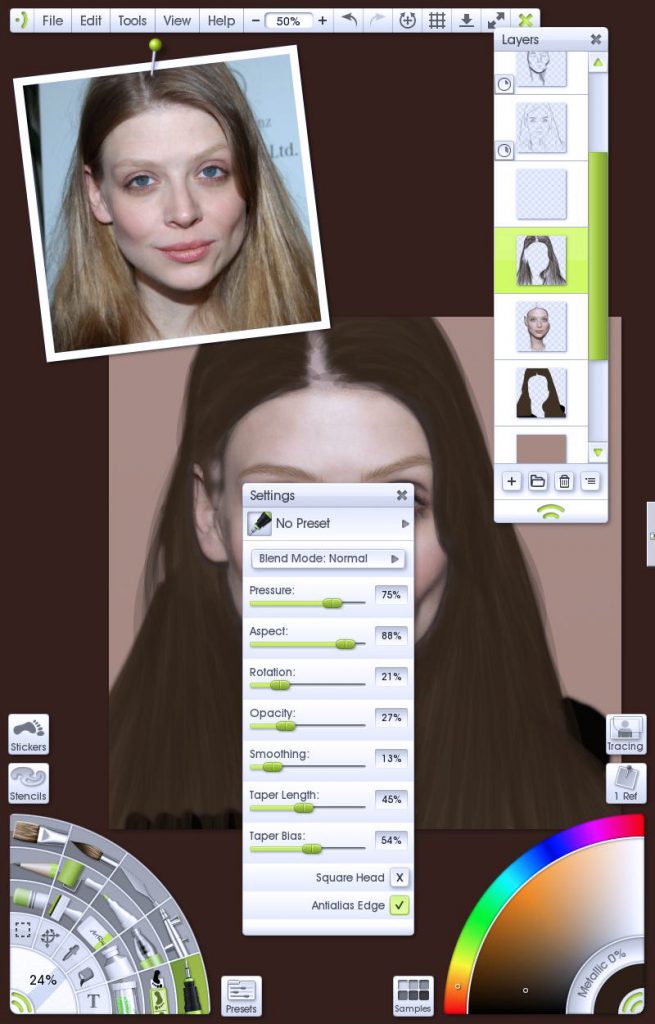
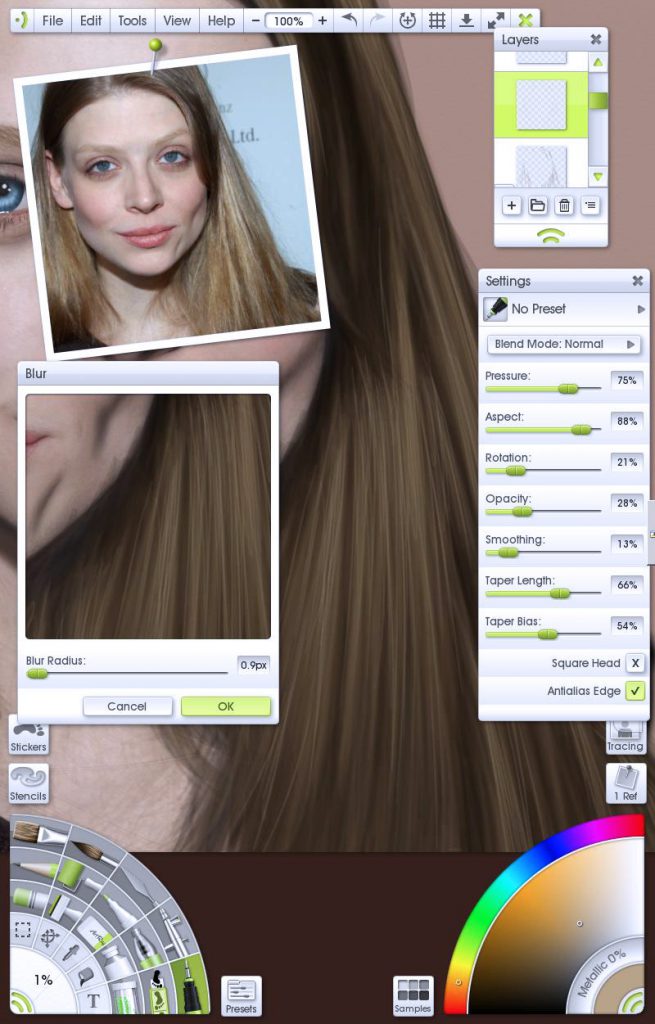
Progressing onto hair, I lay down a foundation of mid tone with the Airbrush for the body of the hair, then, using the Ink Pen tool on low opacity, I start layering to add structure. The long smooth lines of the pen overlap give form and flow to the hair. This doesn’t work so well for complex, short curly hair but long silky locks are a dream.
Turning down the lights I reduce the pen size and work on shadows and dark patches. Again long strokes following the flow of the hair. This is most complex on dark hair, shading black is understandably awkward.
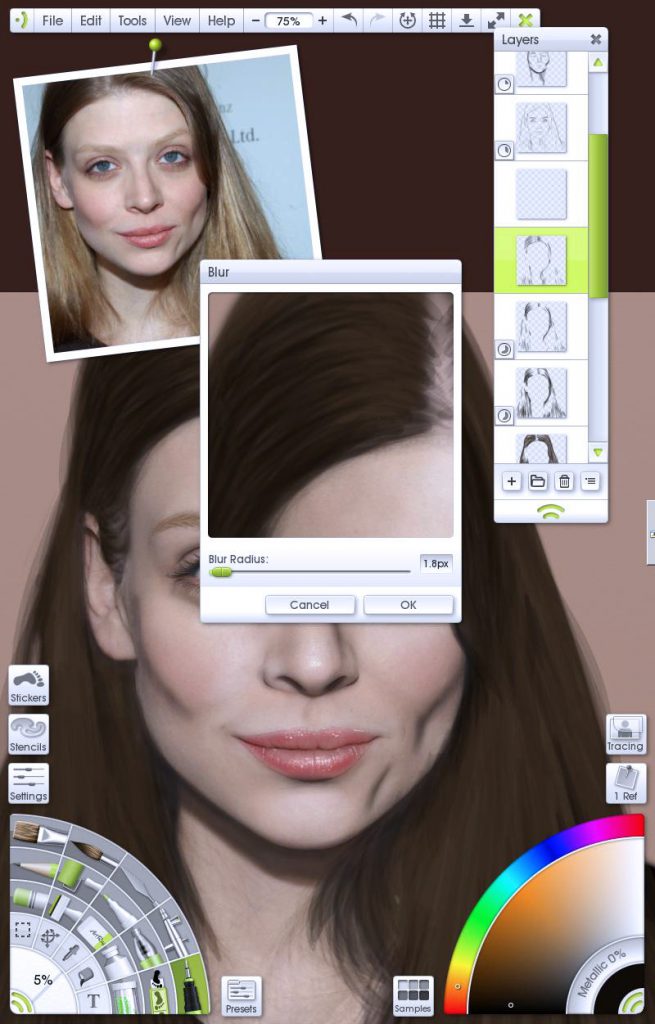
This whole system is repeated using light tones for highlights, start with a larger pen and define the direction and position of highlights, build up layers with smaller and smaller width strokes. At any time you can take a layer and slap some blur on it, this softens the strokes and helps them blend into the body of the hair and can develop volume and density if the texture isn’t just feeling right. When you hit the final highlights you can try switching up to a screen layer if you want that really glossy ‘she’s worth it’ look. Embrace your inner chaos and add stray hairs. Even the most pampered red carpet hairdo will have the odd hair out of place.
Tidying Up
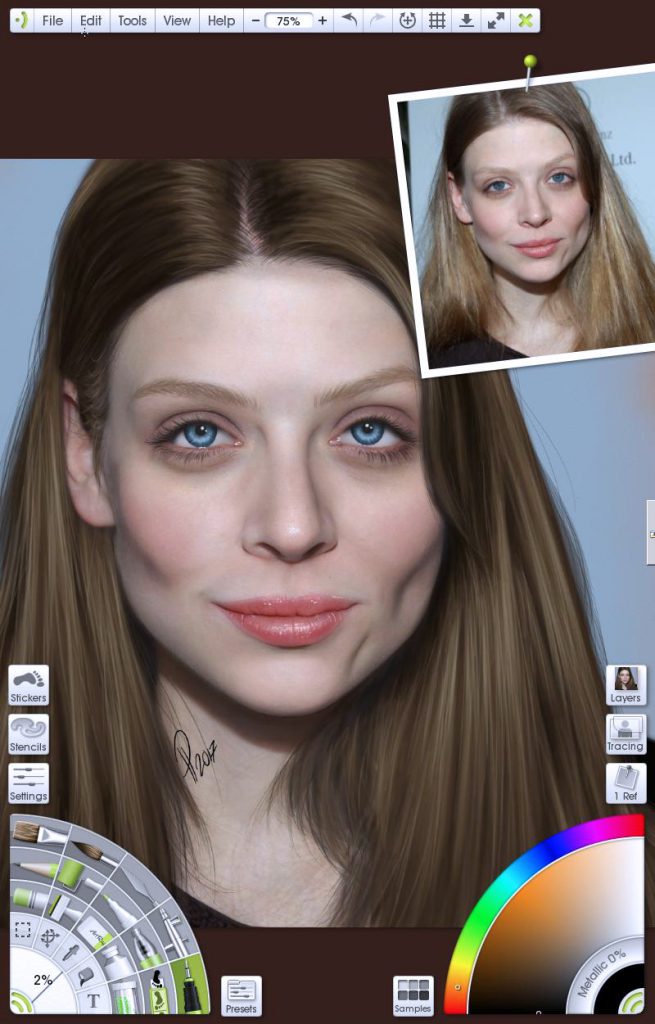
Nearing completion I usually look at the whole image and consider if it needs more definition.
A large spray of dark grey shading over the eye sockets, under the chin and down each sides of the head can help increase the 3D shape of the head. Blur the spray, maybe turn the layer into an Overlay and twiddle the opacity. Splash something complimentary on the back layer (be careful of this colour tinting your skin tone from beneath the layers, you can always mask it off with contents selections.)
So, yeah, that’s about all I can say on this. Be patient with your work and yourself, practise and have fun. Take a day out to explore all the tools ArtRage has to offer, who knows what you’ll find a use for.
See more of Paul’s art:
Facebook | Instagram | DeviantART | ArtRage Artist Feature
Find more ArtRage painting tutorials!
[fp_carousel width=”940″ height=”200″ items=”5″ num=”-1″ speed=”600″ tag=”painting-tutorial” orderby=”date” post_type=”post”]See more features from our amazing ArtRage artists!
[fp_carousel width=”940″ height=”200″ items=”5″ num=”-1″ speed=”600″ tag=”artist-feature” orderby=”rand” post_type=”post”]For more help with using ArtRage, check out the ArtRage 4 Manual, the list of community tutorials. And don’t forget to check the FAQ section!
You can also drop by our Artrage Forums, or Contact our Tech Support directly.