Designing the Clumpy Wool Custom Brush with Sav Scatola (ArtRage 5 Custom Brush Designer Tutorial)
This tutorial was written by Sav Scatola using a beta version of ArtRage 5, using the new Custom Brush Designer. It explains how to create his Clumpy Wool Custom Brush preset, and demonstrates the effects that you can get with it.
ArtRage has always had a strong tool set but the introduction of stickers and the Sticker Spray tool gave us a whole host of extra brush making options. I love making and using sticker spray brushes but unlike the native tools, they don’t interact with canvas textures or blend with paint already applied to the surface.
Now with the introduction of a new brush engine in ArtRage 5, both these issues are addressed. The Custom Brush tool is a ‘dab’ based system, which can almost be thought of as a complete app within an app. It has its own brush designer and options for user definable canvas interaction and paint blending. However unlike native or sticker spray tools, custom brushes will pick up and blend paint anywhere, even an imported painting or photo. You can also control the amount of color pick up which curiously gives the option of making blenders as well as brushes.
Let’s see the new system in action by first building a brush then creating some sample paintings to get an idea of its potential uses. I have in mind a brush which will quickly lay down a base layer resembling a thick woollen coat like sheep or Llama wool. It doesn’t have to be very photo real as I want to keep my brush set loose and painterly, so something which with a squinted eye gives the impression of clumped wool.

Create the Brush Head
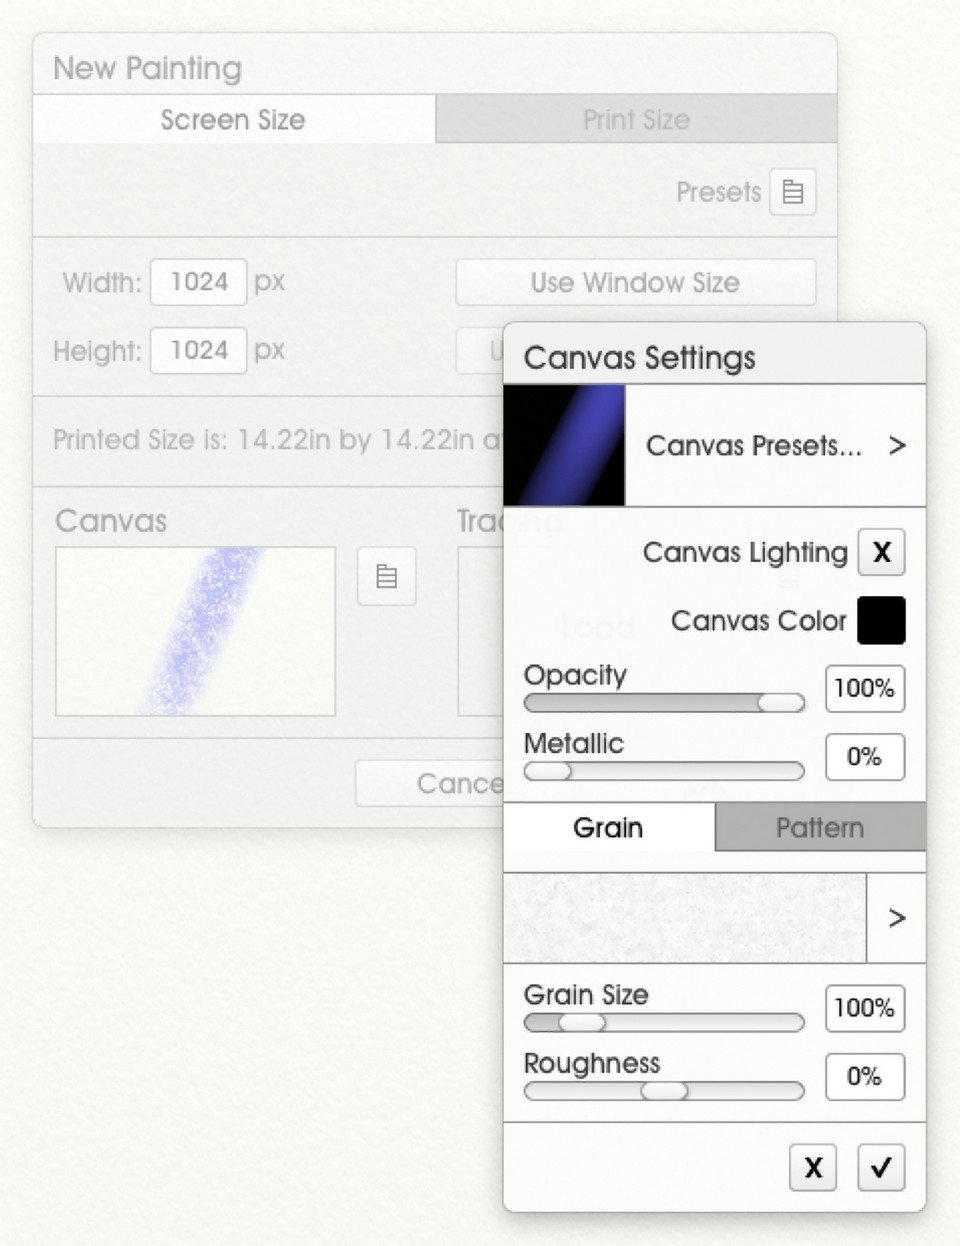
The first thing to do is make a brush head. For custom brushes any sections you do not want included should be pure black and any parts you do want included should be white. ArtRage 5 now supports multiple open documents so I create a new painting at 1024 x 1024 pixels, switch off canvas lighting to ensure the color is not affected by the canvas texture, change the background color to solid black and reduce the canvas grain to zero.
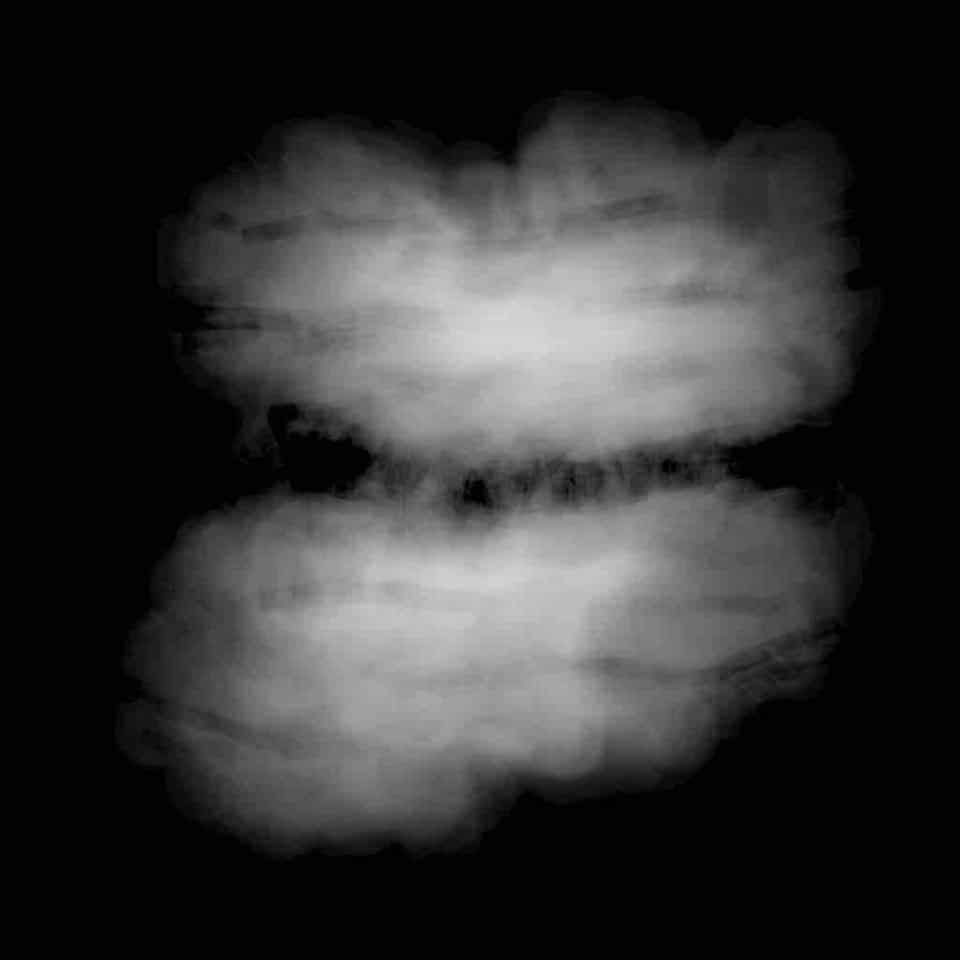
Then using white, I hand paint two horizontal bean shapes. I next use the eraser tool to lightly remove some parts giving a textured greyscale finish rather than flat white. Any shade of grey will register with those closer to black being less visible. Once finished this brush head is simply saved as a native .ptg file.
The Custom Brush designer allows you to invert your brush head when you import it, so you can add PSD brush heads, or paint in black on a white background if you prefer.
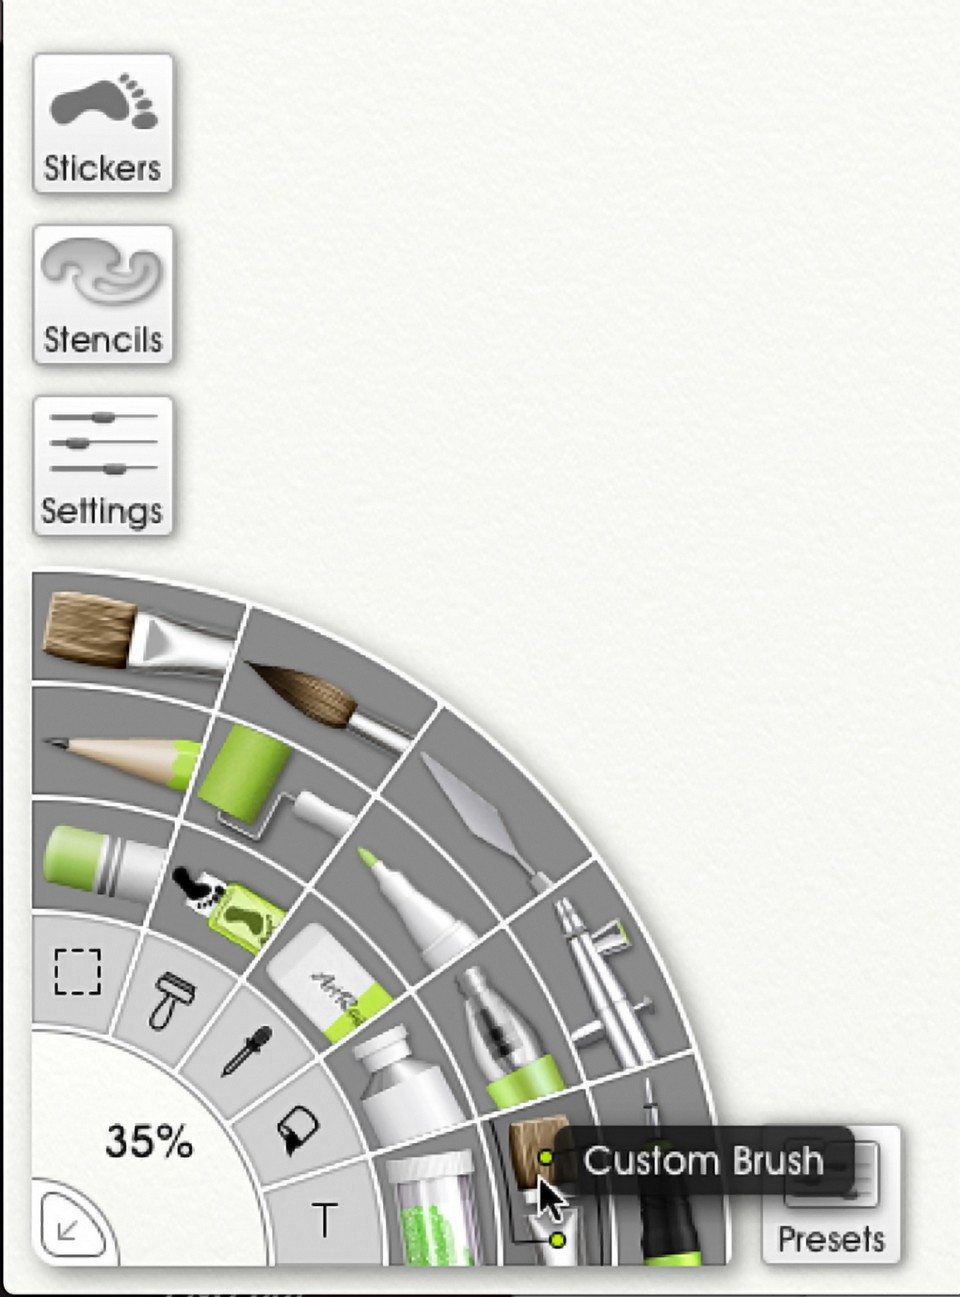
Now we can make a brush. The Custom Brush tool is accessed by clicking its icon in the tool panel or from the top menu; Tools > Select Tool > Custom Brush. Click on settings, then Brush Designer at the bottom of the Settings panel.
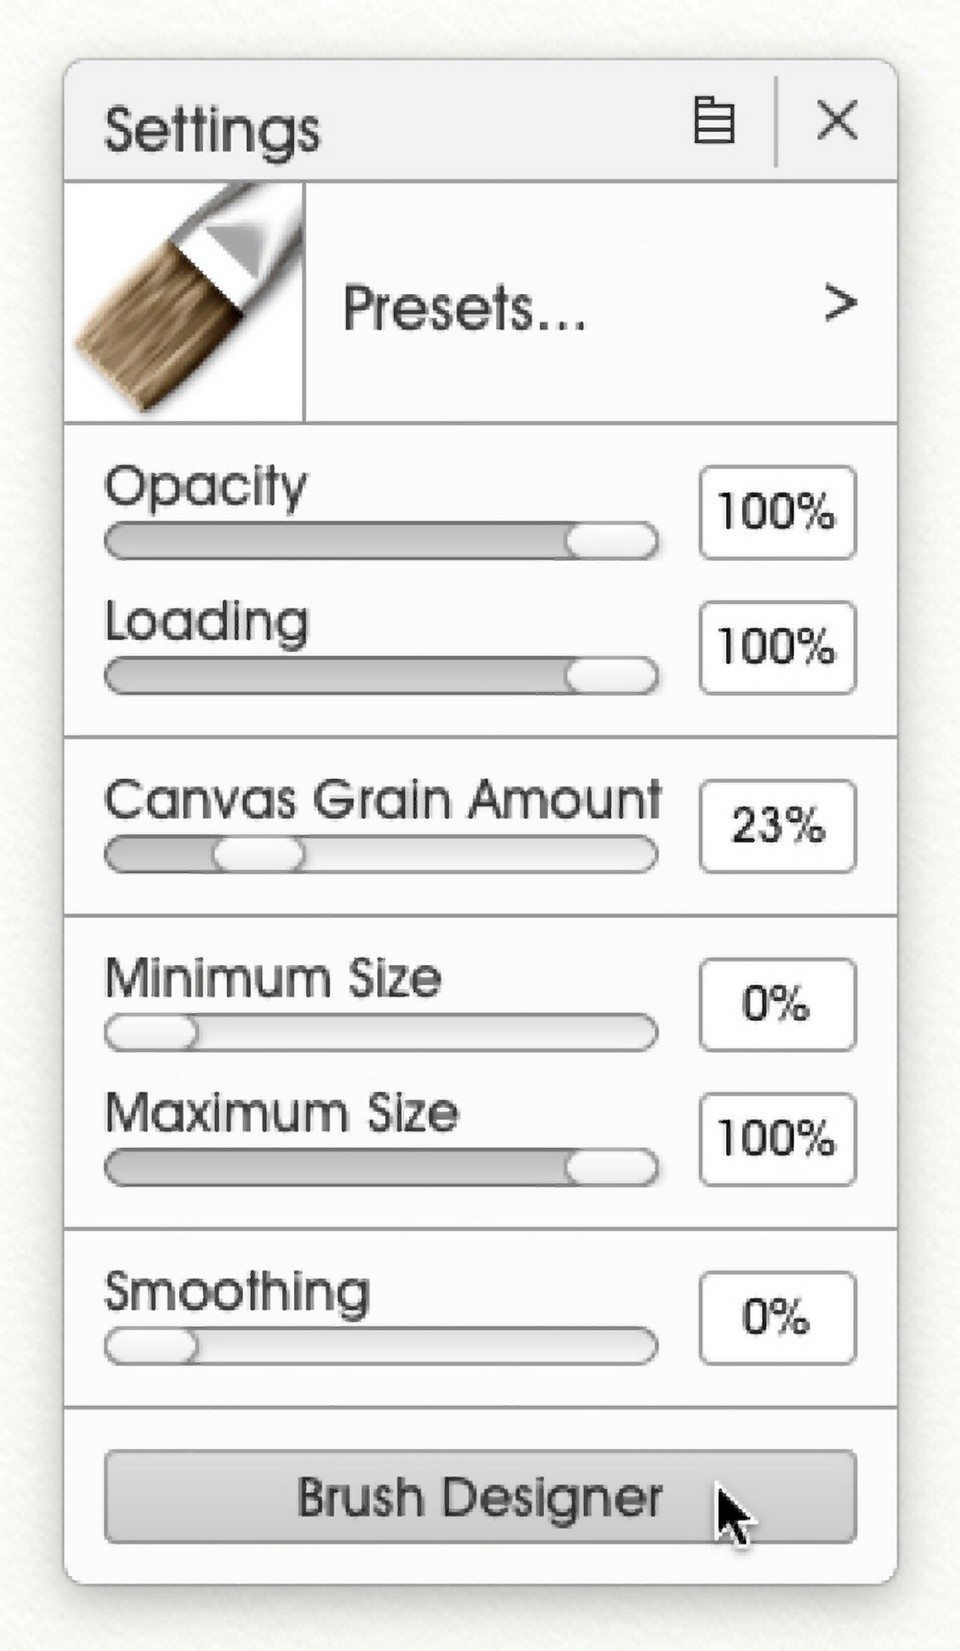
A quick overview of the Brush Designer settings for the first tab.
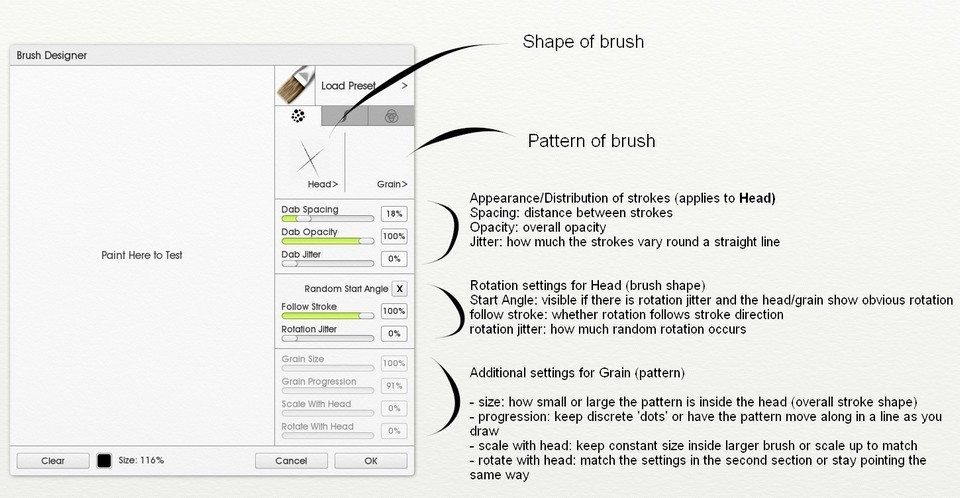
Head Settings
First I load the brush head by clicking in the empty square titled, ‘Head.’ A pop up menu appears with four options, ‘Select from Collection,’ ‘Load Brush Head’, ‘Invert’, and ‘Reset.’ I choose ‘Load Brush Head’ and locate the .ptg file just created.
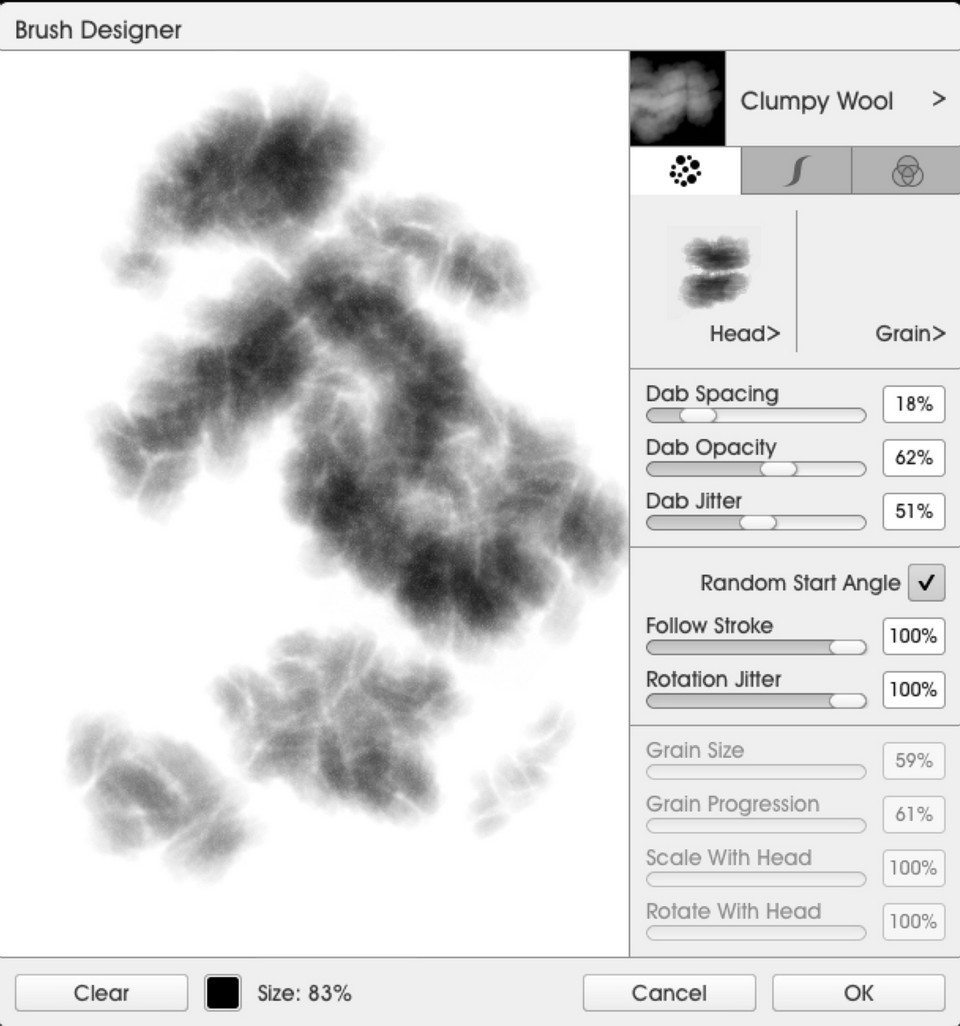
Next I set Dab Spacing. A value of 0 would mean no spacing between each sample of the brush head laid down. This would result in a very dense stroke of solid flat color, but I want to keep some impression of the texture in order to control build up, so after some experimenting I settle on 18% spacing between samples.
Dab Opacity is set to around three quarters, again to avoid a fast build up to solid color. I want some level of randomness in the brush stroke.
Dab Jitter randomly offsets samples from the current point of contact – I set it to around 50%.
Random Start Angle randomly rotates the brush head at the start of each stroke. This helps avoid pattern repetition which is necessary when trying to create organic textures.
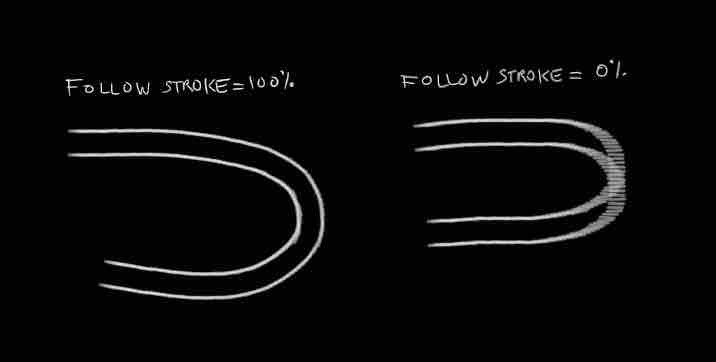
I found sliding ‘Follow Stroke’ to 100% helped in this case though I’m not exactly sure why, it just looked better.What does it do? Imagine a pair of parallel rails curving. Follow Stroke allows you to keep those rails parallel to each other as they curve, otherwise there would be overlap. In other words, Follow Stroke rotates brush head samples to match stroke direction.
Rotation Jitter again helps avoid pattern repetition by randomly rotating each sample as it is laid down. I set it to 100%. As an aside, this setting is also useful for making chalk or pastel type brushes.
No grain is loaded, so the related sliders are not available for editing.
Stroke Settings
I have left the middle tab, ‘Stroke Settings’ at its defaults. This means when using a pen and tablet, the brush size and opacity will diminish with lighter pressure. Again these properties help with random patterning.
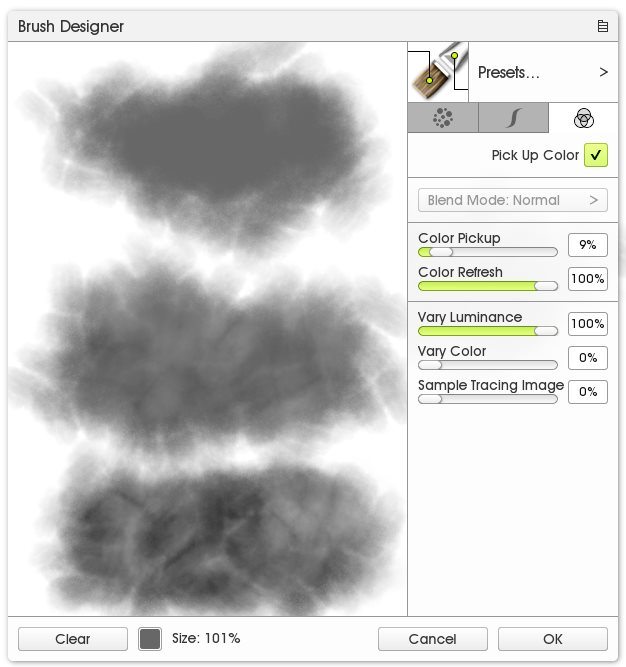
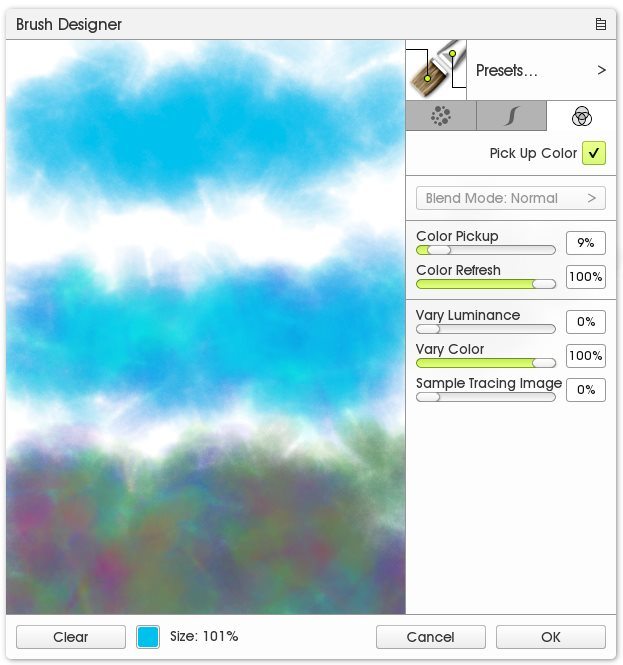
Color Settings
Next I click on the ‘Color Settings’ tab and click the ‘Pick Up Color’ check box.
I set the Color Pickup slider to 9%, meaning that although the color loaded on a brush will dominate, a small amount of color already on the canvas will blend with it. More blending occurs with longer uninterrupted brush strokes. When using a tablet this setting is also affected by the pressure with which you apply a stroke.
You can also set ‘Color Refresh‘ to 0% to create a blender brush that uses all the same settings but only blends existing colours.
Vary Luminance and Vary Color aren’t used for this brush, but they can be very useful for specific effects.
You can leave the ‘Vary’ sliders at 0% for a solid colour preset, which is what is used in the rest of this tutorial, but you can adjust ‘Vary Luminance’ and ‘Vary Hue’ for randomised darker and lighter shades, and different hues throughout your stroke. The variance is based on a range around your current colour, and the larger the percentage, the wider the variation.
This option is very good for creating specific effects, like cloud lighting, or for more realistic colour variation.
Note: This tutorial was created in the beta version of ArtRage, and some additional settings were added later, which is why these screenshots look different.
Save Preset
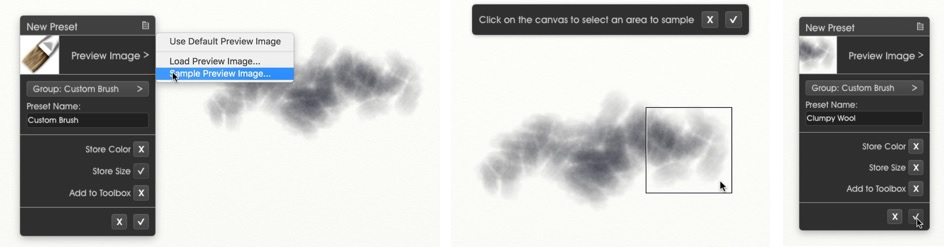
Now all that remains is to save a preset of the brush. I make some marks on the canvas, choose ‘New Preset’ from the Settings pop up menu, click on the arrow to the right of ‘Preview Image’ and choose ‘Sample Preview’ from that pop up menu. I drag the sample capture square over my stroke and accept the preview. I name the brush, uncheck ‘Store Size’ then save. Clumpy Wool can now be recalled at any time from the Tool Presets list.
Painting With the Clumpy Wool Brush
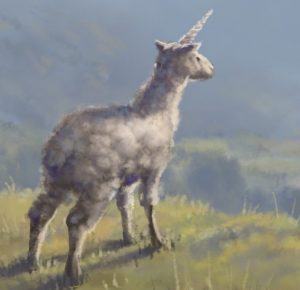
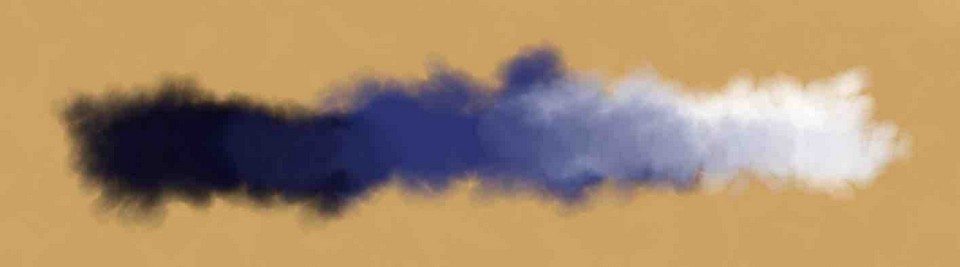
To test the brush I make a dark ball with small random jittery strokes. I then overlay subsequent layers of lighter colour until we get something resembling a sheep body (if you squint your eyes!!).
Next I add a dark head top with a lighter layer over it, all the while keeping the pressure quite light and strokes jittery. I add dark ears and a face, legs and a shadow before finishing off with the smallest hint of detail.
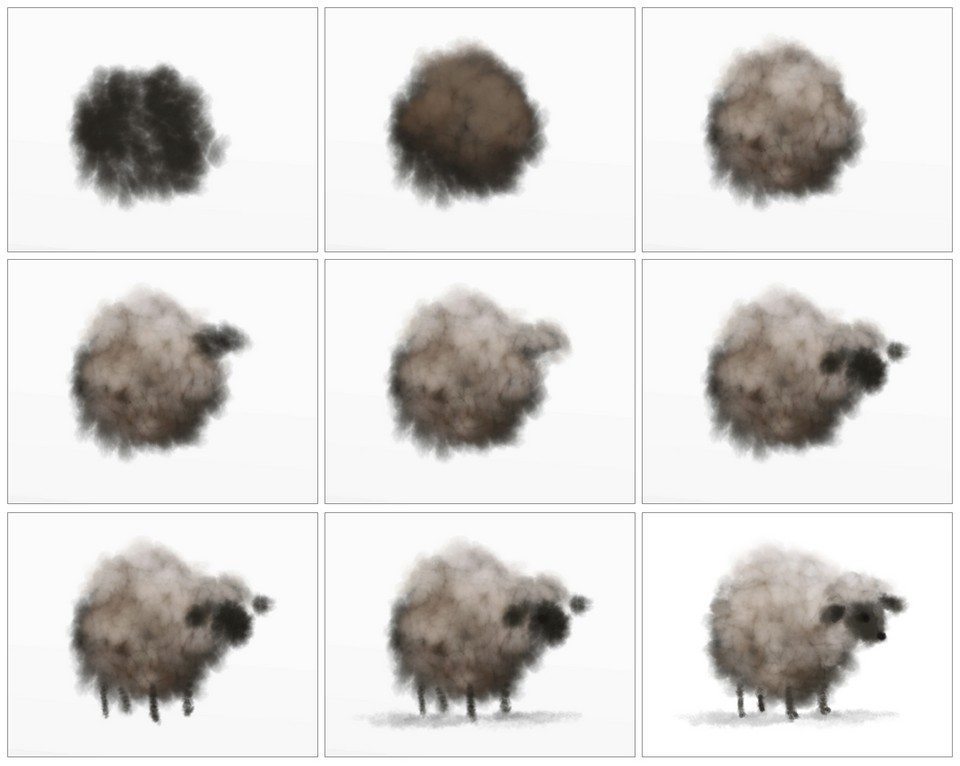
I’m guessing this sketch will not win any prizes, but already the brush feels good. It fulfils my original vision of a loose painterly tool suggesting a clumpy soft organic material.
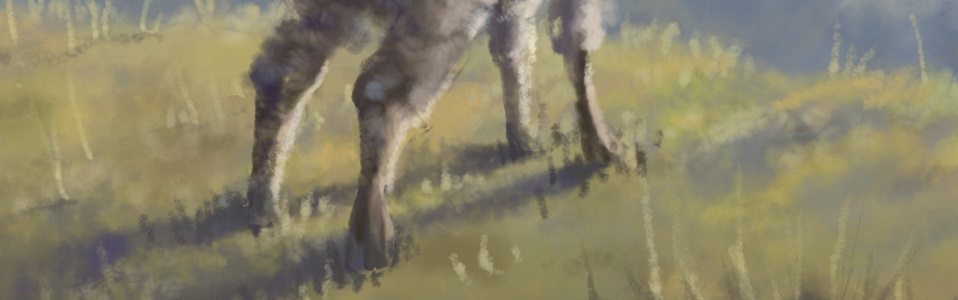
Continuing with the test, I paint a whole scene with just this brush.
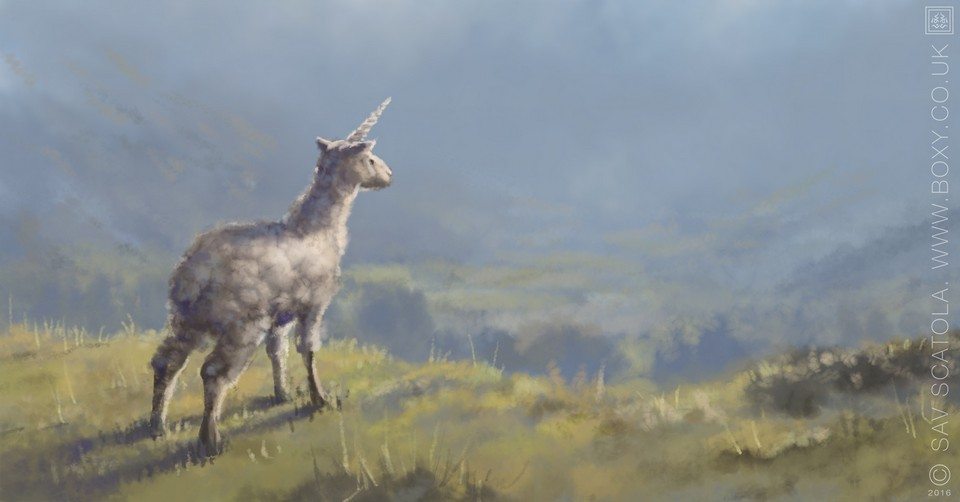

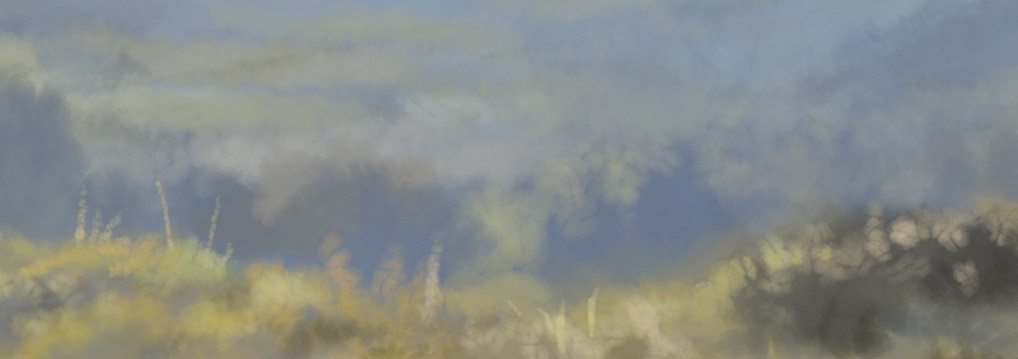
The canvas is covered with a background mist before overlaying a hint of fields and trees in a distant valley. The foreground hilltop is added next and although still loose, has more definition. The contrast between sunlit grass and distant trees really helps push it forward. Finally comes the creature.
Once again I start with darks and build up lighter layers until we get a sense of that clumpy woollen coat. Occasionally I change settings like opacity and dab spacing as required, but all in all I like the way it handles.
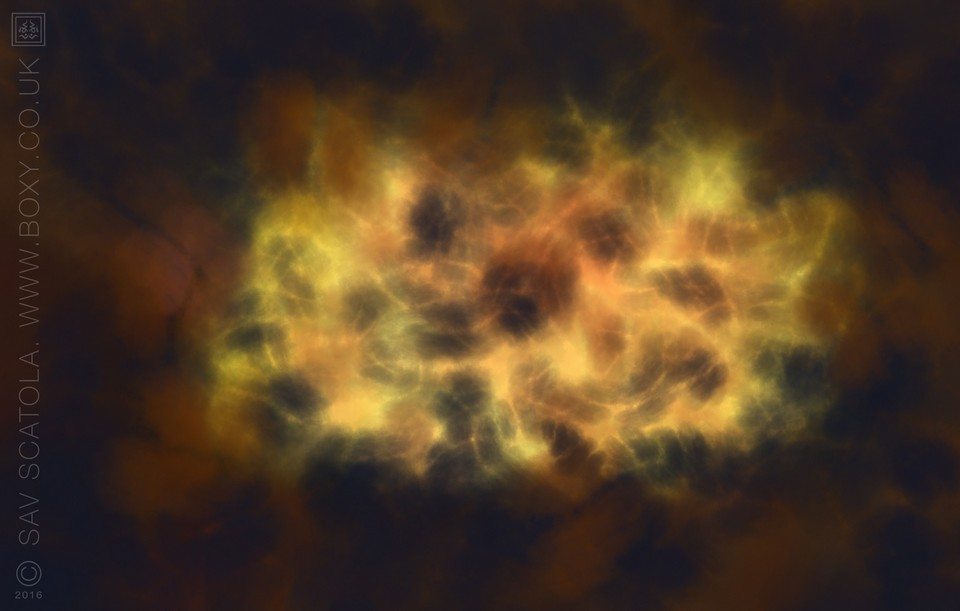
The large size textures remind me a little of cracked hot coals so I also do a quick sketch starting with lights working to darkest tones, again using the same random jittery strokes. I think playing with dab spacing would also be good for suggesting cobbled paths or random stonework.
I love the new Custom Brush system in ArtRage 5. Once again the settings seem intuitively simple yet powerful, which for me has always been the hallmark of ArtRage.
Download the Clumpy Wool brush here!
Sav Scatola’s website is at www.boxy.co.uk and he is one of our featured artists.