How To Create A Realistic Charcoal Drawing in ArtRage 4 Using Traditional Techniques
This tutorial shows you how to sketch out a charcoal-style portrait in ArtRage, using traditional charcoal drawing techniques.
The steps in this tutorial follow the traditional process of laying down backgrounds, then adding detail through darker tones and a kneaded eraser, as well as using a tortillion or finger-like smudge tool.
ArtRage allows you to learn and use traditional media, as well as retaining all the benefits of digital art. This tutorial sticks quite closely to a traditional drawing, and doesn’t fully explore all the possibilities of the software, such as layers and mixed media. With the exception of an alternative background, this drawing tutorial uses a single layer, just like a real charcoal drawing would. The ‘undo’ option was used frequently, though!
Which ArtRage Edition Are You Using?
This tutorial was created for ArtRage 4. ArtRage 5 added a new property to the Chalk tool: Noise. Adjusting the noise amount and scale will let you get far more realistic charcoal effects than the default Chalk properties which are used in this tutorial, so the techniques shown here will be more effective in ArtRage 5.
Most of the settings and techniques in this tutorial will also apply to mobile and older desktop editions of ArtRage, with the exception of the Stylus Properties, the ability to install custom presets, and some of the more advanced Palette Knife settings, which vary. You can refer to the feature comparisons for help figuring out what will work in your edition.
Resources
This charcoal drawing lesson uses the following tools and resources in ArtRage 4:
- Chalk Tool
- Eraser Tool
- Palette Knife using these custom presets from SomeoneSane
- A custom canvas background based on Strathmore Charcoal Paper, imported as a canvas grain.
Download Charcoal tool and canvas presets for ArtRage 4
Instead of trying to create them yourself, you can download and install the paper and tool presets. This ArtRage 4 Package File will install automatically after opening. It won’t work for older editions: Charcoal Tool & Paper Presets.Steps
Tutorial
Step One: Fill in the background
Here, you’re just covering the background with charcoal. You want it to be approximately mid tone for your final image (so that you can add both darker and lighter areas later). Don’t worry too much about how it looks, just try and make sure you have a nice, even coverage.
Chalk Tool Settings:
- Pressure 0-2%
- Softness 7%
- 500% Size (Hold shift and drag right on the canvas area, or click on the size and type in 500)

Softness 7%
Notes:
- My example background above isn’t very evenly shaded because I was starting to block in areas of shading as I went. If you feel confident, you can start to do this, but it makes it harder to fix mistakes.
- For this tutorial, I actually didn’t bother covering the whole background at the beginning, I just filled in the area I wanted to work in and created a new layer at the end to act as the background. As long as you cover the entire area you will be drawing on, and enough to border it, you can decide how you want the finished background to look later.
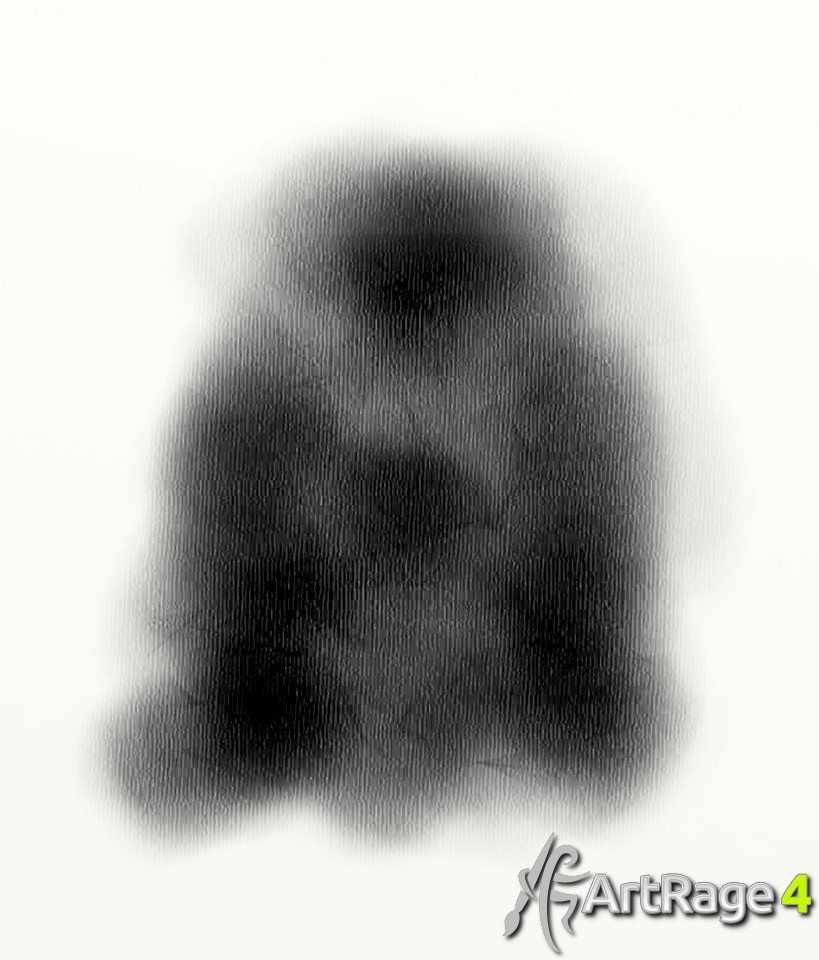
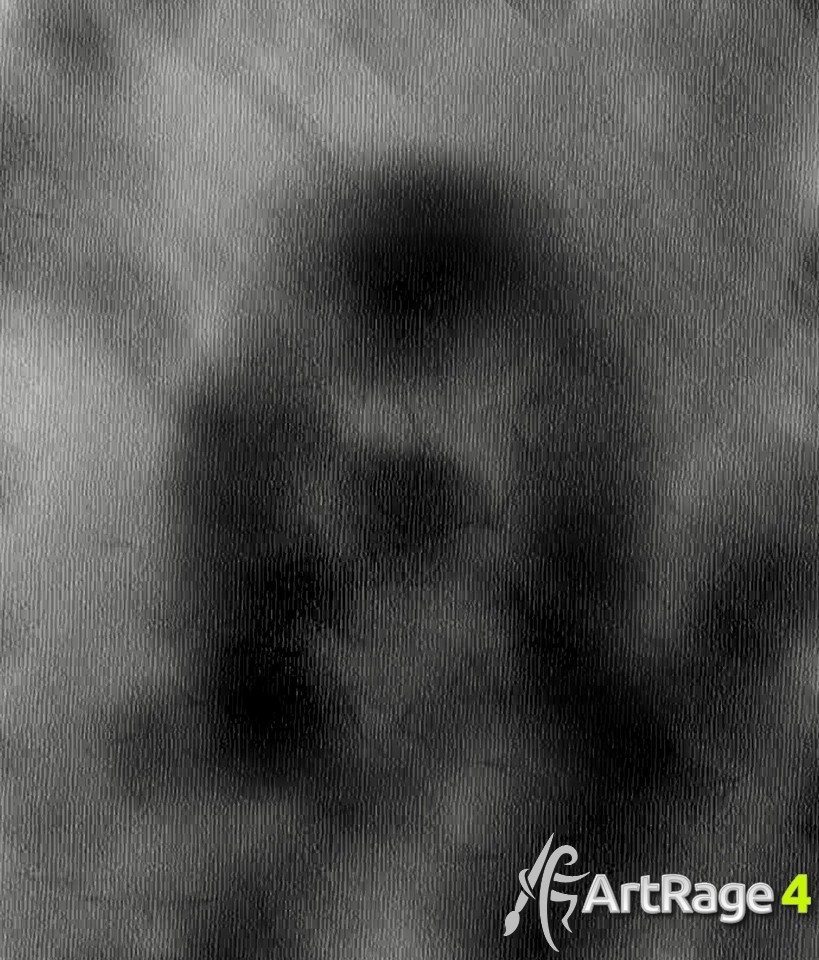
Step Two: Block in areas of shadow
Here we start to build up the ‘shape’, roughing in darker areas around the face and features.
Optional: You can draw a quick sketch layer to act as a guide for your sketching, which you can hide or delete later. It should show:
- The actual shape of the subject’s face
- Areas of shadow and light
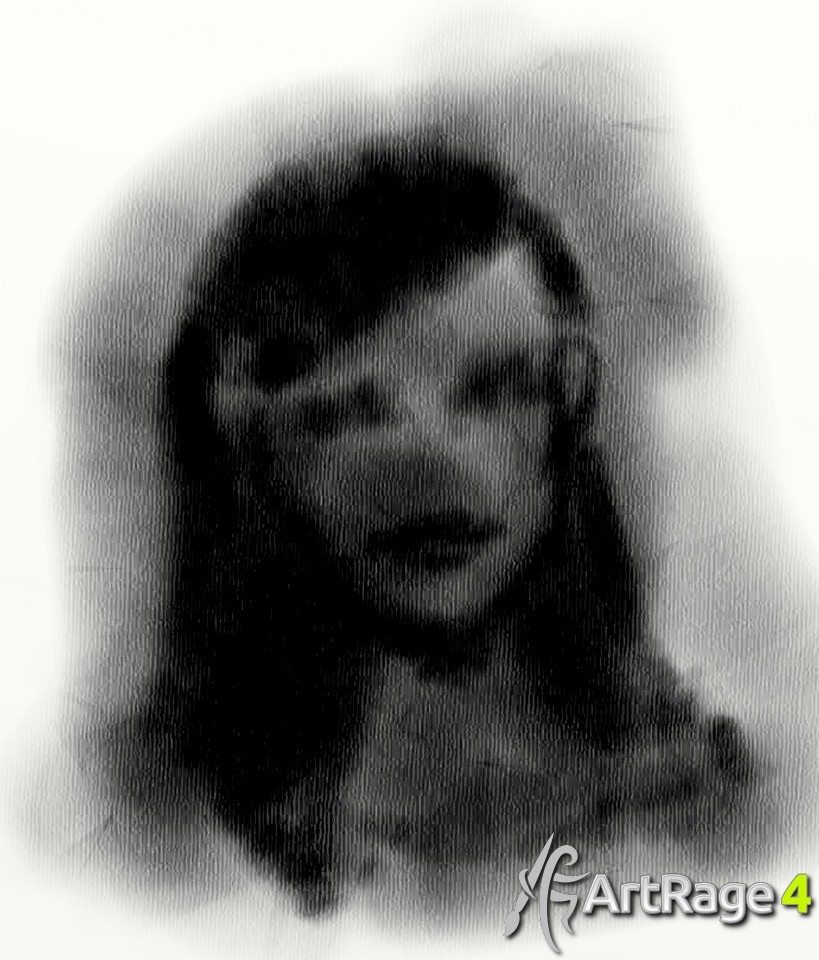
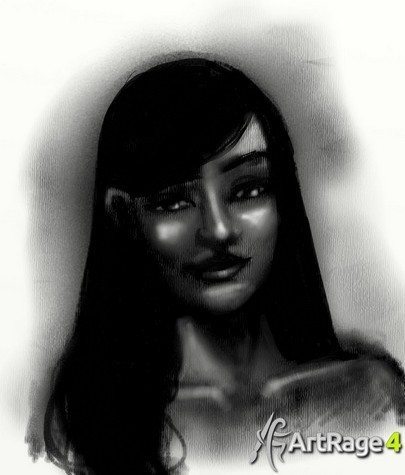
Step Three: Refine Outlines
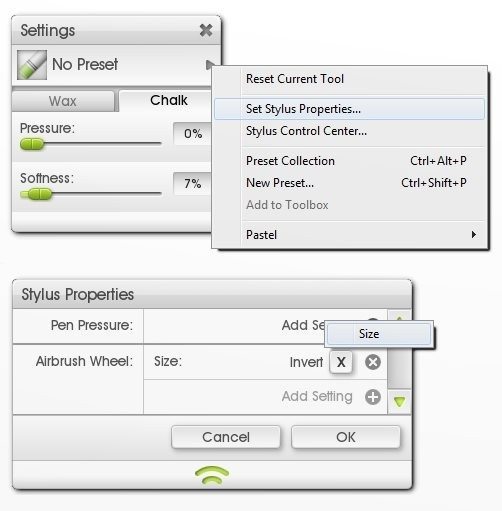
Now we have the base shadows, we can start getting more detailed, and turning into an actual face. I have darkened the hair and added facial features. From now on, it will be more about getting the face to look right, rather than building it up. I’m still using the Chalk tool, but I’ve increased the pressure slightly, to make it easier to cover the paper with solid black and create more defined edges. I have also changed one of the Stylus Properties.
Stylus Properties
This is one of the advanced features in ArtRage 4 for Wacom Styluses. Here I’ve added Size as one of the things affected by pressure, to help me control my shading a bit better. This means that when I press harder, it gets darker and bigger (or smaller, if I invert the property).
Step Four: Basic Highlights
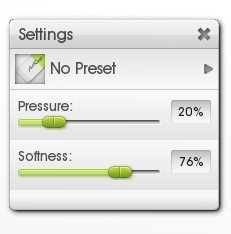
This step is optional, but it helps me figure out what I want to do next. Here I’m doing the opposite of Step 3, adding the lighter areas of detail instead of the shadow. I did this by using the Eraser.
The Eraser settings should be very soft and light. I used Softness 76% and Pressure 20% or less.
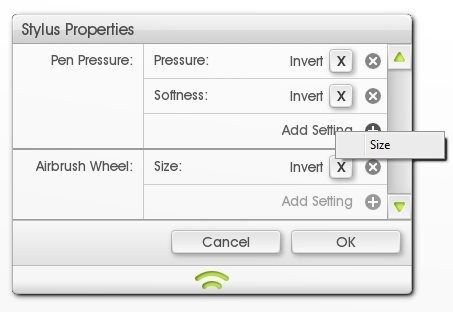
I also edited the stylus properties to add Pressure and Softness, so that the tool felt more like a real soft kneaded eraser. I didn’t add size, because I needed to control the actual size quite closely (as you would if you were using the corner of an eraser – it doesn’t get larger, just erases more).
Note: Instead of the eraser, you can just use a white Chalk with all the same settings of that you are using for the original Charcoal. It requires a bit more control and you will need to blend the edges if you use this method (the eraser has built-in blending due to the soft edges), but it also lets you retain more of the paper texture in the white areas. It also means that you can add white highlights if you aren’t using a white background.
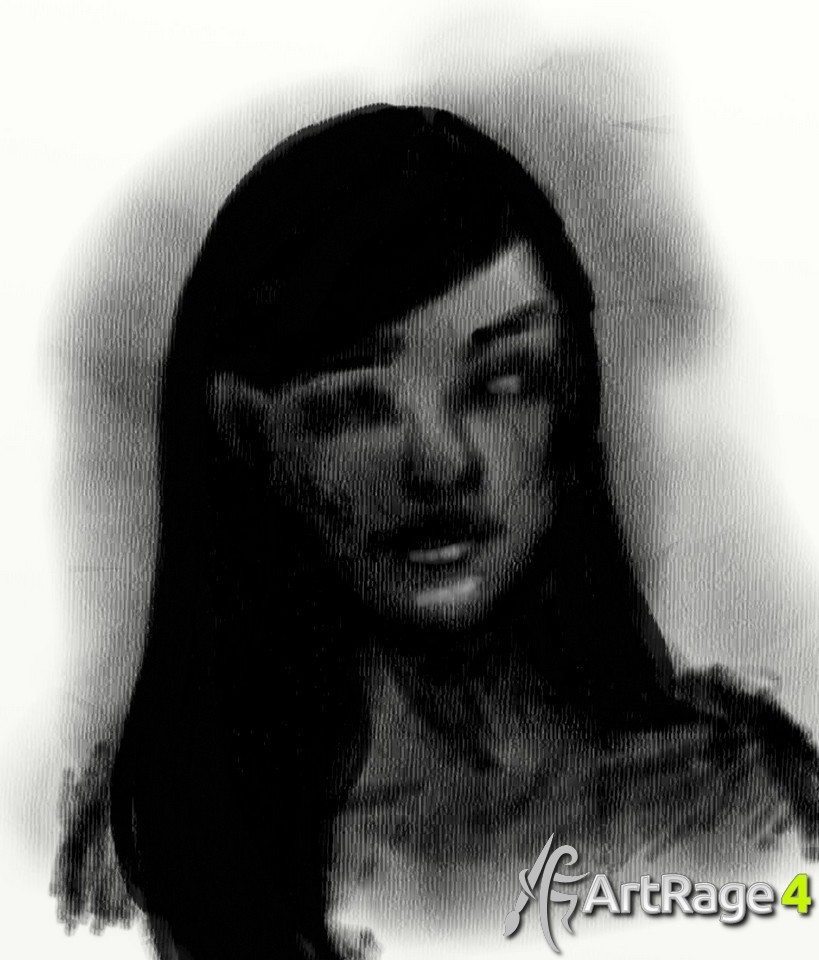
Step Five: Smudging
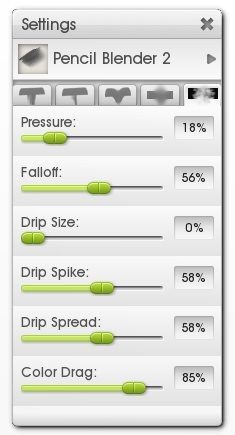
Here we use the Wet Palette knife like a finger or tortillion to gently smudge and blend areas of charcoal. I have smudged most of the face, to make it look more like soft skin, but left areas of texture. I have also blended some of the highlights and shadows, to soften them, or get them closer to the tones I wanted.
Note: it is important to use very low pressure for the palette knife. If you do not like the results you are getting, reduce the pressure you are using. You can also experiment with different palette knife settings and modes.
The Palette Knife settings I am using are based on SomeoneSane’s Pencil Blender presets in this Pencil Pack.(Download the package file and open it with ArtRage 4, and they will automatically install.).
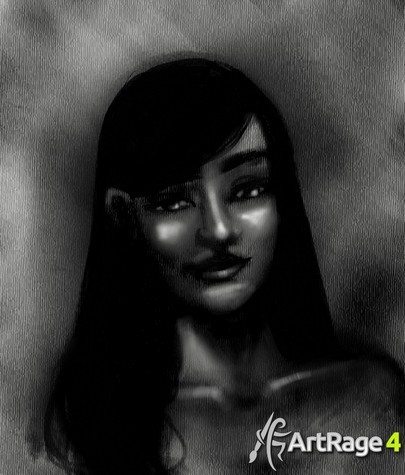
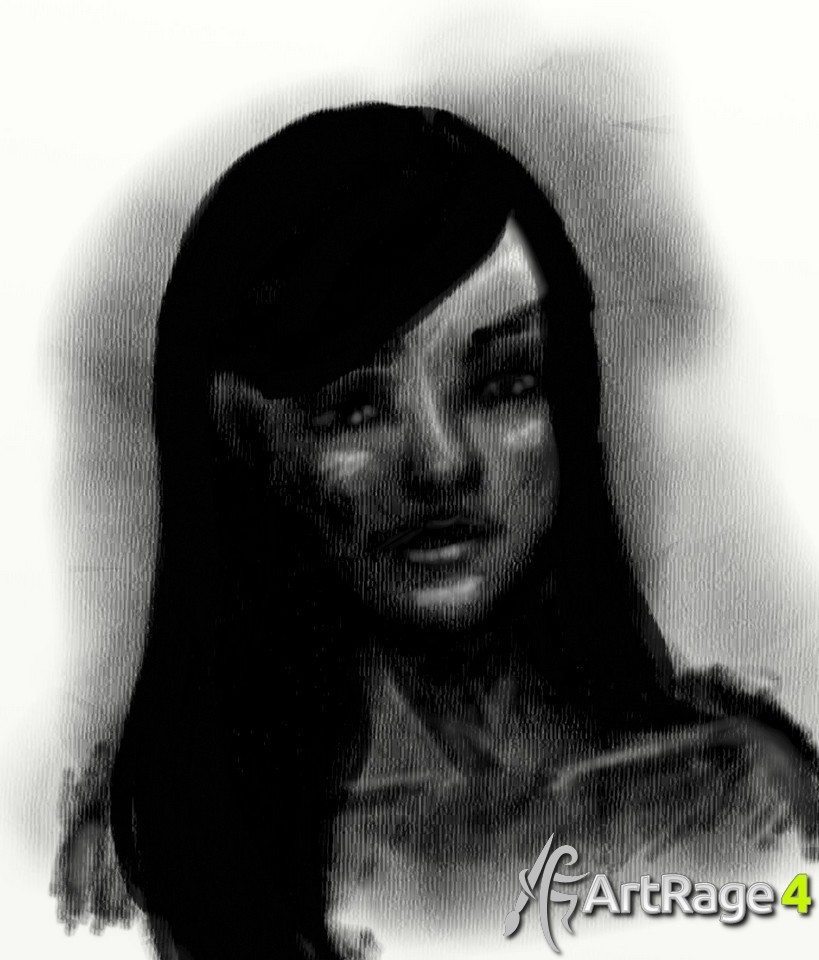
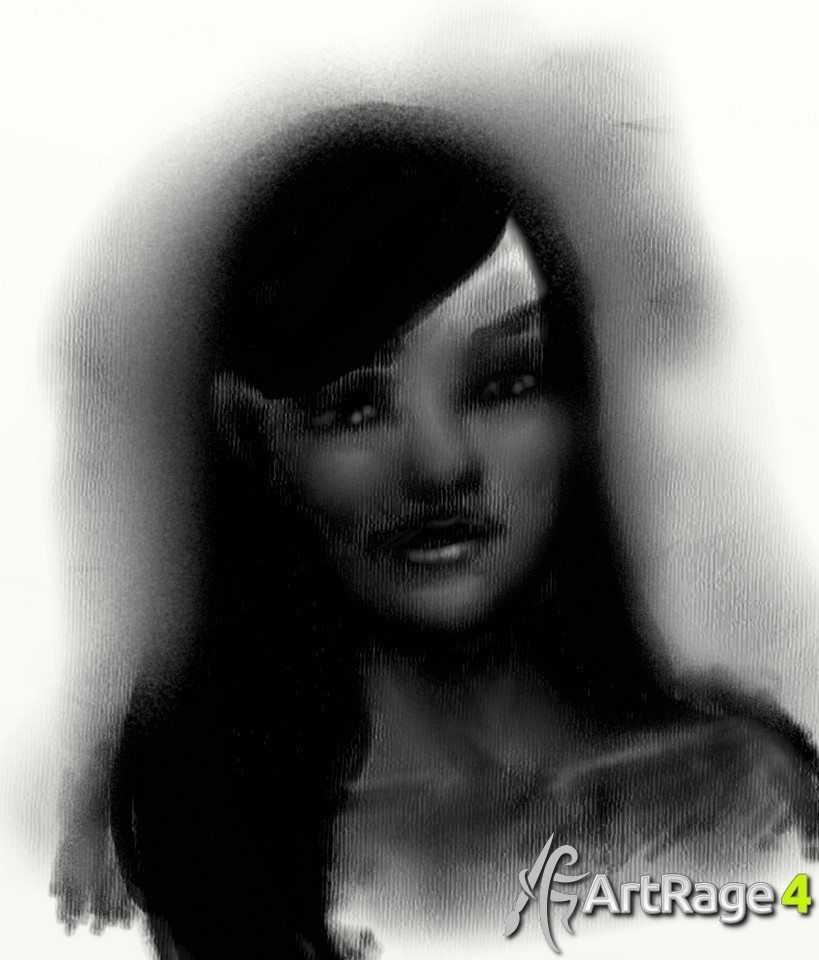
Step Six: Final Details

Here I’m switching between Chalk, Eraser and Palette Knife to add and refine details. Fr example, I used the eraser to create highlights on the cheek and eyes, a White Chalk to create a slightly stronger highlight on the tip of her nose, and a high pressure, very small, Black Chalk to draw extra hair strands on her shoulder, which were then softened with the Palette Knife.
Step Seven: Background
Finally, I go back and create the background that I would have started with if I was drawing with real charcoal and paper. I pick up the Chalk tool again, turn the pressure right down to 0% and the size back up to 500%, and cover the background with nice even shading, with a few variations in tone to add interest. If I wanted to, I could blend it all smoothly, but I quite like the paper texture here, so I’m leaving it.
Once I’ve created the background, I use the Eraser to lighten the areas under the face, so that I don’t accidentally cover up all the highlights I created.

However, I’m not sure I like the background after all, as it’s pretty dark. But because I created on a separate layer, I can choose which version to keep.
Now go create your own drawing! We’d love to see what you create, so tag us online, or post to our Facebook Page, Twitter, Tumblr, DeviantART group, or forums.
More ArtRage Tutorials
[fp_carousel width=”940″ height=”200″ items=”5″ num=”-1″ speed=”600″ cat=”Tutorials” orderby=”date” post_type=”post”]For more help with using ArtRage, check out the ArtRage 4 Manual, the list of community tutorials. And don’t forget to check the FAQ section!
You can also drop by our Artrage Forums, or Contact our Tech Support.