How to Create A Custom Sticker in ArtRage
Did you know that you can create custom brushes?
The ArtRage Sticker Spray feature is an extremely powerful tool with an intimidating range of options. Any Sticker you add to ArtRage can be used to create a Sticker Spray, and any Sticker Spray can be customised in almost any way that you can think of, so you can use it to create custom brushes using your own images, whether that’s a random scatter of leaves or a specialised pencil effect.
Sticker Sprays are repeating patterns that use Stickers as the images for the stroke, and ArtRage includes a wide range of presets. But you can install and create your own custom Sticker Spray brushes. This tutorial introduces you to the process, and will show you how to create a basic sticker spray from a single image.
This tutorial applies to the desktop editions ArtRage Lite, ArtRage 4 and ArtRage 3: Studio Pro (ArtRage Studio and ArtRage Lite can Import existing sticker files (.STKs), but can’t create new ones).
Step One: Create a New Sticker
You can use any image at all as sticker. If you would like to create a custom sticker, just paint the image or images you would like to use, and then save it as an image file.
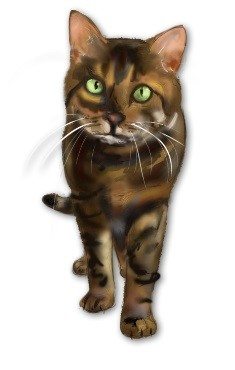
Usually you will want to have a transparent background, so make sure to save it as a PNG file with transparency. If you do not do this, then you will end up painting in the background of your image with every stroke as well.
To add your new sticker, open the Stickers panel (you can find this on the left-hand side of your screen, just above the tools). You will probably want to create a new Group to add your new custom sticker too, to make it easier to find.
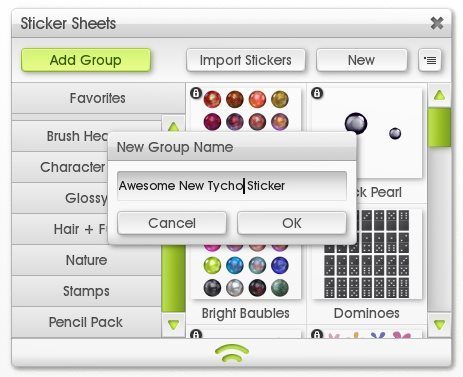
To do this click “Add Group” and type the name of your new group.
Then click “New” to add your sticker.
The New Sticker Sheet screen is a bit confusing at first glance, but for a simple image brush you can ignore most of these options. The different boxes allow you to load multiple images to create different combinations of image, texture, gloss (Shine), and metallic effects in your sticker spray, so if you know you need a specific effect, you can start experimenting with these options.
You can use a single image, or load a “sheet” of stickers, and tell ArtRage to use different parts in the sticker spray using the ‘Columns’ and ‘Rows’ sliders in the New Sticker Sheet panel. We are not going to cover that today, as it’s a little more advanced, but it is entirely possible to do.
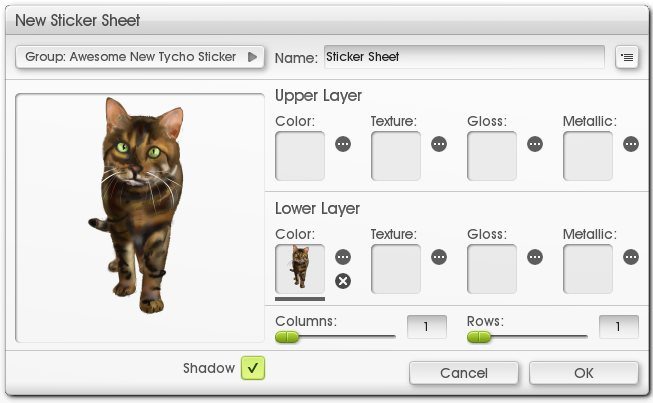
But for now, just click the Lower Layer ‘Color’ box and browse to your image file. Then click ‘OK’.
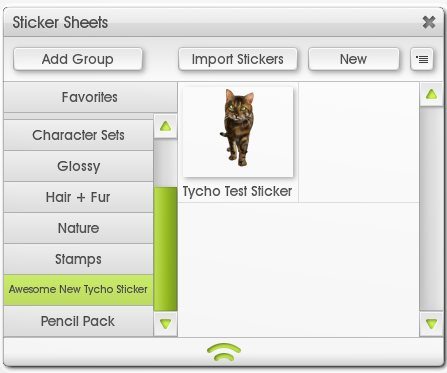
You have now successfully created a sticker, and you will be able to see it in your Stickers collection. You can rename it, move it to a different group and delete it. If you click on it, you can add it as an individual sticker to the canvas.
Step Two: Turn Your Sticker into a Sticker Spray Preset
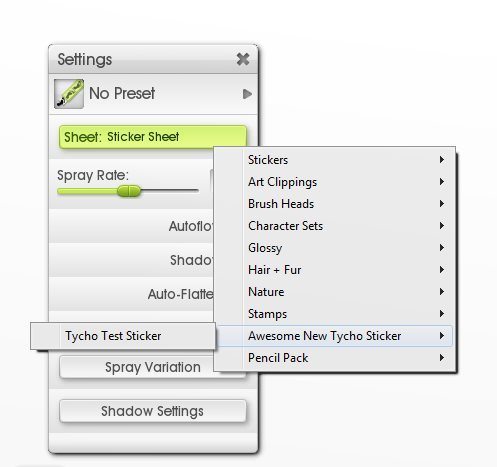
Now that you have created the sticker that you will be using, it’s time to go to the Sticker Spray tool.
Open the Settings panel and browse to your new sticker.
You can try painting with it straight away, but remember that it will use the settings of the last Sticker Spray preset that you loaded. This is actually a great shortcut for creating new Sticker Sprays, as you can load a preset you want to copy, load the new Sticker and then save it as a preset without ever worrying about any of the individual settings.
However, if you’re not quite sure what you want yet, or don’t actually like any of the current preset settings (or don’t want to browse through them all!), then you should set up some basic Values in the Spray Variations panel.
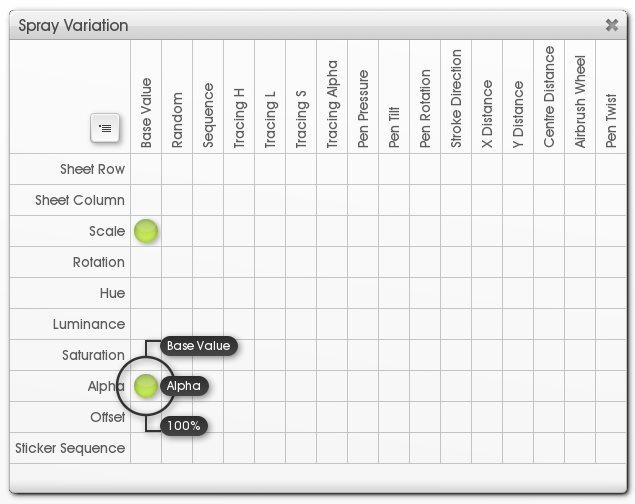
Looks pretty scary, doesn’t it? All those different options! Don’t worry, you don’t need to know what most of them do yet, and you can set up your new custom brush in less than a minute.
You have two options for creating a new basic Sticker Spray quickly and easily.
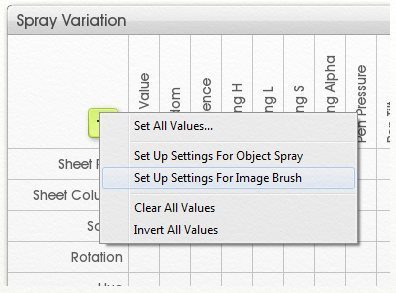
All of them use the little menu button in the top left of the Spray Variations panel. Open that menu and choose ‘Clear All Values’ to set your own very basic values, or choose ‘Set Up Settings for Object Spray’ or ‘Set Up Settings for Image Brush’ (depending on which one you want).
Keep reading to learn more about what each option actually does.
Option One: Clear All Values and set basic values for Scale and Alpha.
As long as you have some kind of value for Scale (so that it has a size), and Alpha (opacity – so that you can see it!), then you can use it as sticker spray brush. The three different options you might want to use are:
- 1. Base Value: This sets an ‘absolute’ size and opacity based on the actual sticker (so 50% Scale will give you a sticker spray that is half the size of the original sticker image). For a very straightforward sticker spray, just set Scale and Alpha to 100%
- 2. Random Value:This randomises the sticker scale/opacity. 50% Random scale means that it will vary between 0-50% of the original size. A negative -50% value will allow it to vary between 50-100% of the original size.
- 3. Pen Pressure Value: This allows the sticker to change based on the pressure of your stylus. A 50% scale will allow it to vary between 0-50% of the original size.
Note: Because none of the Tracing values have been set, you won’t be able to use this brush for tracing images.
Only use one of these options for now. If you use more than one, they will combine with each other (all other values will use the Base value instead of the actual sticker properties, for example). For a full list of the effects of different values on the Scale property see: Sticker Spray Properties: Scale.
Tip: Adjust the Spray Rate in the Settings panel to control how closely spaced the stickers are when you paint.
Option Two: Load the Default settings for Object Spray or Image Brush.
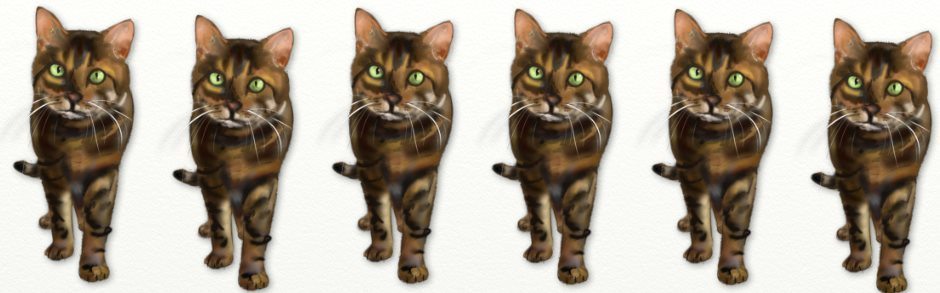
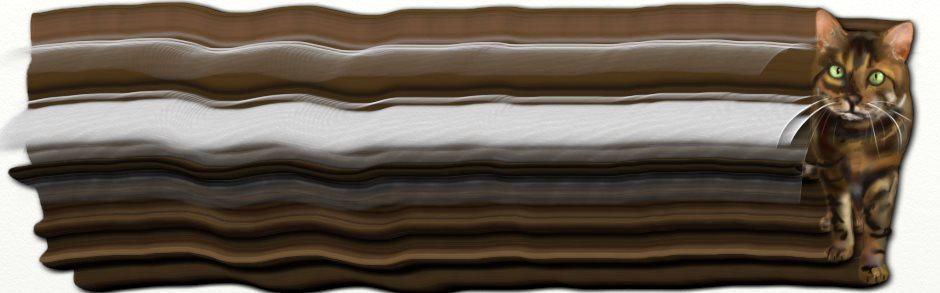
These will set your brush up automatically for either Object Spray (random scatter of objects) or Image Brush (a solid line). You can then save it, or modify individual properties.
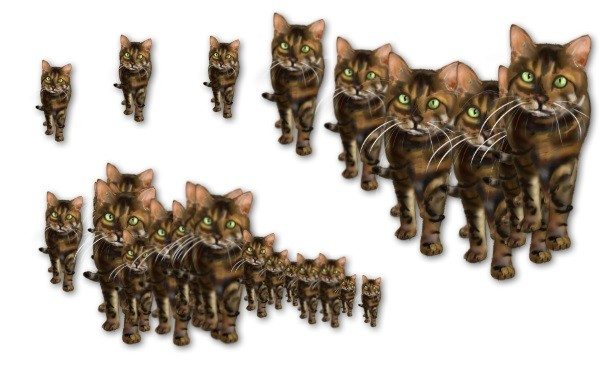
Object Spray

Image Brush
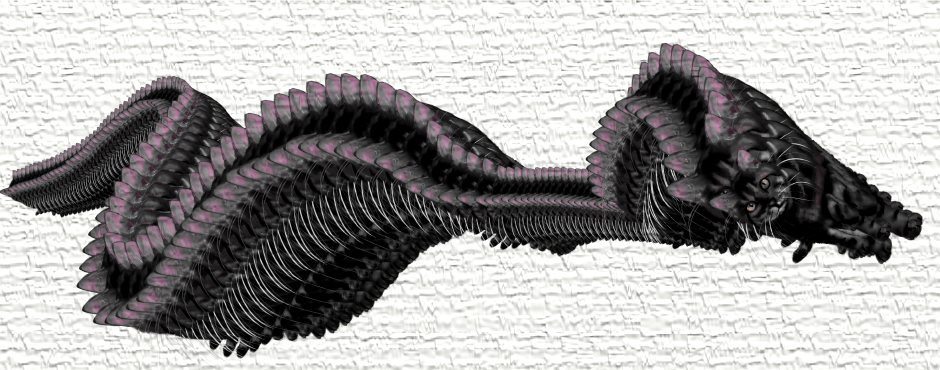
Tip: The default Object Spray and Sticker Spray settings will use your chosen color. Here, you can see what happens when purple is combined with the existing sticker color. Because the original image was quite dark and saturated, the purple only shows up on the ears. To only use the original sticker color values, brightness and intensity, clear the ‘Hue’, ‘Luminance’ and ‘Saturation’ properties.
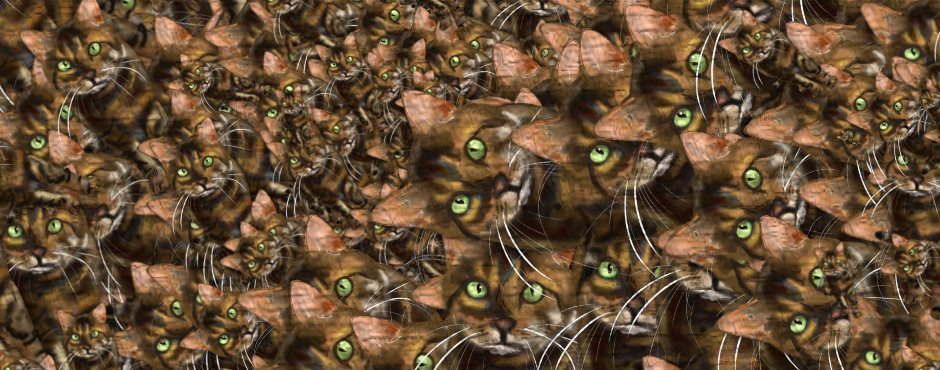
You can then get results like this!
Once you have your Sticker Spray set up, close the Spray Variations panel, and go back to the Settings to adjust Spray Rate, Autoflow, Shadow and more (learn more about the Sticker Spray Settings here). Don’t forget that you can test out the effects by drawing on the canvas at any point.
Then when you are happy with your new Sticker Spray brush, open Presets, and click ‘Add Preset’ to save your new custom Sticker Spray brush (you can use it without saving it as a preset, and the Sticker will stay in your Stickers collection, but you’ll have to set everything up again next time!).
More ArtRage Tutorials
[fp_carousel width=”940″ height=”200″ items=”5″ num=”-1″ speed=”600″ cat=”Tutorials” orderby=”date” post_type=”post”]For more help with using ArtRage, check out the ArtRage 4 Manual, the list of community tutorials or previous posts in the Tutorials category. And don’t forget to check the FAQ section!
You can also drop by our Artrage Forums, or Contact our Tech Support directly.