ArtRage Canvas Selections
ArtRage allows you to mark areas of your Canvas with a Selection. When an area is selected the operations you carry out are limited to that specific area. For example if you select an area then paint, the paint will only be applied inside the area you selected. Think of Selections as easy masking tools allowing you to block off areas of the Canvas you do not want to change.
This section explains what you can do with selections and how you can manipulate them. For information on basic selection creation see the Selection Tool section.
Working With Selections
The Edit Menu provides some basic tools for manipulating selections. Select All selects the entire Canvas, while Deselect All removes any current selection you have. Invert Selection selects the opposite of your current selection. Select Layer Contents is used to create a selection that matches the paint on the current layer.
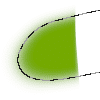
When you have a selection active it is outlined on your Canvas by a series of animated dashes. Everything inside those dashes is selected, everything outside is unselected.
If you have used a feathered selection the dashes indicate the area of the selection that is 50% opaque or more, there may be an area outside the dashes that can still have paint partially applied.
When you have a selected area it limits where paint can be applied on your Canvas. Painting outside the selection will not apply any paint, painting inside it will apply as much paint as the selection allows.
If you use Copy or Cut in the Edit Menu when a selection is active the contents of the selection will be copied to the clipboard.
If you click with the Transform Tool inside a selection the contents of that selection will be transformed. For more information see the Transform Tool.
Partial Selections
If you have a feathered selection or if you have painted a less than 100% opaque selection using Paint Selection mode, your selection will contain pixels that are less than 100% selected. This is the equivalent of adding masking tape that allows some but not all of the paint you apply through.
If you paint over a partial selection your painted result will be less than 100% opaque.
If you Cut the contents of a partially selected area only some of the paint will be removed, leaving some of it behind.
Selection Shortcuts
While you are creating selections using the Selection Tool there are a number of keyboard shortcuts you can use to make the process faster.
While you are dragging to create a selection:
- Hold down Shift when using the Rectangular or Elliptical tool type to lock the selection area to a square or circular aspect.
- Hold down Option (Mac OS X) / Alt (Windows) to drag the selection from its center point outwards.
- Hold down the Spacebar after you have started to drag to drag the position of your entire selection without changing its size.
If you already have a selection created:
- Hold down Shift before dragging a new selection to Add the new selection to the old one.
- Hold down Option (Mac OS X) / Alt (Windows) before dragging a new selection to Subtract the new selection area from the old one.
- Hold down Shift and Option (Mac OS X) / Alt (Windows) before dragging a new selection to have the result be the intersection of the old and new selected areas.
- When dragging your second selection, if you had any keys held down you can release them after the drag has started and press them again to constrain the aspect of your selection or create it from its center point as with the instructions above.
These shortcuts do not work when using the Paint Area tool type. Some of these options do not work when using the Magic Wand tool type.
When there is a selection active:
- Press or hold down the arrow keys on your keyboard to move the selection
1 pixel at a time.
- Hold down the Shift key to move 10 pixels at a time.
- Click and drag inside the selection when the Selection Tool is active to move it.