How To Draw Straight Lines in ArtRage
Need to draw a perfect straight line in any direction? Whether you want to quickly sketch out a building, or add a perfect border, ArtRage offers several features for straight line drawing.
If you need to draw a straight line in the desktop editions of ArtRage, you have several options, from keyboard shortcuts to Guides. You can carefully set up your guidelines and draw neatly along them, or add quick perfect straight strokes on the fly. Combine this guide with these tips on drawing smooth curving lines to get perfect lines for design and illustration.
On This Page
- Keyboard Shortcuts
- Stencils
- Layout Tools
- Grids
- Guides
- Perspective
Note: All of these options are desktop only. If you are using a mobile edition of ArtRage, you can import an image with straight lines or use a real ruler on the screen to get similar results. Shortcuts and Stencils have been in ArtRage since ArtRage 2, but the Layout tools are new in ArtRage 4.5 and later.
Keyboard Shortcuts
Hold ‘Control’ (Ctrl) on Windows or ‘Command’ (Cmd) on Mac OSX to automatically create a straight line. Hold ‘Shift’ to force that line to be at specific 15° angles from your starting point.
This lets you draw a straight line at any time, in any direction, from any point on the canvas, with any tool. However, the entire line will be created at full Pressure without any variation because it is a projection, you do not actually draw the line.
If you need to naturally draw a line with greater control over the pressure as you draw, use a Stencil or a Layout Guide.
Learn more about Keyboard Shortcuts.
Stencils

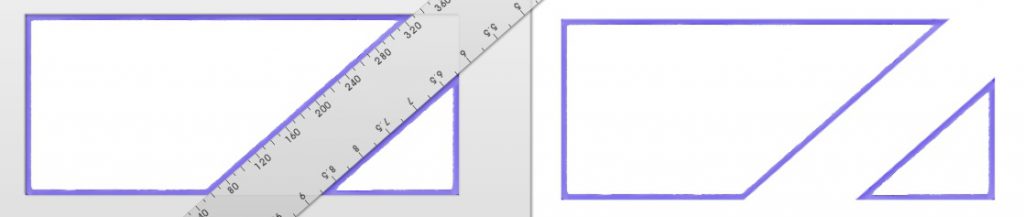
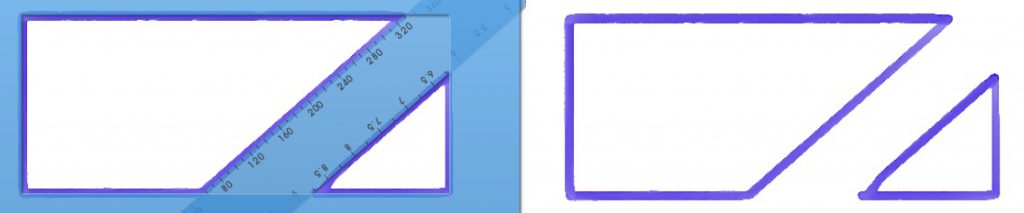
All desktop versions of ArtRage come with Stencils. You can use Stencils to mask out the shape of a line (create a thin line and invert it) or use the Ruler and Guide modes (note: Ruler & Guide modes are not currently available in ArtRage Lite). You can resize and rotate active stencils using Ctrl, Alt and the Transform tool.
Right click on an active Stencil to switch it to Ruler or Guide mode (the Ruler stencil is set to Ruler mode by default). These modes will guide your line around the edge of the stencil to help you draw a smooth line.
The difference between Ruler and Guide mode is that the Guide mode will allow paint to continue under the edge of the Stencil area, rather than masking the canvas completely.
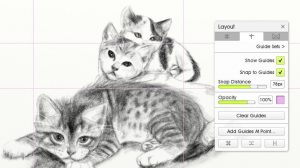
Layout Guides
The Layout Guides allow you to add guidelines of different types over your image as you draw. They include a ‘Snap To’ feature that automatically snaps your cursor to the line. You can adjust the strength of the Snap, which will control how closely you need to draw before your cursor locks to the line and how easy it is to wander off it.

You can access the Layout Guides from the View menu or the upper menu bar.
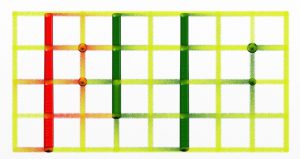
Grids (ArtRage 4.5 and 5)
Add a grid over your image and adjust the line spacing to get lines in the right places. This is a very good way to draw multiple regularly spaced lines, or a rectangular shape. Learn more.
Guides (ArtRage 5 only)
Guides are single vertical and horizontal lines that can be added to any point on the canvas or frame existing paint on the current layer. Learn more.
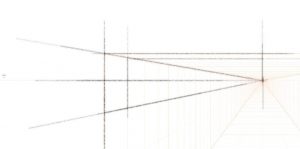
Perspective (ArtRage 5 only)
Custom perspective lets you add lines that accurately follow one and two point perspective. You can move the vanishing points to anywhere on or off the canvas to get the perfect angle. Snap to Grid for Perspective follows the major lines (outer and diagonal lines) and allows the line to continue past the point where the visible perspective ends. Learn more about perspective.