This guide is included in your copy of ArtRage 5 under Help > ArtRage Manual.
- How to Paint in ArtRage: Select a tool on the left, select a color on the right, then click and drag in the central canvas area to paint.
- How to Save your Painting: Select Save Painting in the File Menu at the top to save a painting file.
- How to Export your Painting: Select ‘Export Image As’ in the File menu to export your painting as JPEG, PNG, PSD or other file format for the web or editing in other programs.
Interface Modes
There are two modes that you can choose from using the Interface Modes menu in the View Menu. Each has a light and dark option.
Classic Mode
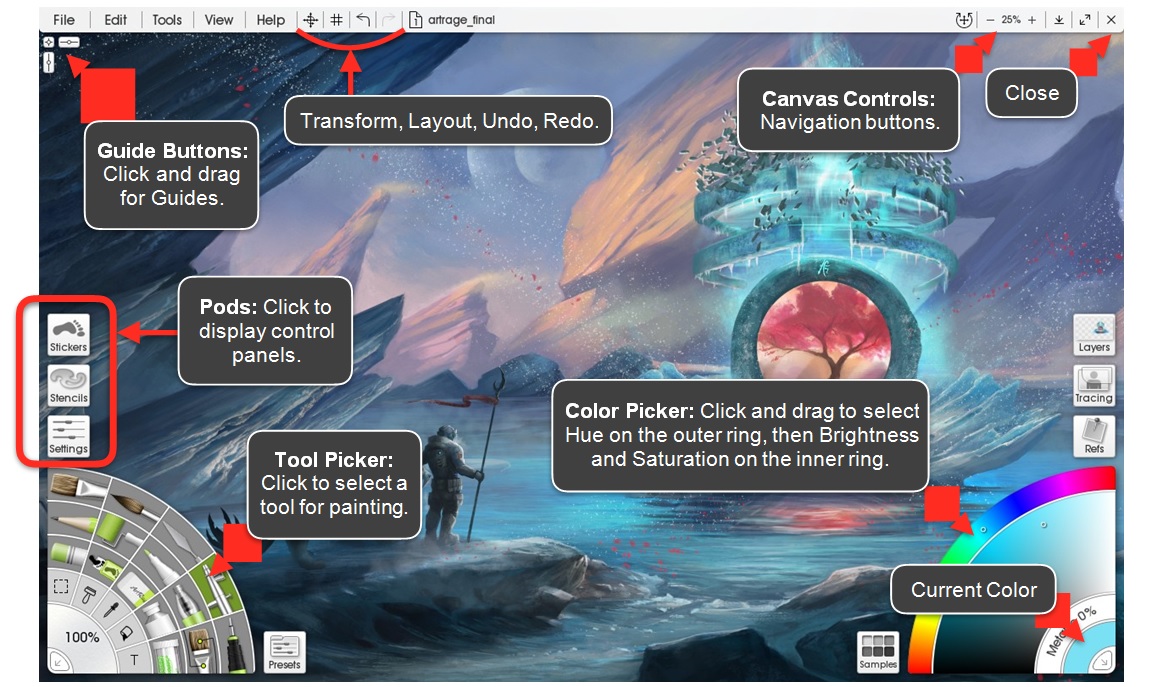
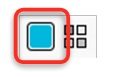
Classic ArtRage mode has a Tool Picker on the left, a Color Picker on the right, and Pods that you click to access panels with settings and other utilities.
Click a Pod to expand it to a panel. When you close the panel, the pod reappears.
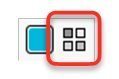
Docking Mode
Docking Mode keeps all of the panels in the top Menu Bar. When you click on a button the panel appears and remains visible until you click off it.
You can also attach panels to the edges of the screen if you want to keep them open.
Tear Off: Click the Tear Off icon on the titlebar of a pop up panel to tear it off the menu bar and make it float.
Docking: Drag a panel to the left or right edge of the screen and a Dock Indicator appears, drag your cursor over the indicator and let go to dock the panel to that side. If there is already a docked panel on that side, just drag your new panel in to the Docking Tray and drop it to dock there. You can dock panels on the left and right sides.
Docked panels can be collapsed in the tray using the arrow icon in their titlebar.
Undocking: Click the Tear Off icon on the panel’s titlebar to remove it from a Docking Tray.
Expanding and Collapsing: Docked panels can be expanded and collapsed using the arrow indicator in their titlebar.
Lights Out
Both Classic and Docking Modes support Lights Out. Turn this feature on to invert the standard bright interface and make it darker.
Working with Tools
Tool Pickers
To activate a Tool for painting, select it from the Tool Picker.
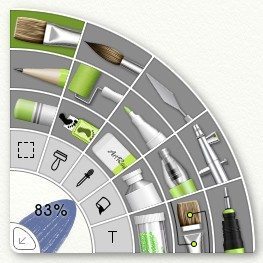
Classic Mode has a Tool Picker curve on the left hand side of the screen.
The current tool is highlighted, click a tool to make it active.
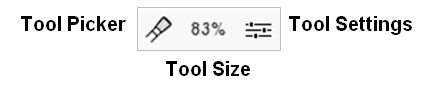
Docking Mode has a Tool Picker button that pops up a Picker when clicked. This button shows an icon of the current tool and can be found next to the Tool Size and Settings buttons.
In Classic Mode click and drag on the tool size indicator in the corner of the Tool Picker. In Docking mode, click and drag on the size value next to the Tool Picker icon in the menu bar.
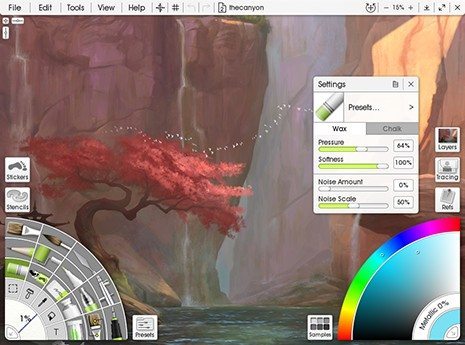
Tool Settings
Each tool h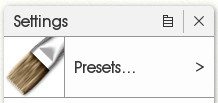 as a number of settings that can be changed to customise its behaviour. The Tool Settings Panel contains controls for all of these settings.
At the top of the Settings panel is an area that displays the currently loaded Preset. Click this area to select a new Preset.
Tool Presets
Tool Presets are stored sets of Tool Settings that represent specific types of a tool. For example, a dry oil brush and a heavily loaded oil brush are the same Tool but each has unique Settings, a Preset is used to represent this.
Open the Tool Presets panel either from the Tools menu or using the area at the top of the Tool Settings Panel.
When you select a preset its settings are applied to the current Tool and you can start painting with it.
Creating Tool Presets:
You can add a new Preset from the Presets Panel or from the Tool Settings panel preset menu. When you do this the settings of the current tool are stored with a Name and Icon for easy recall later.
You have the option to store Tool Size and Paint Color with the Preset if they are important to recreating the specific tool type you are storing.
The Tools

Oil Brush: A bristle tipped brush that applies oil paints that can be blended together and smeared on the canvas. Learn more!

Watercolour Brush: A fine tipped brush that applies watercolour that blends and spreads in to other wet areas of the canvas.

Palette Knife: A knife for blending paint on the canvas in various different ways.

Airbrush: A sprays that creates a fine mist of paint on the canvas.

Ink Pen: A hard tipped pen that creates smooth solid ink lines on the canvas. Learn more!

Pencil: A sketching pencil with adjustable tip hardness for shading or line work. Learn more!

Paint Roller: A broad headed roller that creates solid trails of paint on the canvas.

Felt Pen: A felt tip highlighter pen that applies translucent inks to the canvas.

Gloop Pen: A special effect pen that creates expanding blobs of paint on the canvas.

Custom Brush: A special effect brush with a highly customisable brush head for creating user defined brush stroke styles. Learn more!

Sticker Spray: A tool for spraying stickers from a Sticker Sheet on to the canvas.

Pastel: A wax or chalk pastel that applies strokes of dry media to the canvas.

Cloner: A brush like tool for copying areas of the canvas using paint strokes.

Eraser: A hard or soft eraser for removing paint from the canvas.

Paint Tube: A tube of oil paint that can create thick blobs on the canvas for blending.

Glitter Tube: A tube of glitter sprinkles for adding texture to the canvas.

Selection Tool: A utility for selecting areas of the canvas for copying, painting in, or manipulating.

Color Sampler: A utility for setting the current color by selecting paint from the canvas. Learn more!

Fill Tool: A utility for filling outlined areas of the canvas with solid color. It also offers Pattern Fill and Gradient Fill modes. Learn more about Solid Fill!

Text Tool: A utility for adding post-editable text Layers to the canvas.

The Transform Tool: One more tool exists, a Transform Tool located on the Menu Bar. Click this and you will be able to select an item to transform. See later for more information.
Colors
Color Pickers
To select a paint color select it from a Color Picker. Classic and Docking Modes have their own Color Pickers.
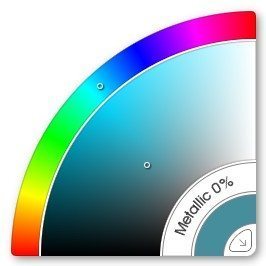
To select a Color you first select the basic tint of the color (its ‘Hue’), then you select how bright and vibrant that tint should be.
Classic Mode:
To select a Color in the Classic Mode picker choose its ‘Hue’ using the thinner, Outer Ring.
Then select how bright and how vibrant it is using the thicker, Inner Ring.
The Color Sample in the corner indicates the current color.
Docking Mode:
To select a Color in Docking Mode open the picker using the Color button on the menu bar.
In the picker choose its ‘Hue’ using the thinner Hue Slider. Then select how bright and how vibrant it is using the larger, Square Picker.
The Color Sample beneath the Hue Slider indicates the current color.
Real Color Blending
Normal digital color blending produces results that can be unexpected if you are used to real paint. ArtRage has a second color blending option that can be found in the Color Menu under the Tools menu.
Turn on Real Color Blending to more closely mimic real world paint blending.
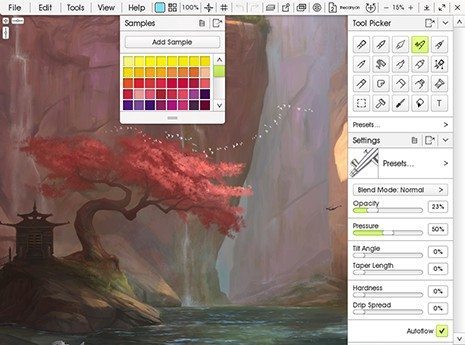
Color Samples
You can store Color Samples for later use. Open the Samples panel to see a list of available samples. In Classic Mode use the Samples pod next to the Color Picker. In Docking Mode use the Samples button next to the current color sample.
The Menu Button in this panel allows you to add samples or load them from the Samples Collection.
Sampling Color
You can sample a color from the canvas to make it current for painting using the Color Sampler tool. Alternatively, hold down Alt/Option and click on the canvas to sample color from beneath the mouse pointer.
Working with Files
Saving and Loading
To save your painting or load a new painting use the options in the File Menu that can be found on the Menu Bar. When you are done painting always Save your work, it will not be automatically saved (you will be prompted to save before ArtRage closes).
Sharing Files – Export & Import
If you need to work with normal image files or save a copy of your painting so that another package can view it (or to share online) use the Import and Export Image options in the File Menu.
Export is used to create a normal image copy of your painting that another piece of software can understand.
When you Import an image file a new canvas is created to store it. When you go to Save that file, you will be asked to save an ArtRage Painting File. If you have made changes and you want to save those changes to a normal image, Export a copy of the painting, but be sure to save the new Painting as well so that you can keep working it later without losing any information.
ArtRage Painting Files (.PTG):
ArtRage Painting Files contain a lot of information that normal image files do not. Due to this, Painting Files cannot be opened directly in other image software.
Important: Make sure to always save your work as a Painting File using Save or Save As, never store the only copy of your work by Exporting it.
Multiple Documents
You can have more than one painting open at a time. The Documents Panel which is accessed from the Menu Bar allows you to display or close the documents you have loaded.
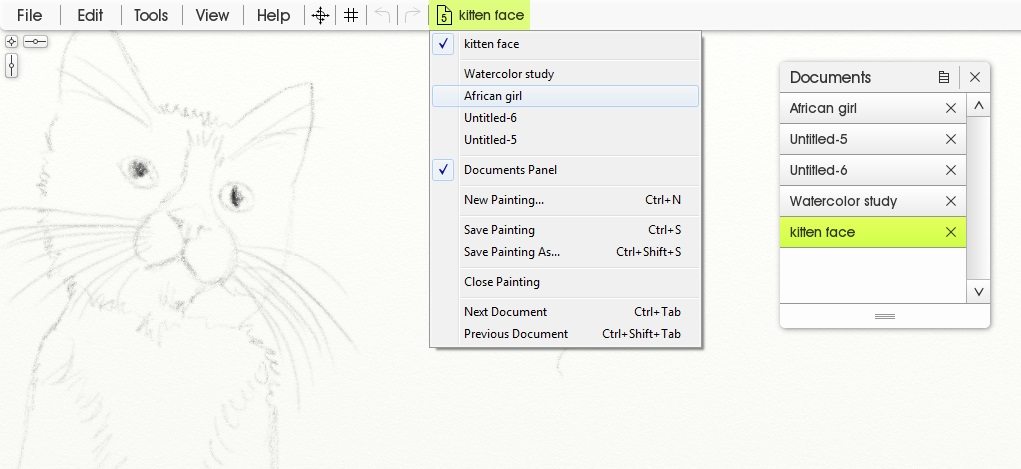
The Documents Button on the Menu bar indicates how many documents you have loaded and displays the name of the current document.
Package Files (ARPACK).
ArtRage Package Files contain sets of resources like Tool Presets, Grain Images, Stencils, and more. When you install a Package File the resources it contains are added to your copy of ArtRage and can be located in the panel for the type of resources that were installed.
You can install a Package File either using the File Menu or by double clicking on the file itself.
Script Files (ARSCRIPT).
ArtRage Script Files contain recordings of paintings made by other people. When you play a script file the painting is recreated stroke by stroke on a new canvas.
You can play a script file either by selecting the option in the File Menu or by double clicking on the file itself.
Layers
Layers are like sheets of transparent plastic that you can paint on. They stack on top of each other and you can paint on any of them at any time. This allows you to paint without damaging existing paint on layers underneath.
Open the Layers Panel by clicking the Pod in Classic Mode or using the button on the Menu Bar in Docking Mode.
The Layers Panel
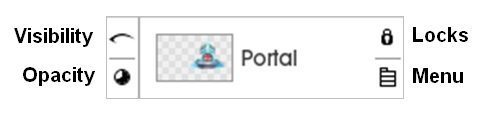
The Layers Panel shows all of the Layers in the current painting stacked on top of each other to show their order on the canvas. The Layer at the top of the panel list is the Layer visible on the top of the Canvas.
Click a Layer to select it for painting, it will light up to show that it is selected.
Click and drag on a layer to move it around in the Layers Panel, this allows you to reorder Layers.
Each Layer has a number of indicators that display information about the Layer.
Layer Groups
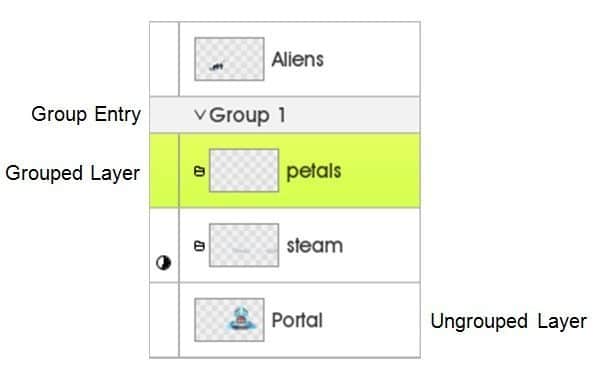
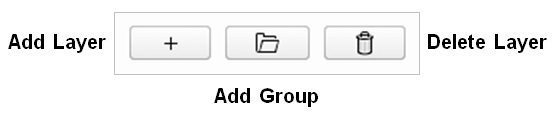
Layer Groups allow you to organise Layers together in to groups for easier control in the Layers Panel. Add a Layer Group using the Add Group button on the Layers Panel then drag Layers in to the Group entry that appears in order to move it in to that group.
Layers that are inside a group are indented slightly. The folder icon to the left of the Layer Preview indicates how deeply the Layer is nested inside groups.
Adding and Removing Layers
The buttons at the bottom of the Layers panel allow you to add Layers, add Groups, or delete the active Layer.
These icons will only be visible when your cursor is over the layer or if the property they refer to has been adjusted from its default state.
The Canvas
Navigating the Canvas
The Canvas Positioner is used to navigate around the canvas.
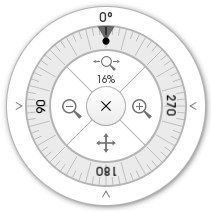
Its button can be found at the right hand side of the Menu Bar.
Rotating: Drag the outer ring to rotate the canvas. You can also click on the arrows in the external border of the Positioner to set rotation to exact amounts. You can also hold down Alt/Option and right-click dragg on the canvas to rotate.
Moving: Click and drag on the Move Icon in the Positioner to move the canvas. You can also right-click drag on the canvas to move it.
Zooming: Click and Drag on the Free Zoom icon in the Positioner to zoom in and out, or click the + and – buttons in the Positioner to zoom in specific increments. You can also hold down Shift and right-click drag on the canvas to zoom.
Note that zooming does not change the contents or size of your canvas, it just adjusts the size it is displayed on the screen.
There is also a Zoom Level indicator at the right hand side of the Menu Bar.
Canvas Settings
The Canvas Settings Panel opened from the Tools Menu allows you to adjust the type of Canvas you are using.
Canvas Settings can be changed at any time but they will not alter any paint that has already been applied to the Canvas.
At the top of the Canvas Settings Panel is a Canvas Presets option that allows you to select a predefined set of Canvas Settings or add your own.
Note that when the canvas is not entirely Opaque ArtRage represents the ‘transparency’ by showing a set of light grey checkers in the background. These checkers will not be included in your final painting.
Tracing & References
Tracing Images
Tracing Images are images overlaid on the Canvas to provide a guide while painting. The Tracing Panel allows you to load images and adjust their settings.
The Tracing Image does not overwrite the paint on your Canvas, it’s placed over the top as a guide only. Your paint will be partially obscured by it but you can control the opacity of the image if you need to see more of the underlying canvas.
When you have a Tracing Image loaded you have the option to choose Colors automatically from it as you paint, this will cause the paint color to update at the start of each stroke to use the color of the Tracing Image under its starting point.
Open the Tracing Panel using the pod in Classic Mode or the button on the Menu Bar in Docking Mode.
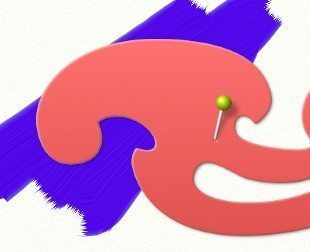
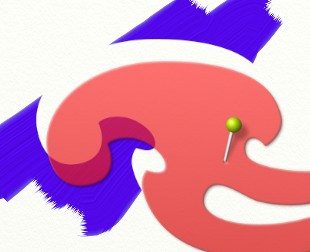
References
The References Panel allows you to create three types of References, which are floating images ‘pinned’ to the screen to act as guides.
Open the References Panel using the pod in Classic Mode or the button on the Menu Bar in Docking Mode.
Reference Images:
Reference Images are images loaded from your computer that can act as a rough visual guide while you work. Alt/Option click in a Reference Image to sample color from it.
Scraps:
Scraps are small sheets of canvas pinned to the screen that can be painted in. These are useful for mixing colors to sample later, or trying out ideas when you don’t want to change the contents of the canvas. Alt/Option click on a Scrap to sample color from it.
Views:
Views are alternative views of your entire canvas that are pinned to the screen. You can zoom and move views independent of the main canvas to observe sections of it while you work. You can even paint in a View to apply paint to the canvas.
You can add all three types of Reference using the buttons at the bottom of the References panel.

Layout Tools
You can access the Layout panel using the Layout button on the menu bar. It provides three different types of layout tool.
At the top of the panel you can select which type of Layout tool you want to edit and load or save layouts for later use using the ‘Sets’ button.

Individual guide lines can be placed on the canvas using the Guide buttons at the top left under the menu bar. Click and drag a button to drag a guide on to the canvas. Shortcut buttons on the panel allow you to quickly frame the content of a Layer with guides.
Grids:
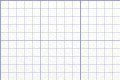
Covers the canvas in a regular grid with control over horizontal and vertical spacing. Learn more!
Guides:

Places individual horizontal or vertical lines on the canvas that can be used to snap paint strokes to a straight line. Learn more!
Perspective:
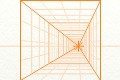
Basic one or two point perspective guides can be set up using the Sets button while detailed editing is available via the Perspective Editor. Learn more!
Layout Snap:
Each Layout tool contains control over Snap. When Snap is on the cursor will snap to the nearest layout line while you paint. Snap distance adjusts how far away from the line you need to be before the cursor moves freely again.
Note: Snap is not active when the lines are hidden.
Transformation
To adjust the position, rotation, or scale of an object on a Layer in ArtRage, use the Transform tool. The tool button can be found on the Menu Bar.
Select it to activate the tool then click on the object you want to transform. When you do this, the interface is replaced by the Transform panel.
This panel displays different options depending on the type of object you are transforming.
Transform Rig: The object you are transforming is outlined with a dotted ‘rig’ with control handles.
Click and drag on a control handle to manipulate it, this changes the scale of the object.
Click and drag inside the rig to move the object. Click and drag outside the rig to rotate it.
Linear v. Free Transform: Linear transform is available for all object types. When this mode is active, Scale operations apply to the entire object.
If an object supports Free transform and that option is selected, the individual control handles on the Transform Rig will move without moving other handles, allowing you to deform the object.
Canvas Navigation:
When you are in Transform mode, hold down the Space Bar and click and drag on the canvas to move it.
Finishing Transformation: When you are done, the tick and cross buttons at the bottom of the panel can be used to close the panel and apply or discard the transformation.
Filters
You can access built in editing features and custom Photoshop filters by going to Edit > Filters. Here you can access:
- Blur Layer
- Adjust Layer Colors (adjust contrast, hue, brightness and other properties for a layer)
- Add Noise
- Remove Color Matte (delete all of one color from a layer)
- Warp (distort and transform)
You can add your own Photoshop filters by going to Edit > ArtRage Preferences. They will automatically appear in the list of filters if supported. Many free Photoshop filters are 32-bit only, so you will have to run the 32-bit version of ArtRage to use them.
Stencils
Stencils are moveable mask and guide shapes that can be added to the canvas.
Open the Stencils Panel using the pod in Classic Mode or the button on the Menu Bar in Docking Mode.
Click a Stencil in the picker to add it to the canvas, or click and drag it to place it.
The Active category in the Stencils panel shows you all of the Stencils currently in your document and allows you to control visibility and other properties.
Adjusting Stencils: Stencils can be moved around the canvas by Right Click + Drag. Hold down Ctrl/Cmd to Scale, or Alt/Option to Rotate. You can also Transform a Stencil by clicking on it with the Transform Tool.
Masking: Stencils prevent paint being applied to the canvas underneath them. Where a Stencil is partially opaque, some paint will get through.
If you stack multiple Stencils on top of each other, their combined overlapping area will mask the canvas.
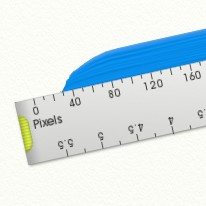
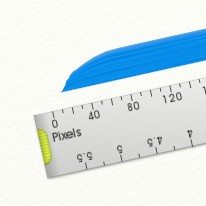
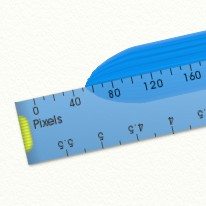
Guide & Ruler Mode: Stencils can also be set to Guide or Ruler mode using their menu.
Both modes cause the cursor to Snap to the edge of the Stencil as you approach it on the canvas to allow the creation of guided, straight or curved lines.
Guides do not mask paint from the canvas, while Rulers do.
Ruler Mode
Guide Mode
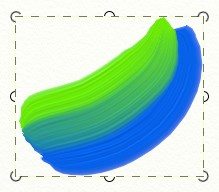
Stickers
Stickers are pre-constructed images that contain color and texture information.
Open the Stickers Panel using the pod in Classic Mode or the Stickers option in the Tools Menu in Docking Mode.
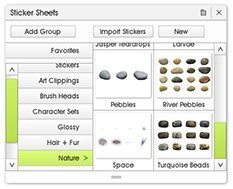
This panel displays a list of Sticker Sheets. Click on a sheet to open it. Each Sheet contains a set of individual Stickers. You can have more than one Sticker Sheet open at a time if you wish.
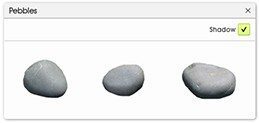
You can add a Sticker to the canvas either by clicking on it on its sheet, or click and dragging. If you click and drag you can place the Sticker where you want on the canvas.
More than one copy of a Sticker from a Sheet can be placed on the canvas.
Manipulating Stickers: Stickers can be moved and scaled using the Transform Tool. Click on one with this tool active to start manipulation.
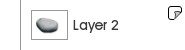
Sticker Layers: Each Sticker on the canvas is represented by a Sticker Layer in the Layers Panel. You cannot paint on a Sticker Layer, if you try to do so a new Layer will be added above the sticker for your paint. The Sticker Layer is identified as a Sticker Layer by the icon at the top right. Click that for options specific to Stickers.
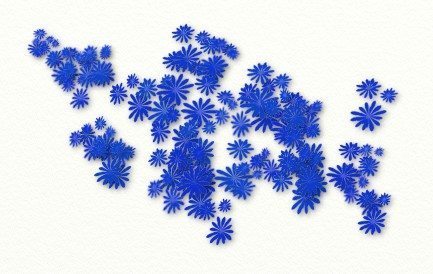
Sticker Sprays: The Sticker Spray tool allows you to spray many Stickers from a sheet on to the canvas in a single stroke. As you spray, a wide variety of different modifiers can be applied to vary the stickers that are being applied.
For More Help
General Information
The ArtRage Forums are a great place to go if you are looking for general information on how to use the product, tips and tricks, or a place to share your art and get feedback.
The Forums can be found at: https://forums.artrage.com/
These tutorials cover how the product works as well as the various techniques you can use in your art in general.
Forum users have a wide range of experience with the product and are happy to give advice and make suggestions if you are unsure as to how you might achieve something.
Technical Support
If you have a technical support query there are a number of different places you can look for help.
For general issues related to the product when it is running, or hardware you are using with it:
- Check the ArtRage Forums. This may give you an immediate answer to your question.
- Try the ArtRage FAQ
- Contact Technical Support
Browse the more indepth feature guides up on the right. This online manual contains more detailed information on ArtRage’s features and how they work.
Tutorials
You can find painting tutorials for ArtRage at: https://www.artrage.com/tutorials/